

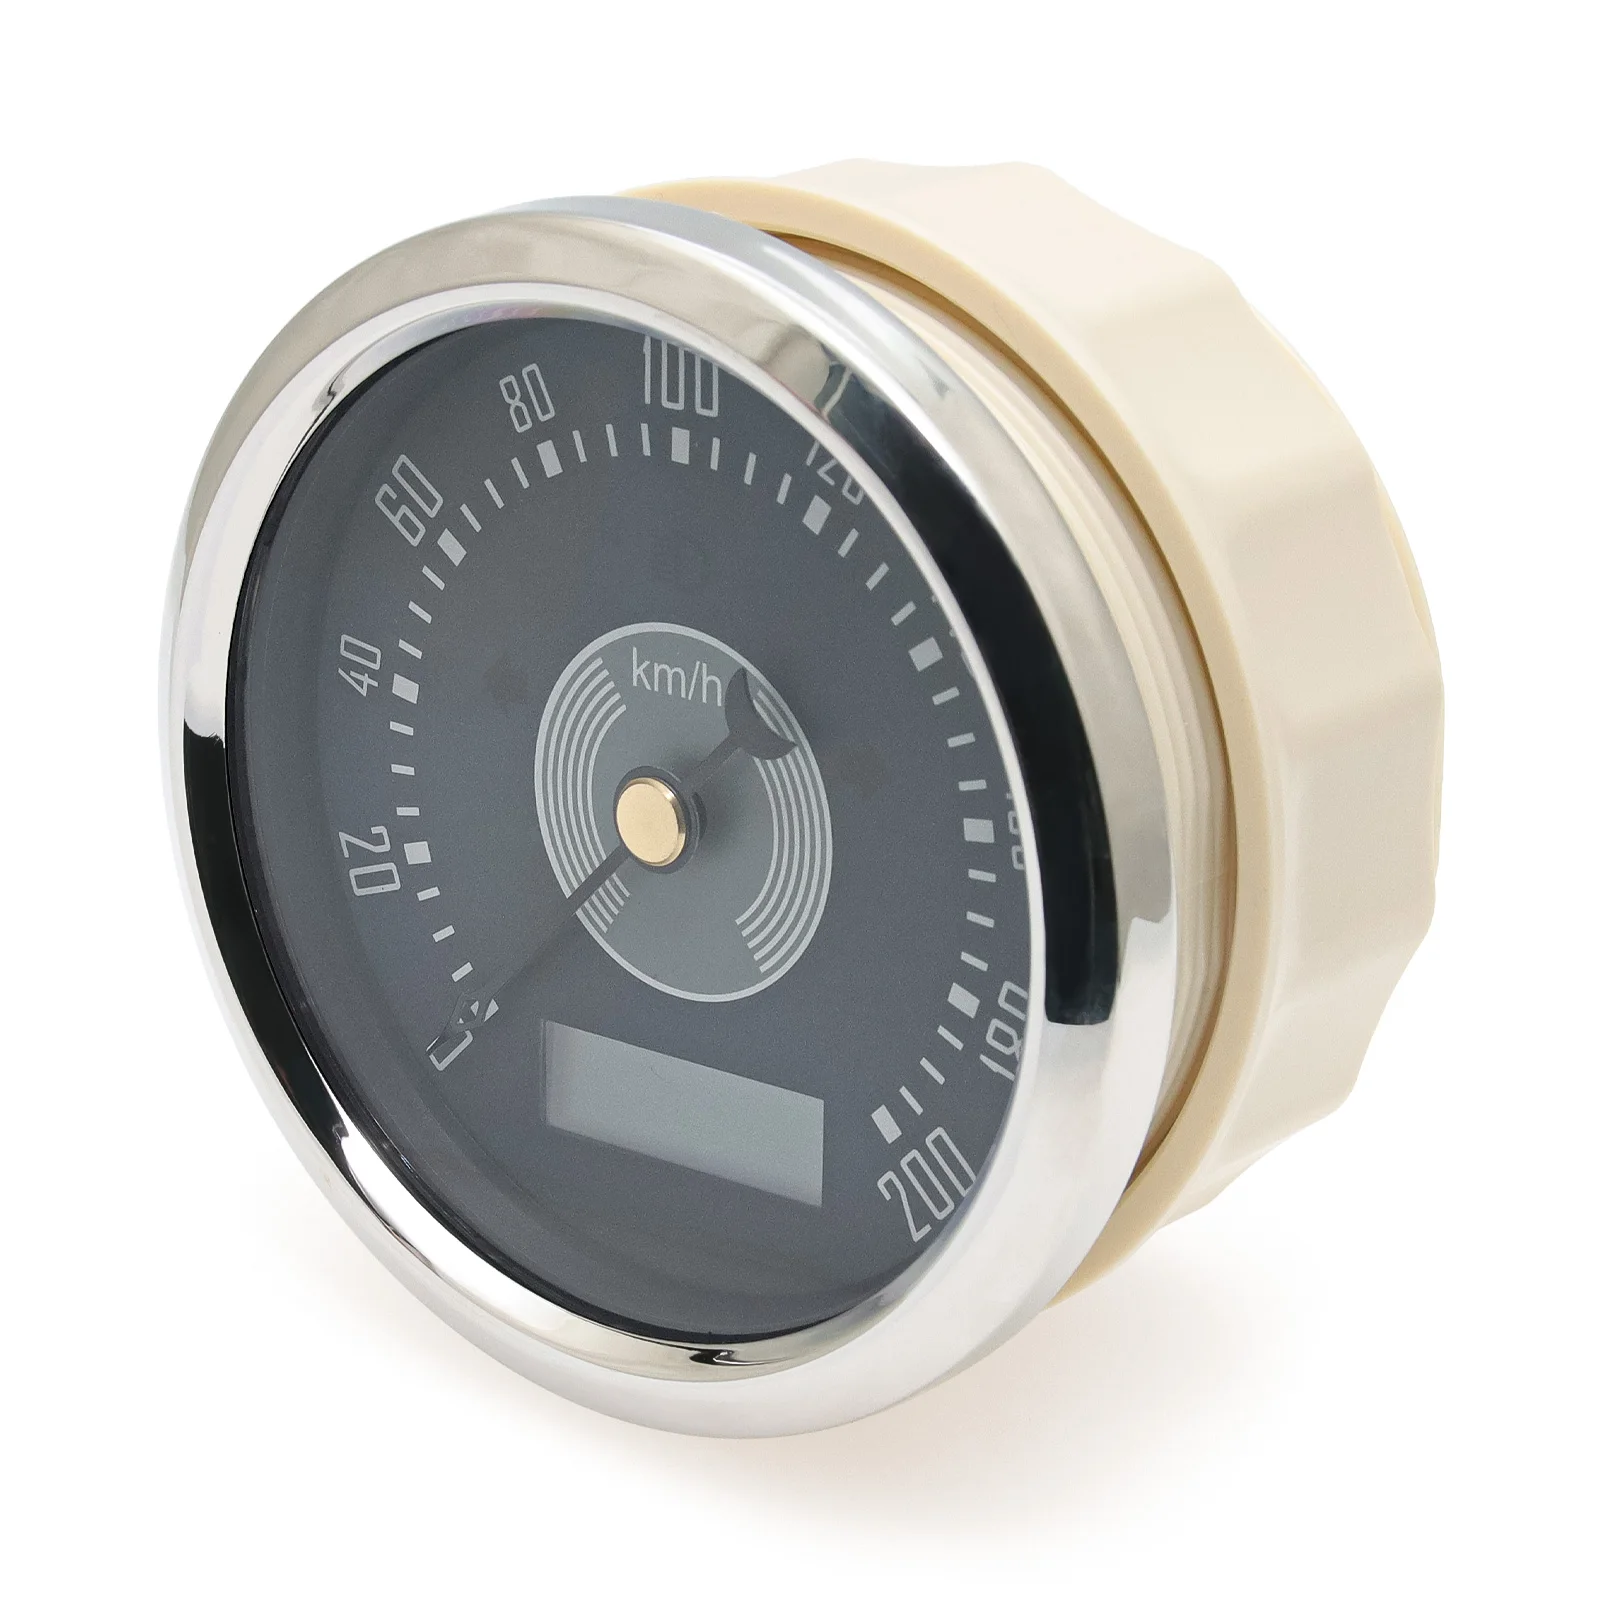
Retro 6 Gauge Set 160KMH,200KMH 85mm GPS Speedometer Gauge 8000RPM Tachometer 52mm Water Temp Oil Pressure Fuel Meter Voltmeter
200KMH BS
$312.88
Sale price
$312.88
Regular price
$0.00
Skip to product information


Retro 6 Gauge Set 160KMH,200KMH 85mm GPS Speedometer Gauge 8000RPM Tachometer 52mm Water Temp Oil Pressure Fuel Meter Voltmeter
$312.88
Sale price
$312.88
Regular price
$0.00
Shipping calculated at checkout.
SPECIFICATIONS
Brand Name: ZMFJH
Country/Region of Manufacture: China
High-concerned chemical: None
Interchange Part Number: Speed Meter
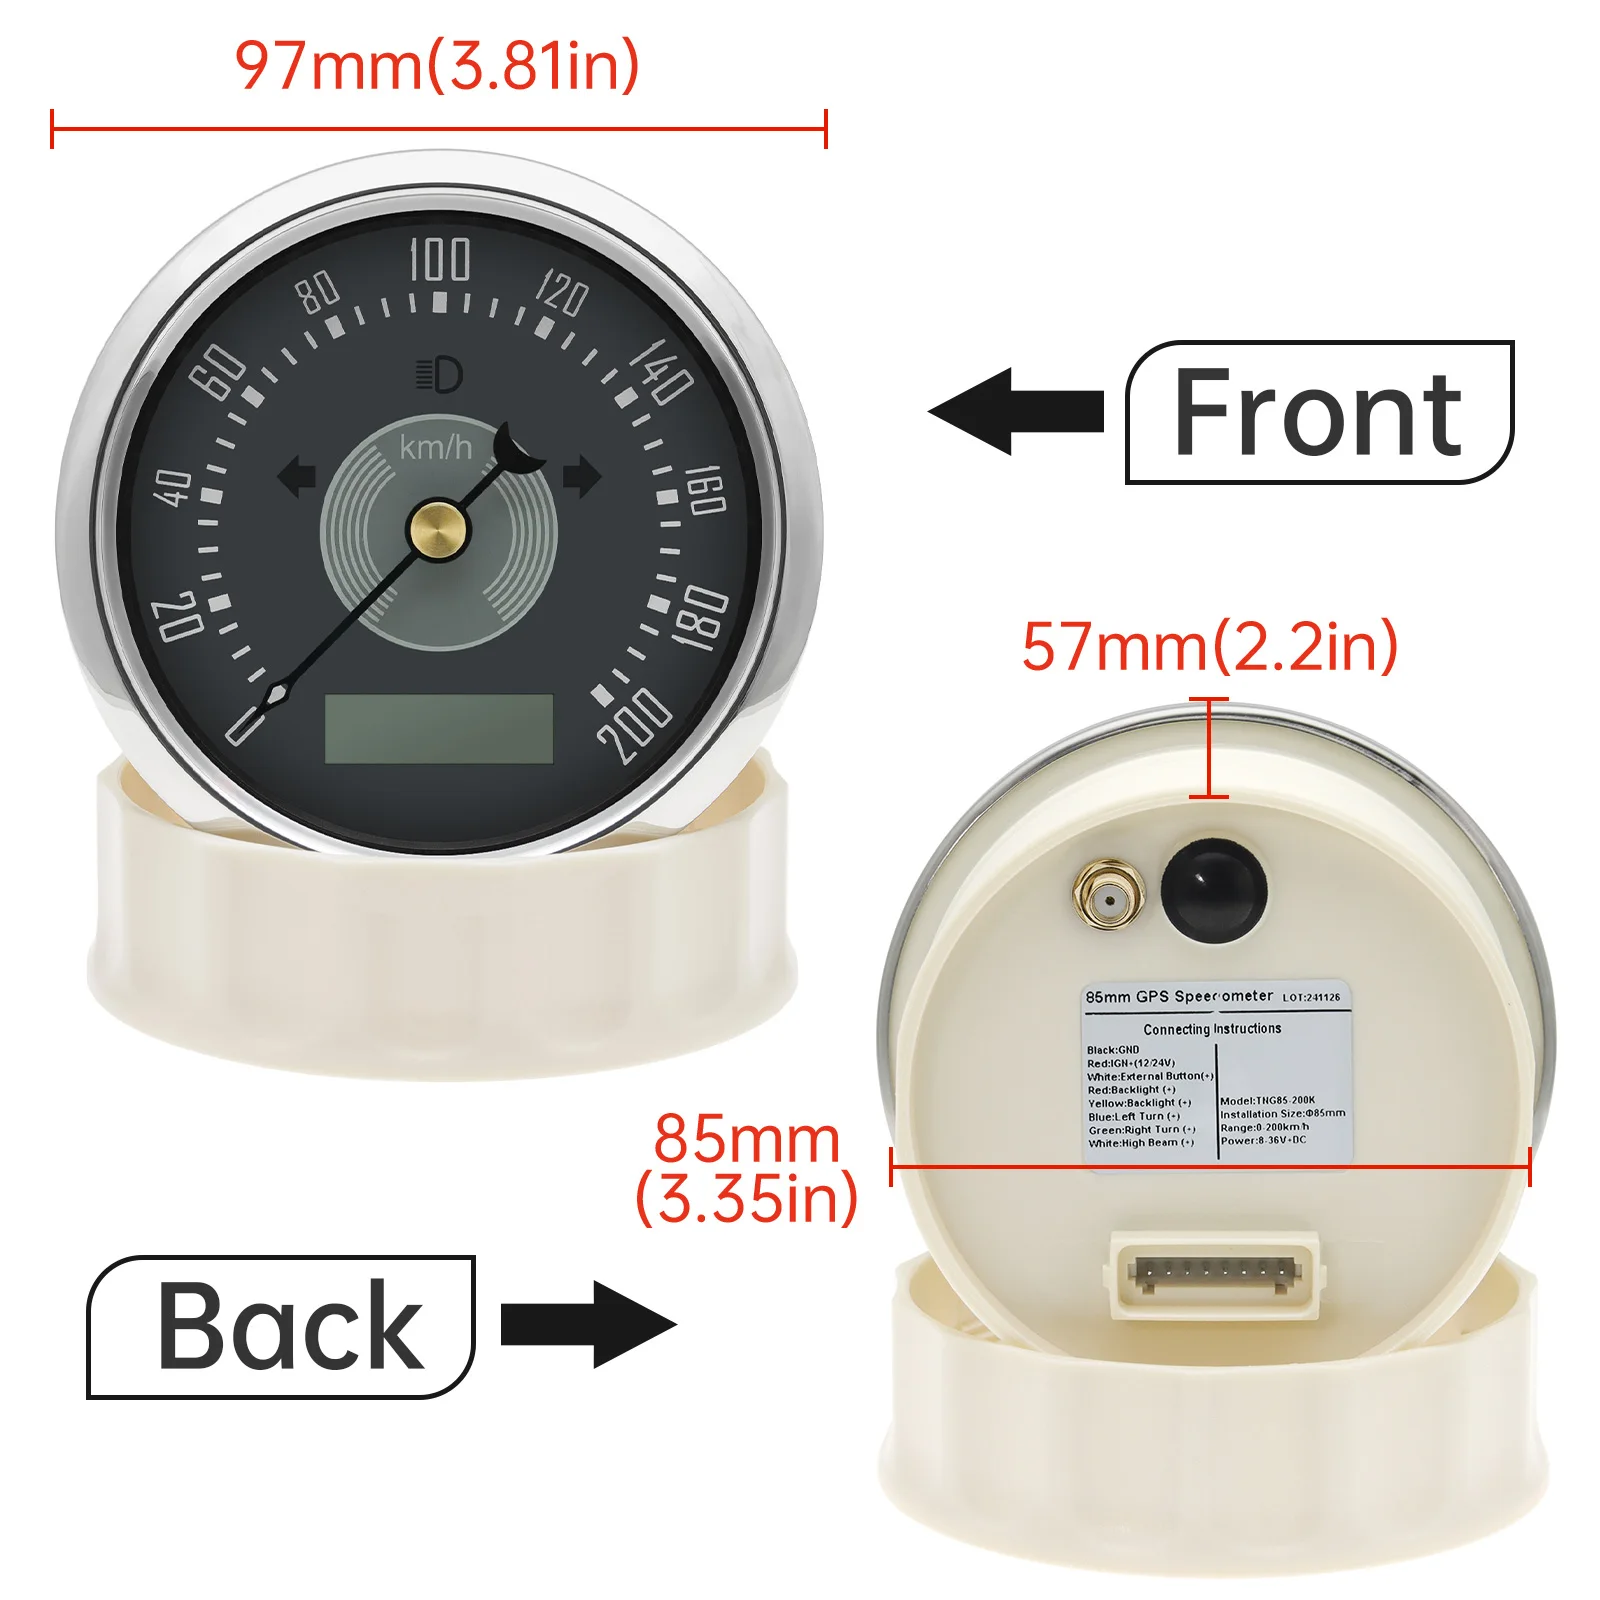
Item Height: 85mm
Item Length: 85mm
Item Weight: 350g
Item Width: 85mm
Manufacturer Part Number: China
Material: Plastic
OEM NO.: 85mm GPS Speed Gauge
Origin: Mainland China
Other Part Number: GPS antenna
Placement on Vehicle: front
Special Features: Waterproof
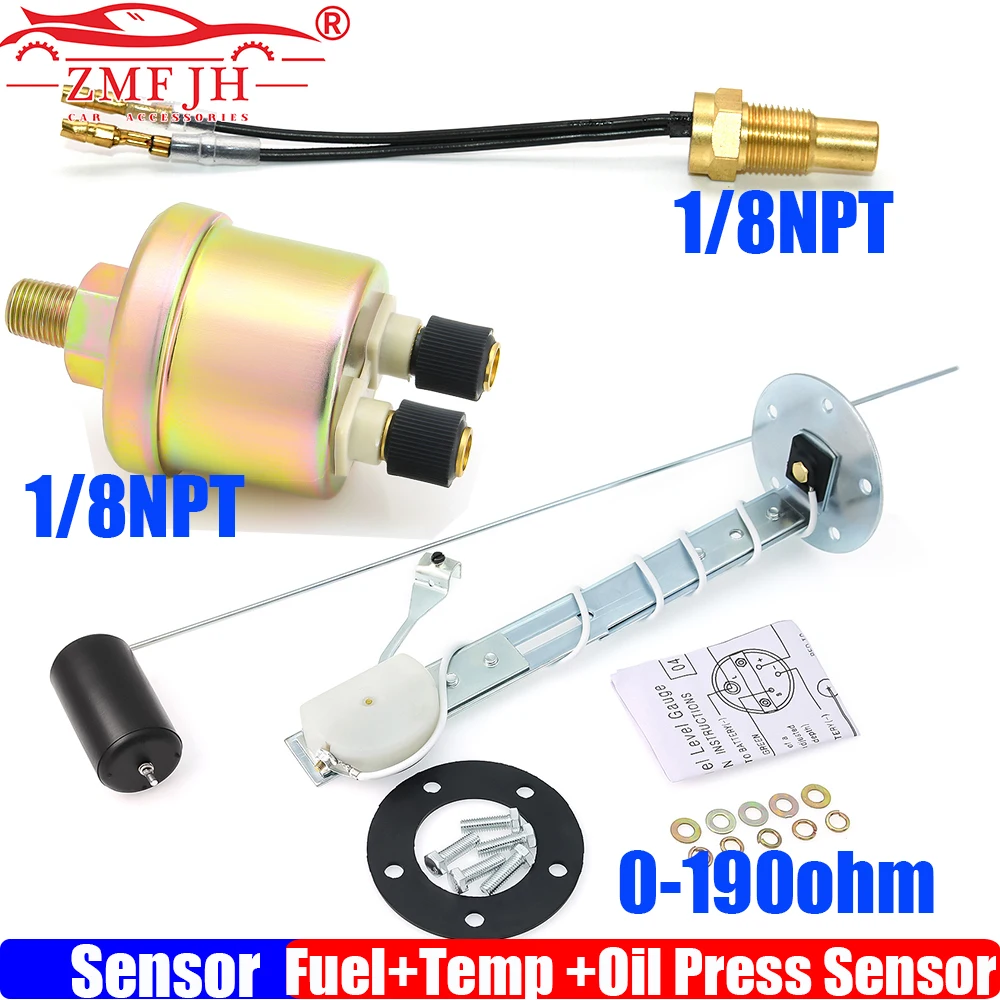
This package is not included Sensor , if you need sensor , please click the photo sensor link to buy sensor together
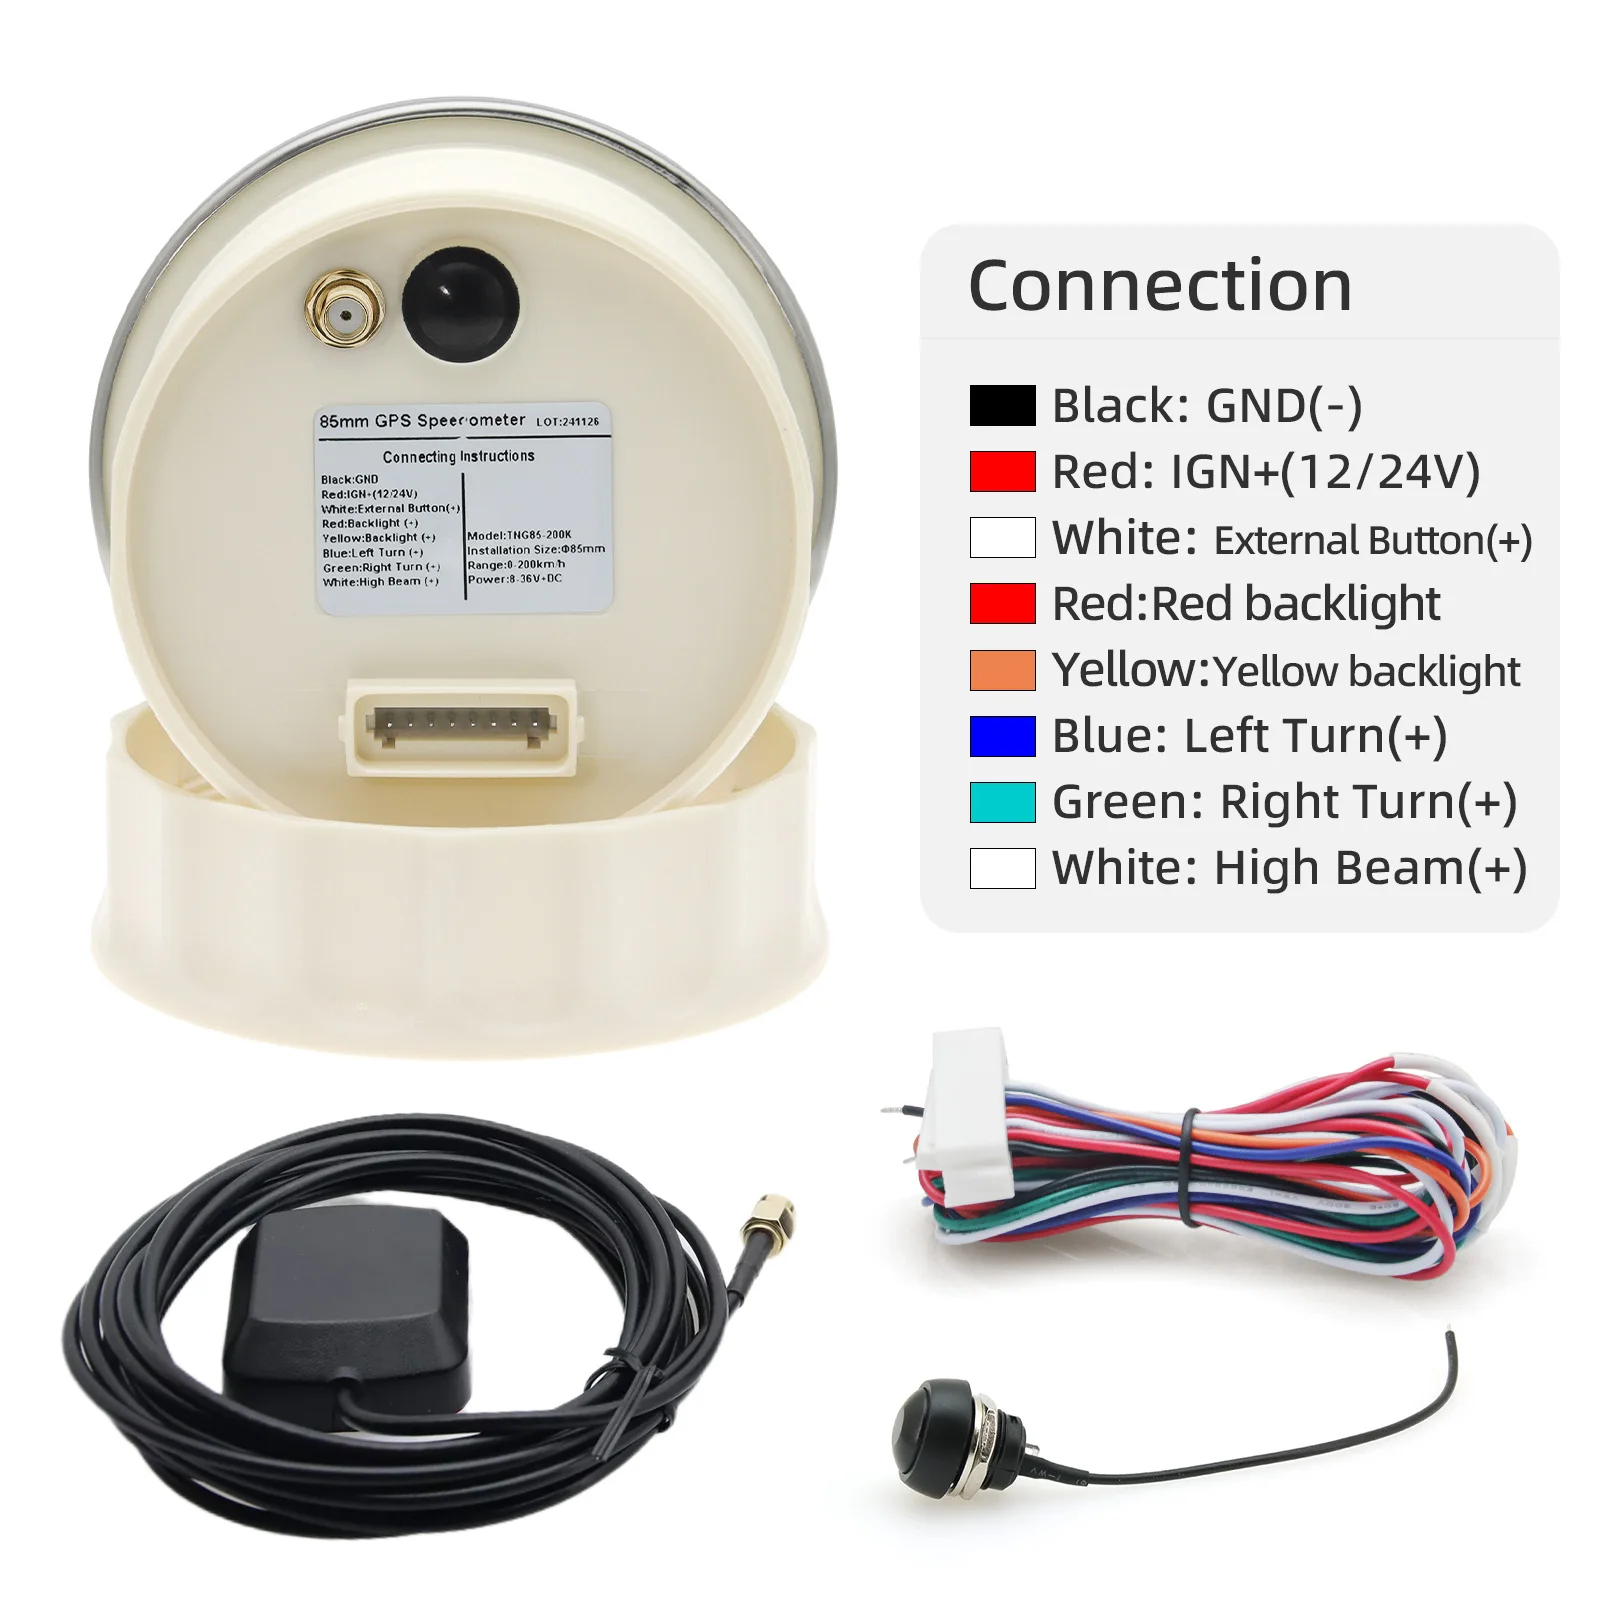
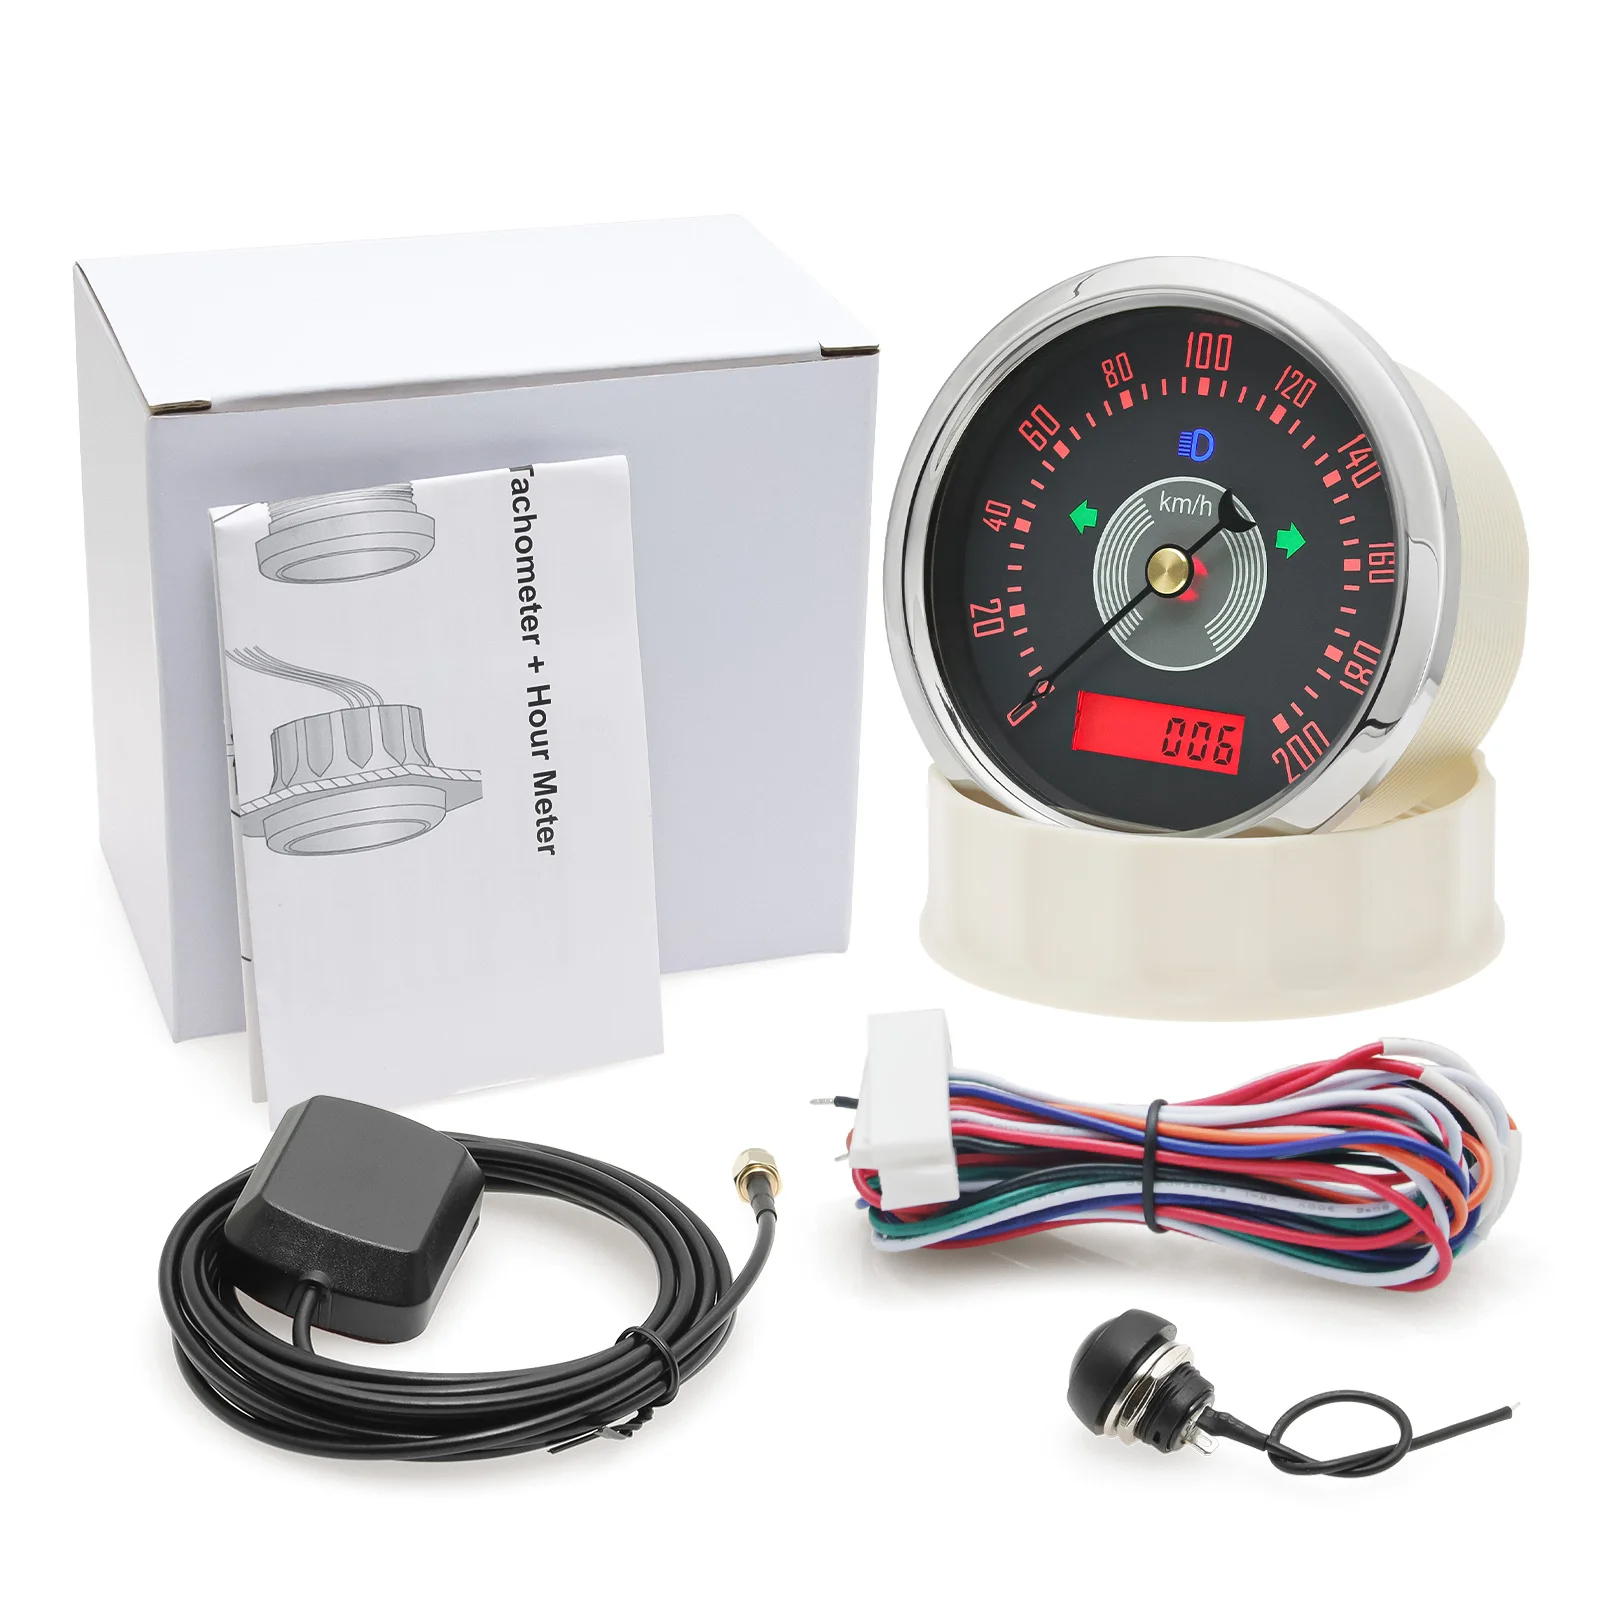
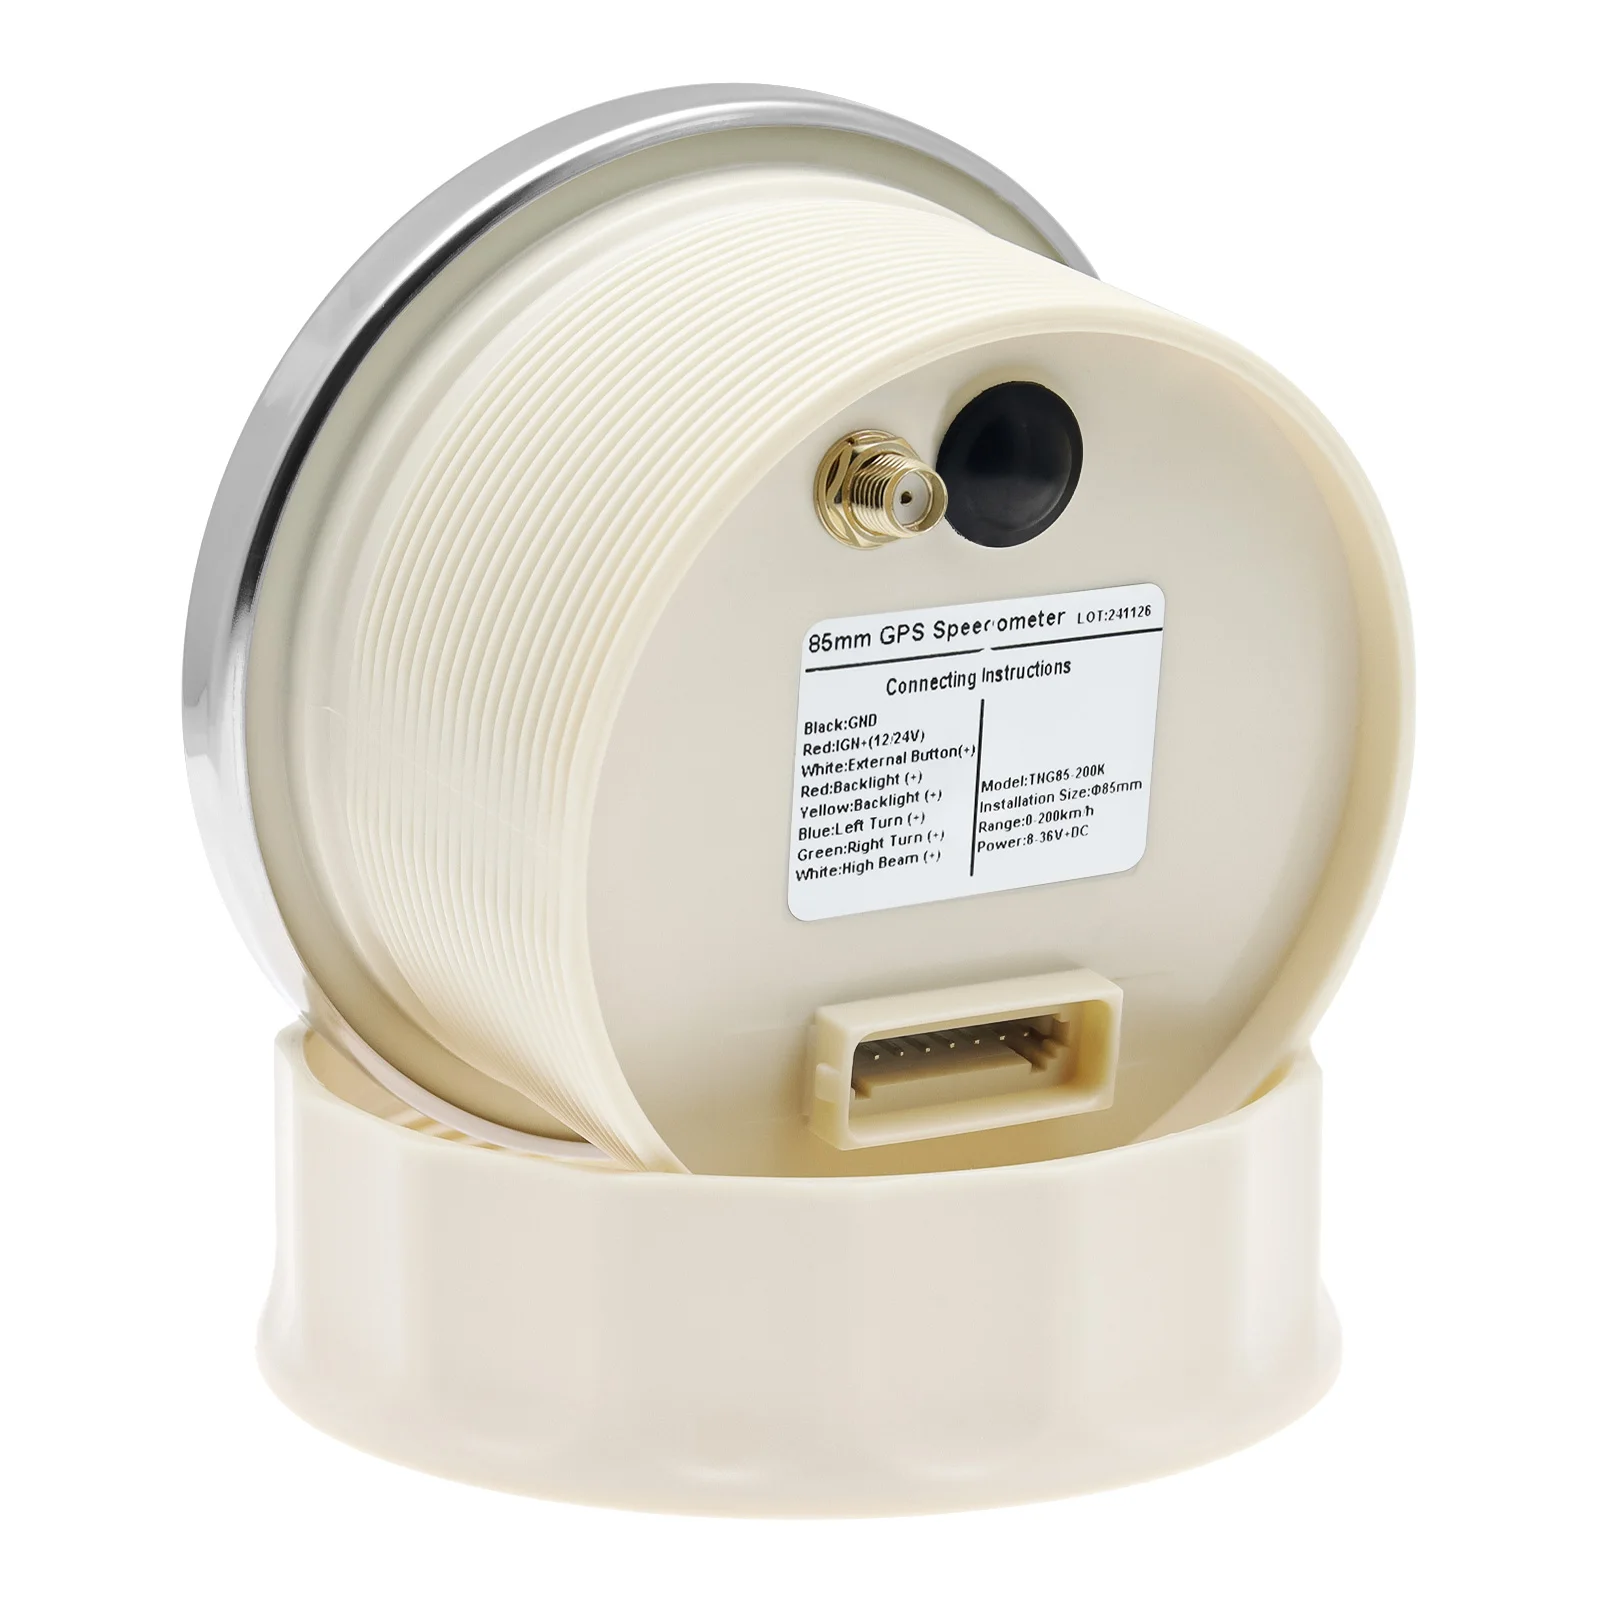
85mm GPS speedometer Gauge connection:
Black line: GND(-)
Red Line: +12V24V
White LIne: External Button(+)
Yellow line: backlight connect to the +
Blue Line: Left Turn(+)
Green line: Right Turn(+)
White line:High Beam(+)
Feature:
work on DC12V24V
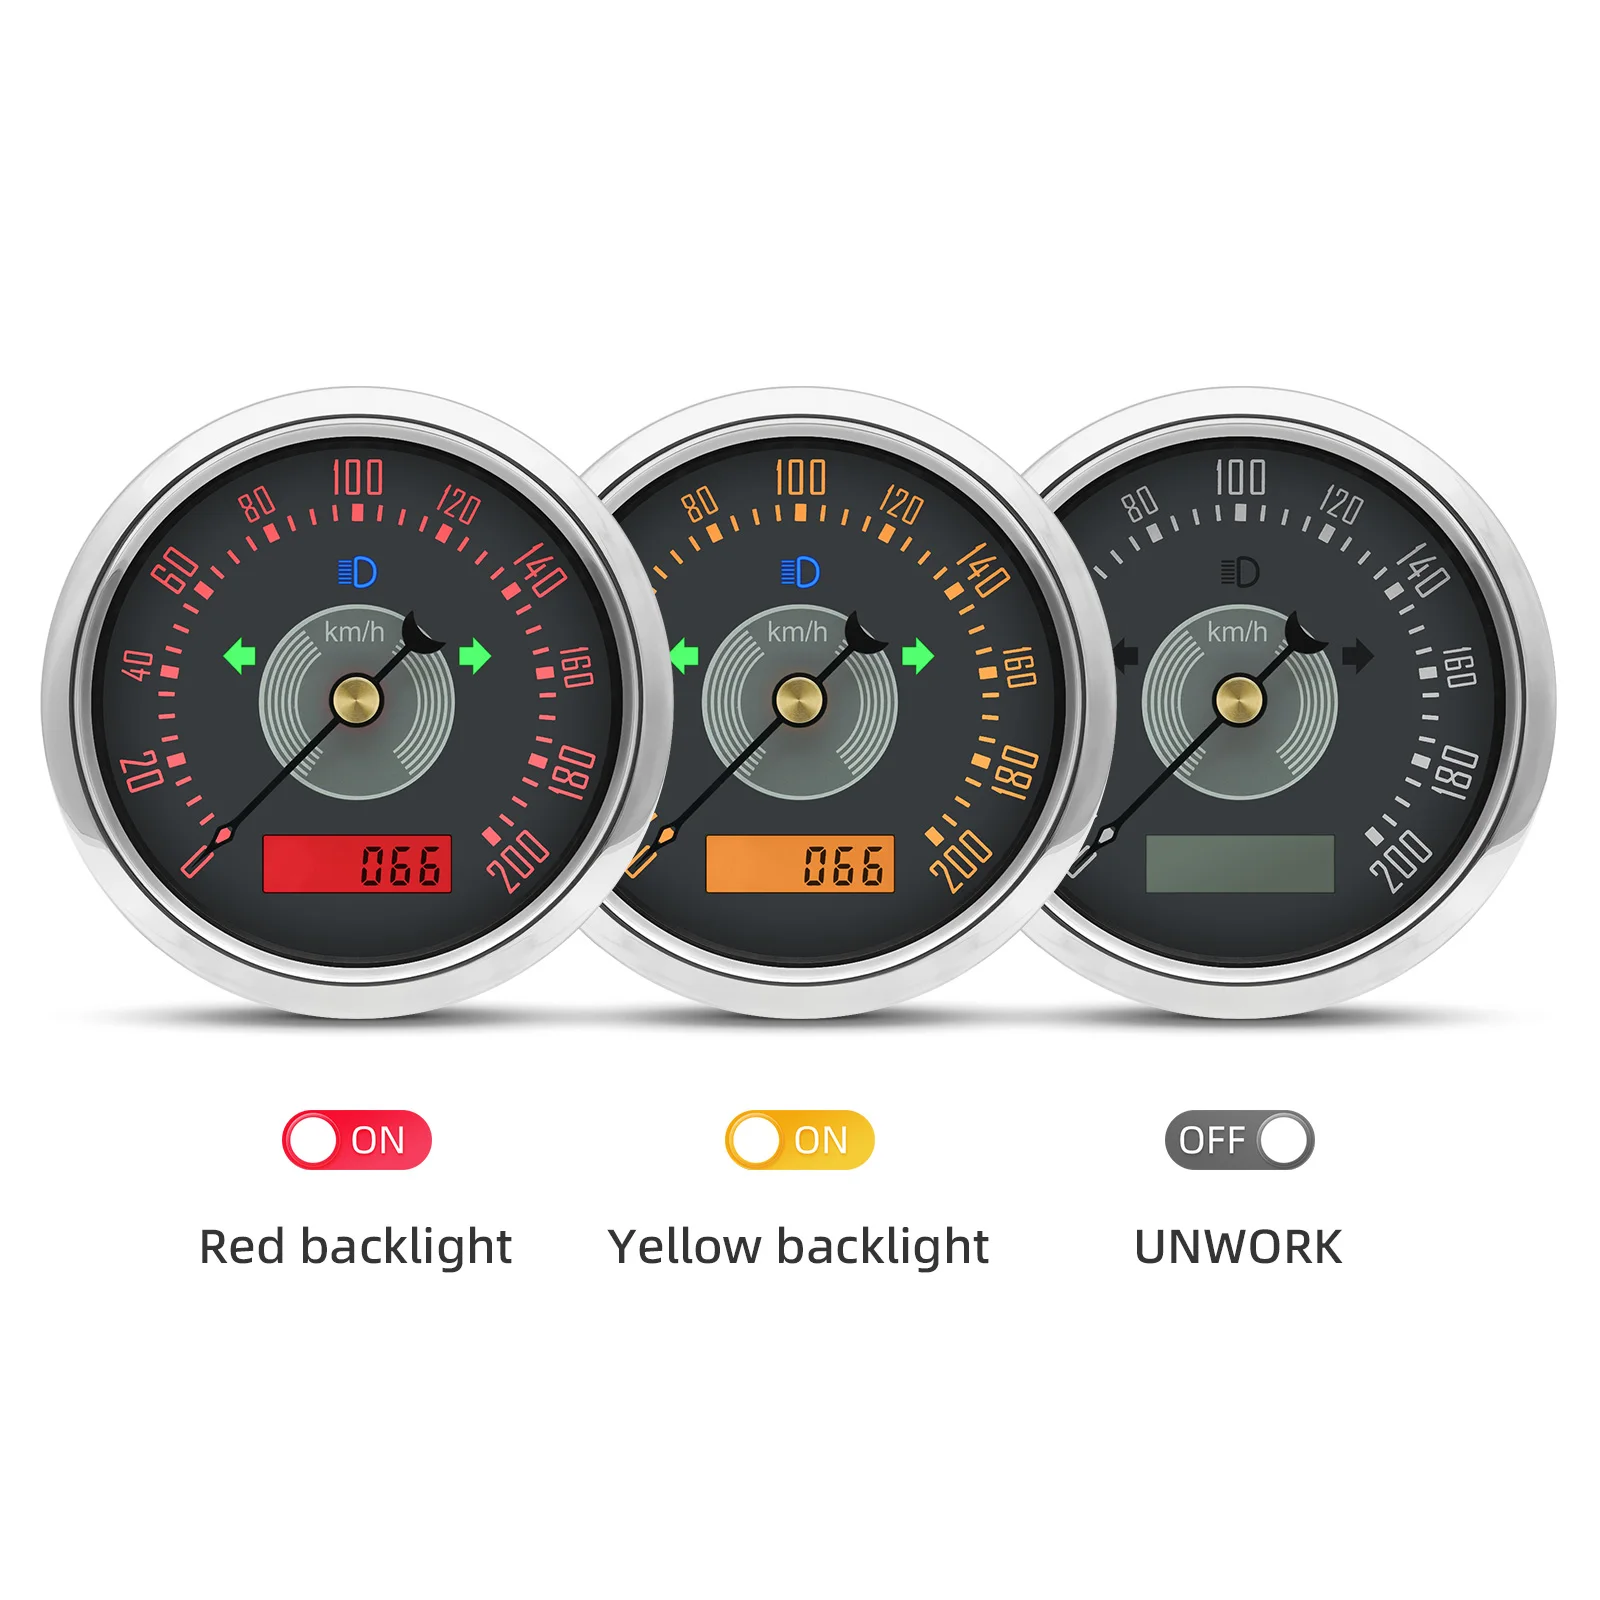
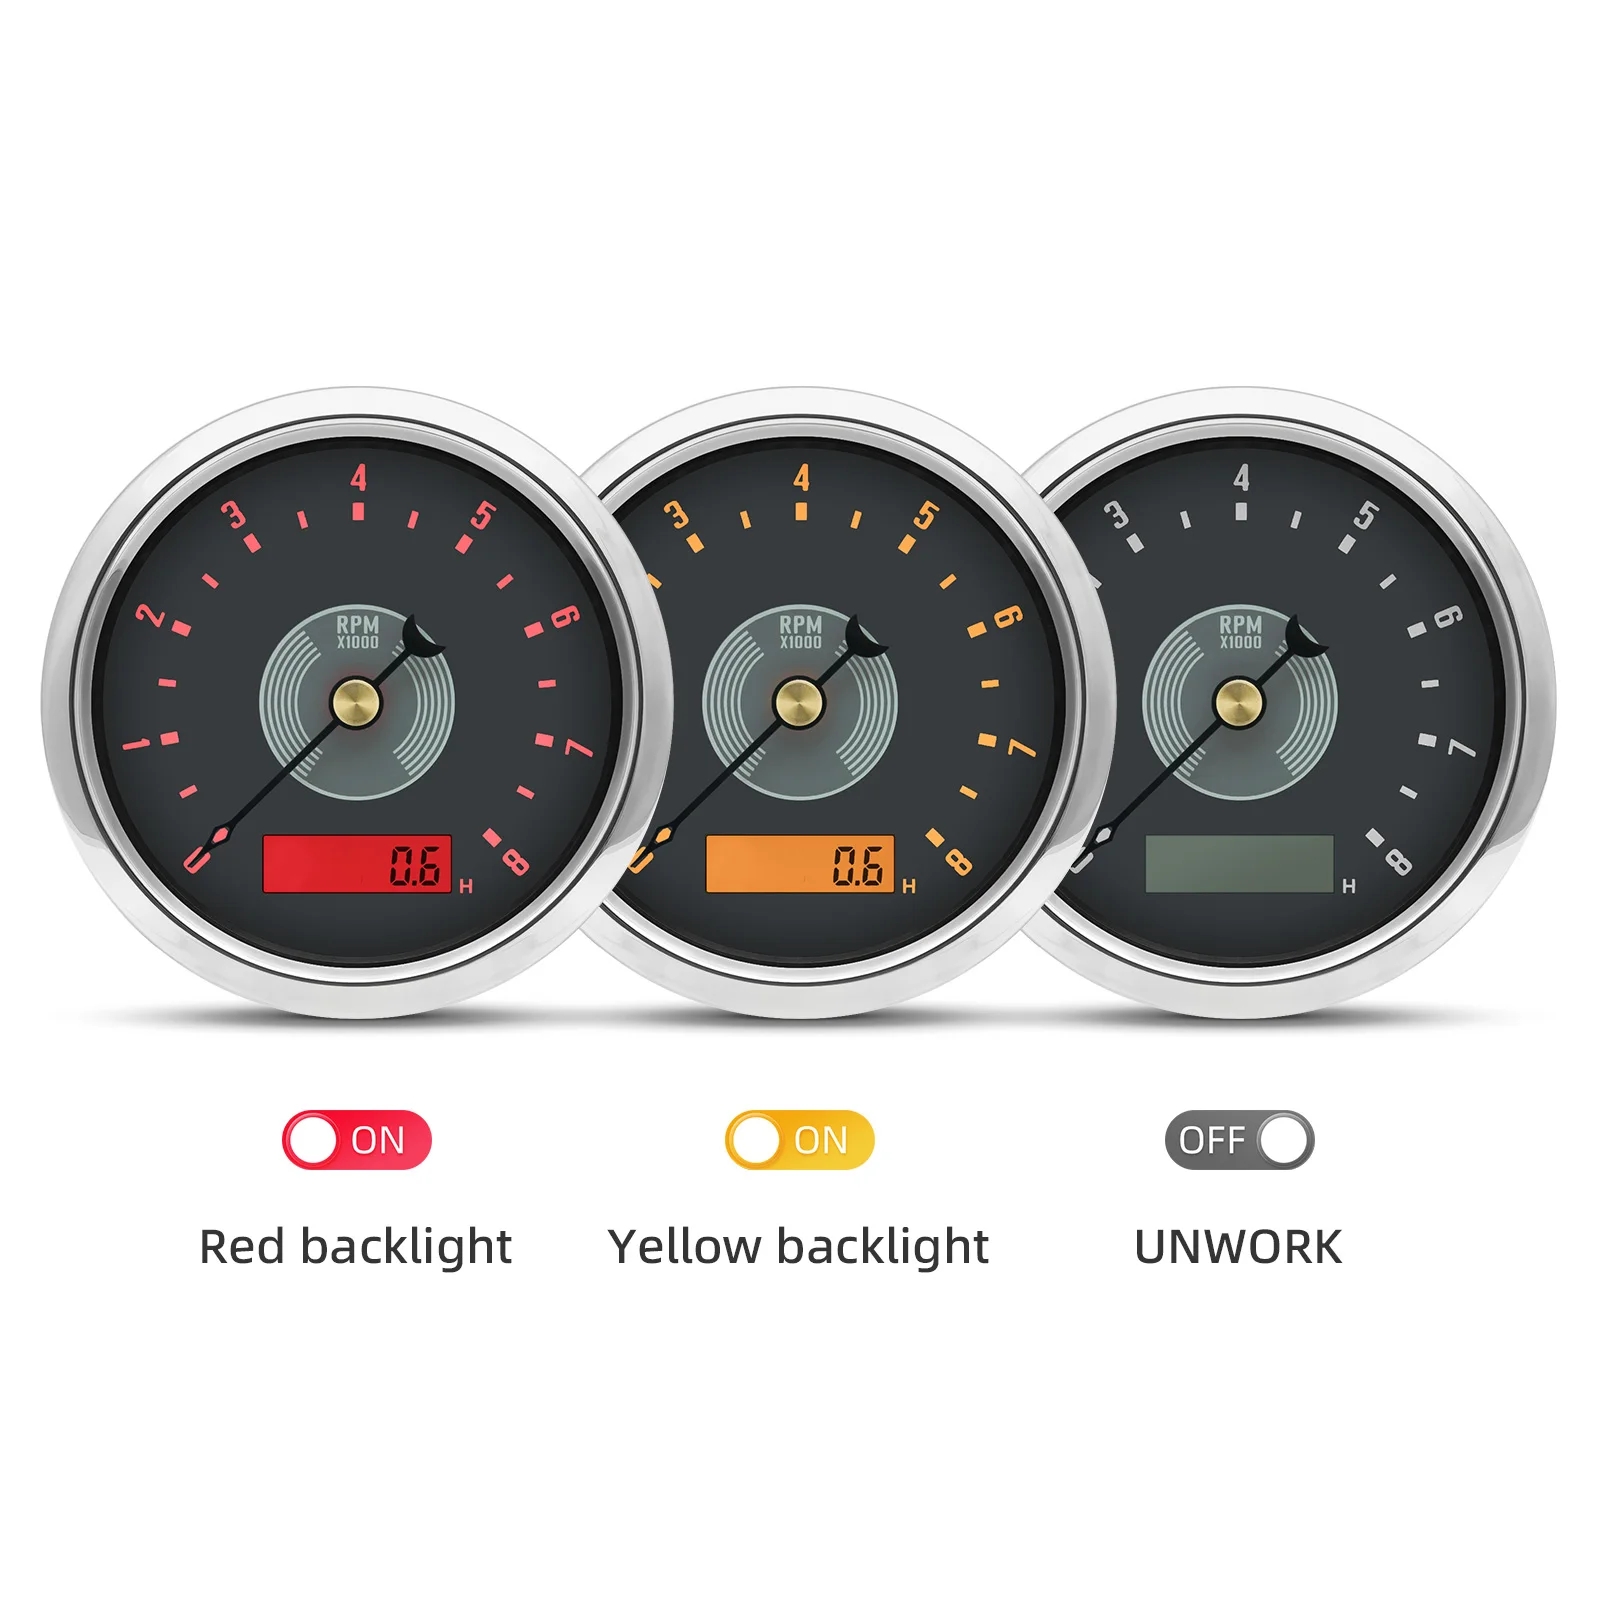
Yellow Red Backlight
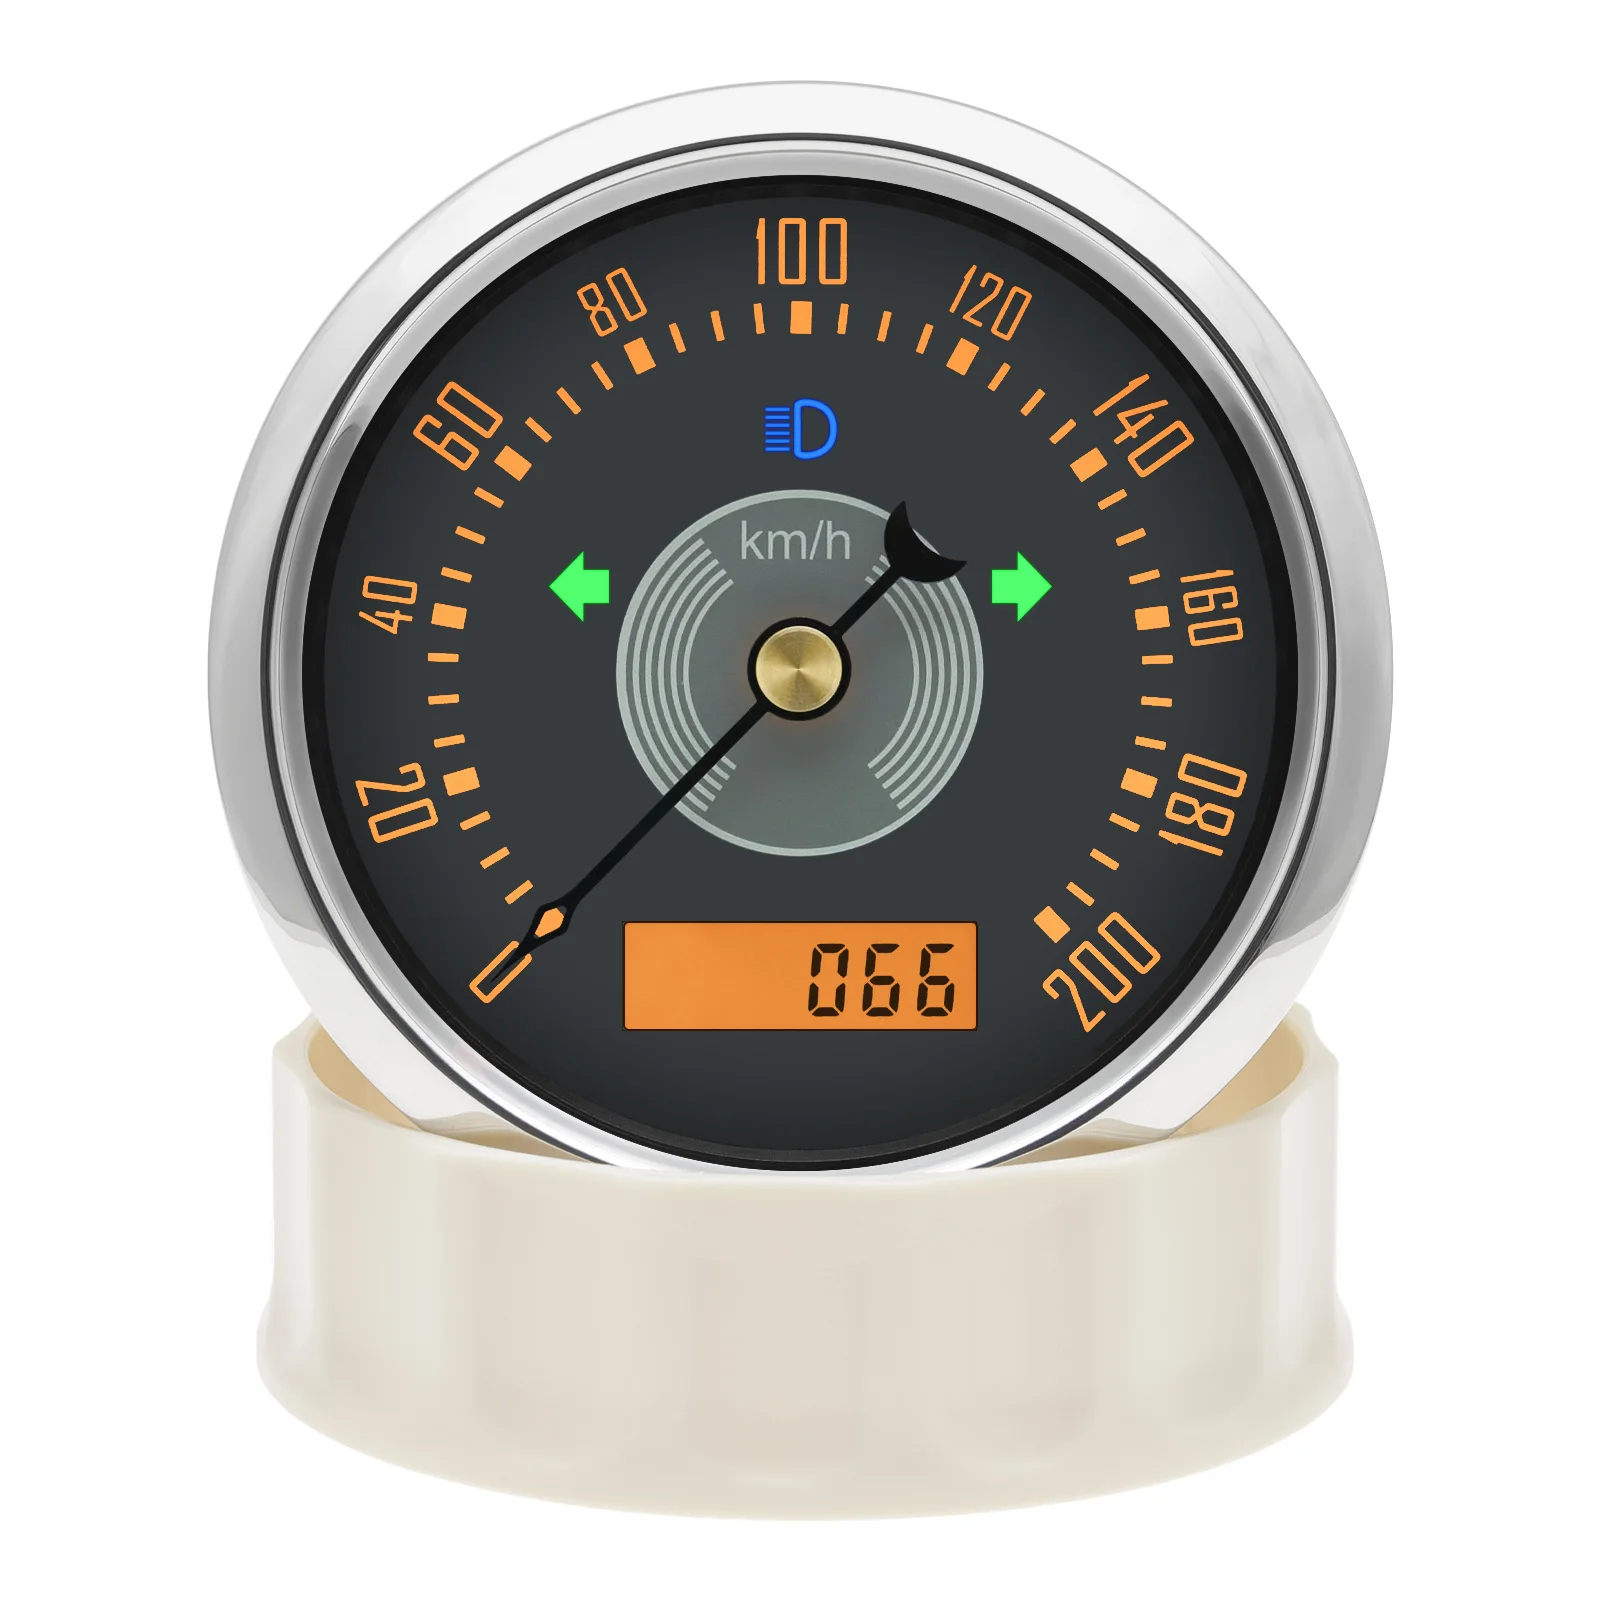
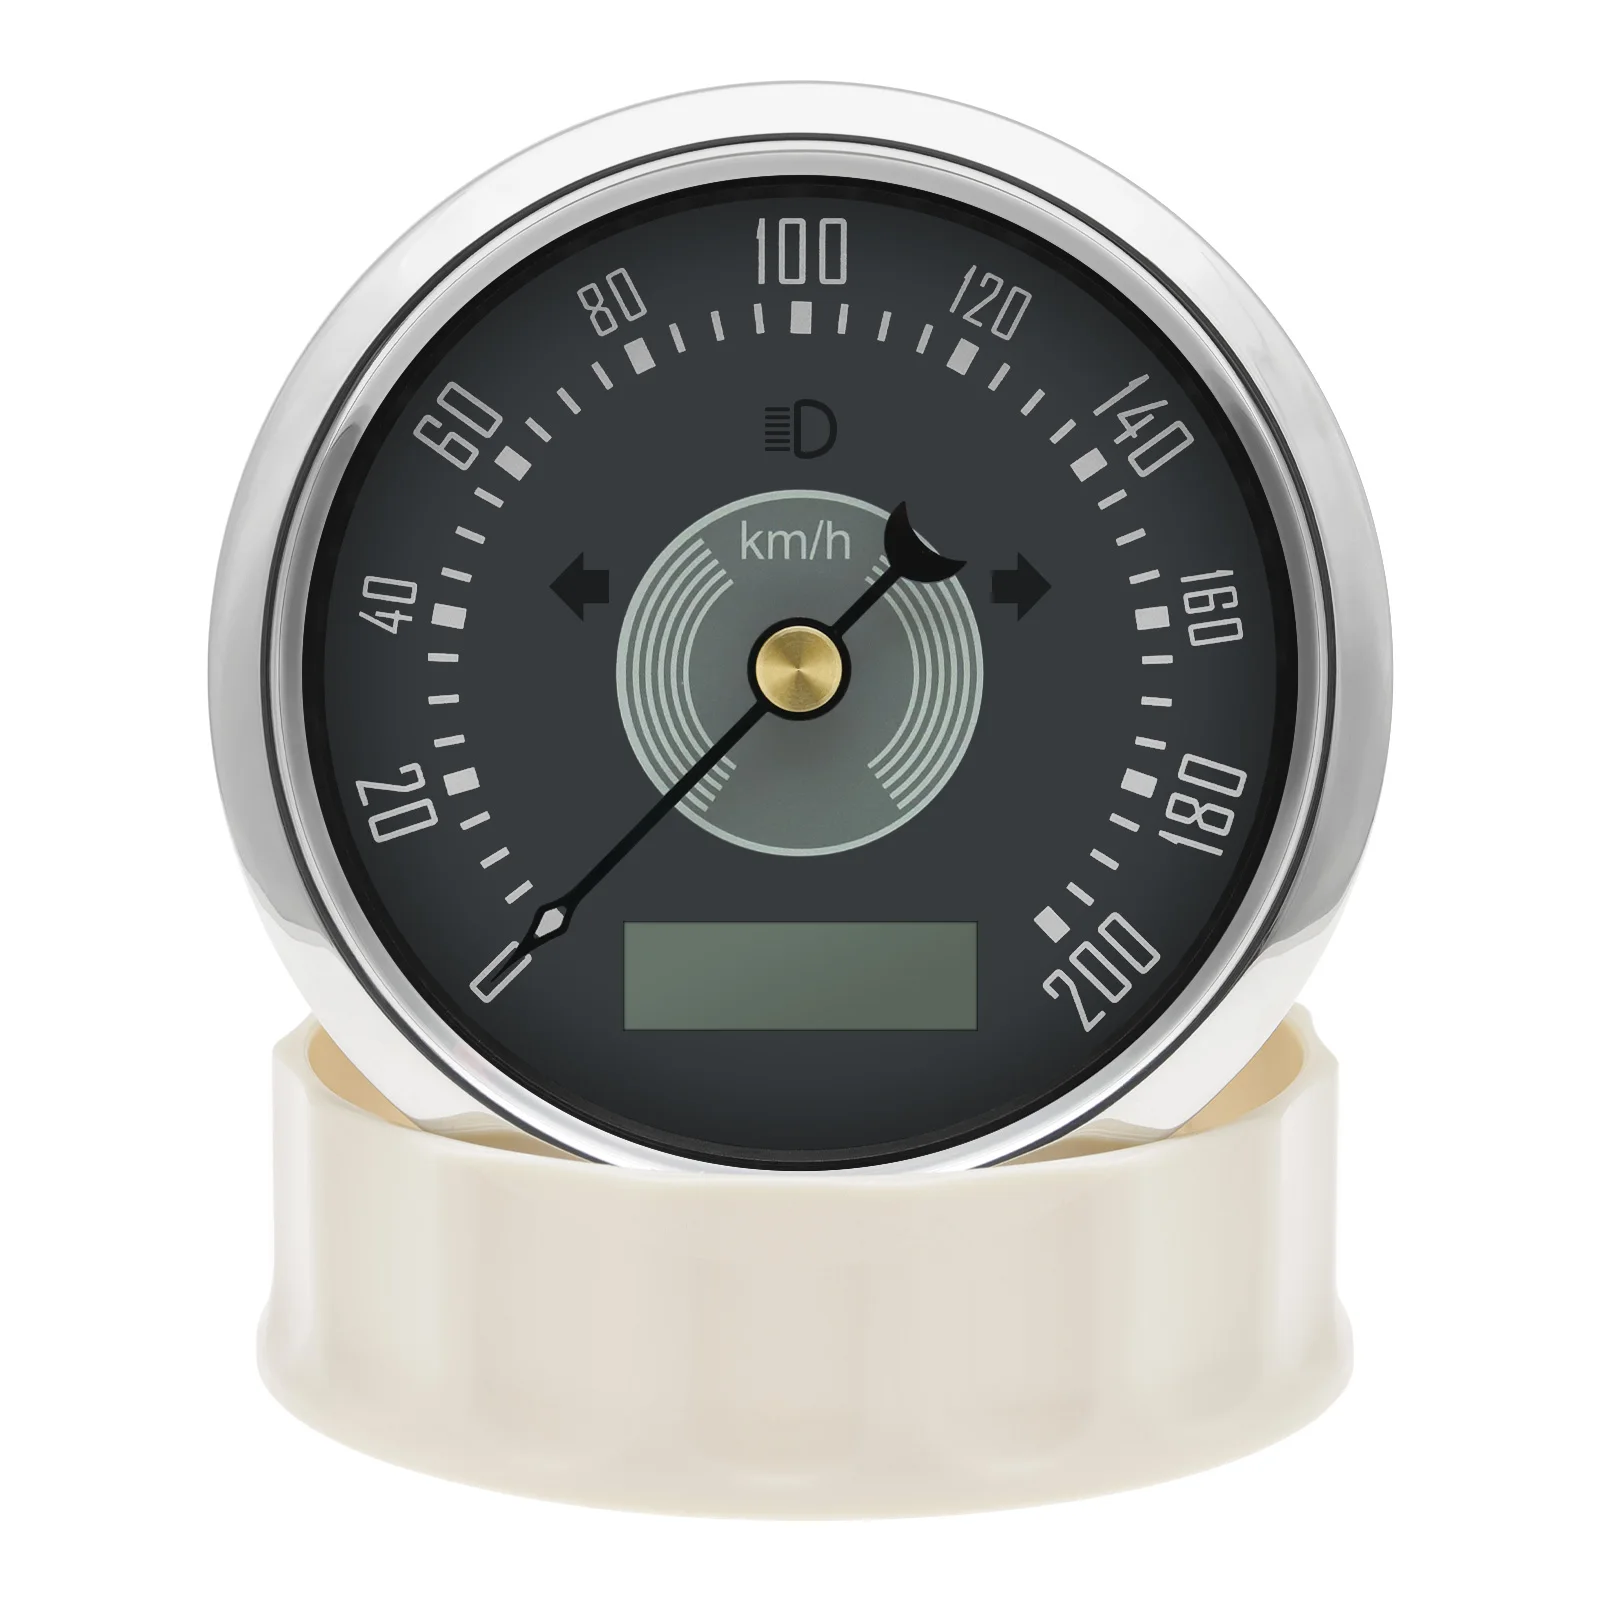
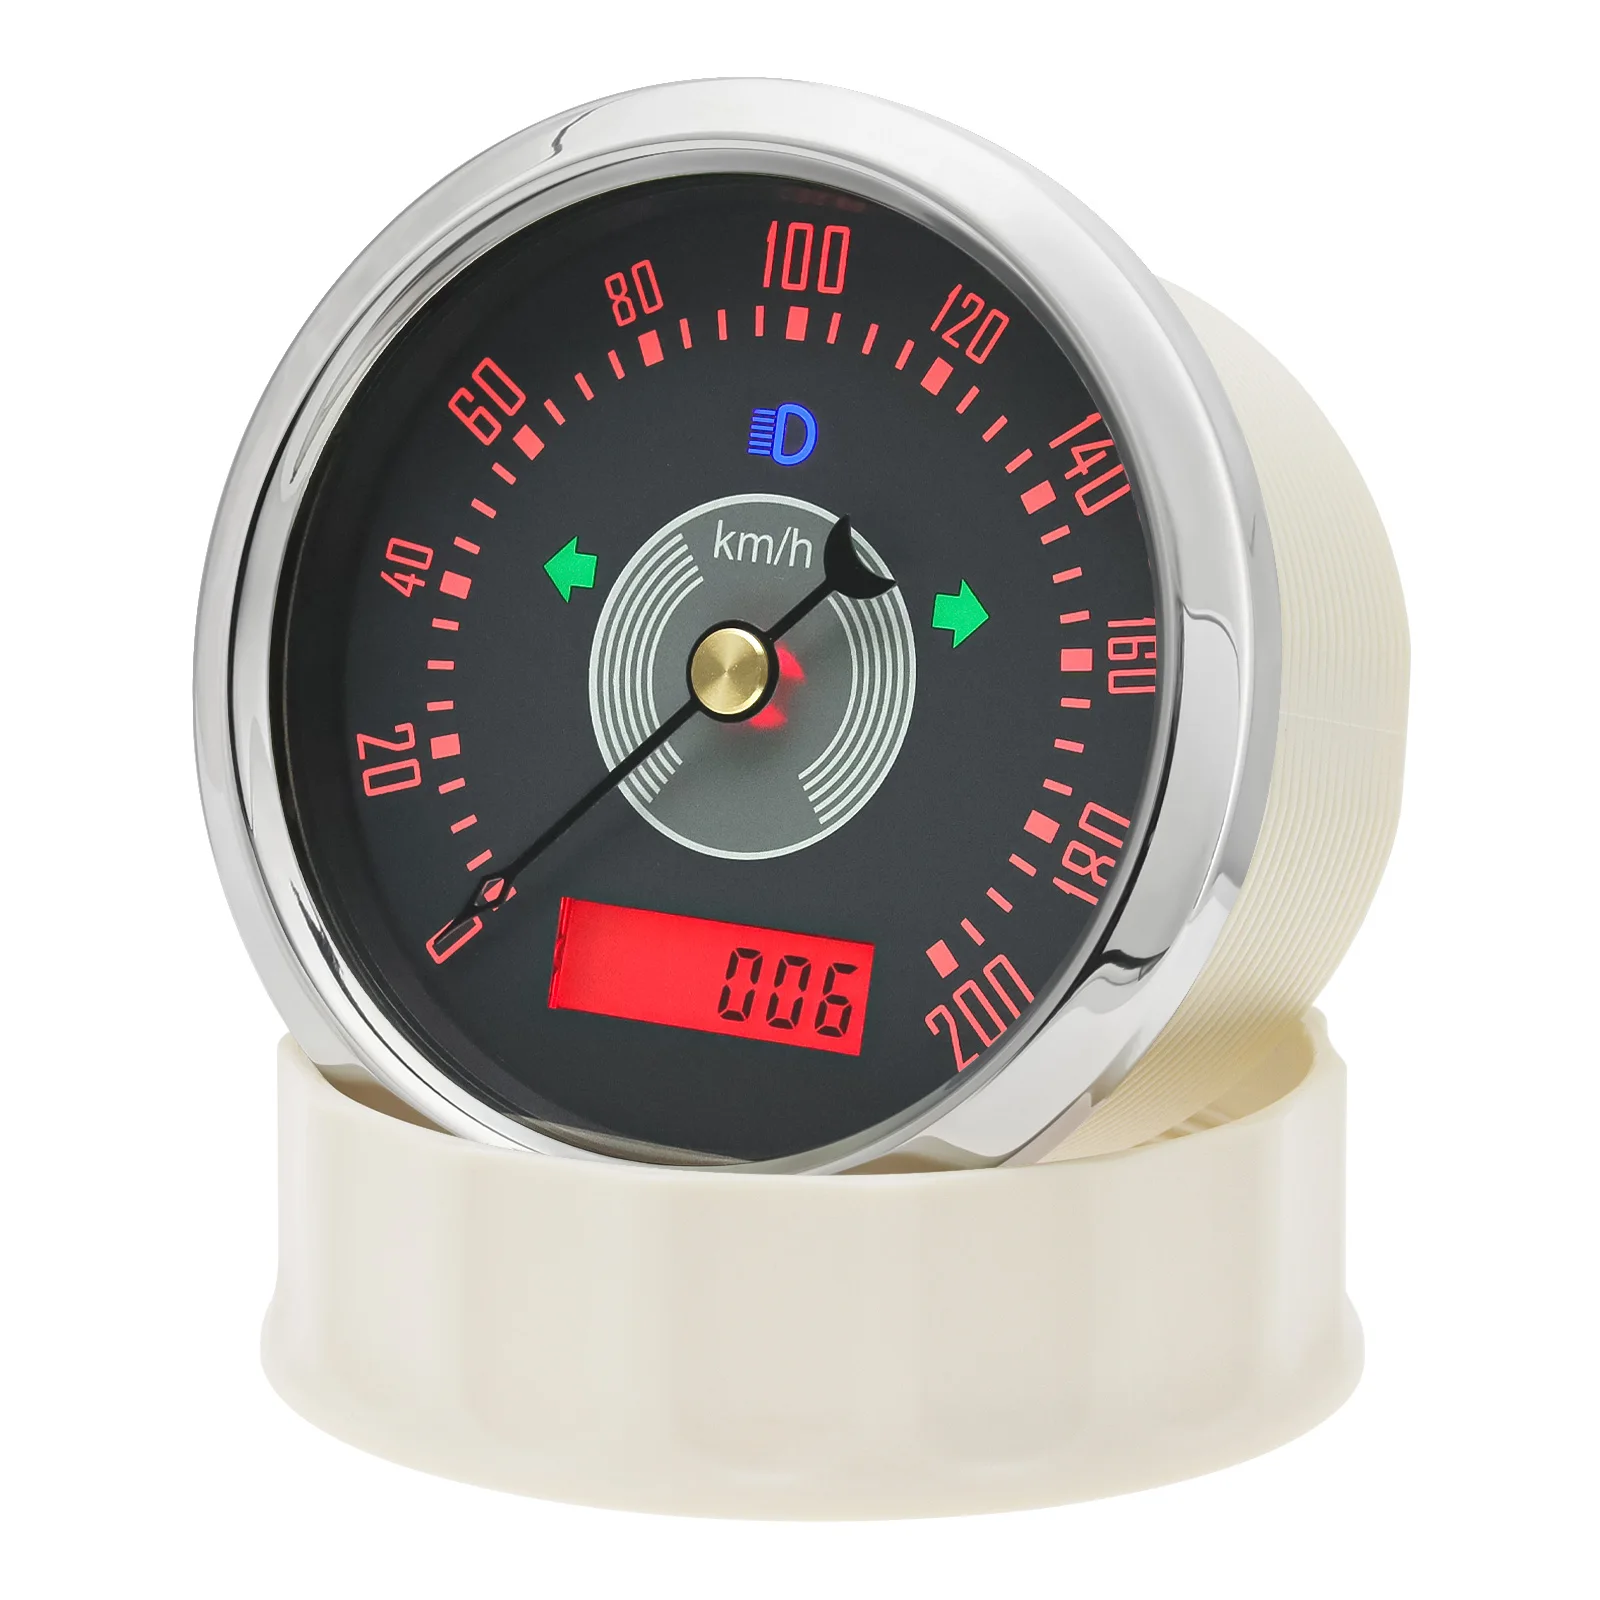
Range: 0~160KMH,0~200KMH,
Waterproof
fit for Gasoline,Diesel Vehicle,car,boat motor etc
how to install the gauge?
1. Cut an 85mm (3 3/8") hole in the panel (II) allow a clearance of . behind the panel.
2. Remove fastening ring (I), insert gauge from front. Tighten gauge (III) using fastening ring ( I)
3. Connect cables according to the diagram. Choose red or yellow background light.
4. Securely fasten the GPS antenna, preferably outdoors (or inside front windscreen) so that it has a clear view of the sky to pick up satellite signals. Connect the antenna cable to socket on the gauge. Do not cut cable.
5. After turning power on, allow the gauge to sample satellite signal for 1 minute.
6. All data is for reference only and should not be trusted as sole navigation source.
Function Select: “ODO”,“BUZZ”
1.Press and hold on the back button or external button, then turn on the power supply.
The LCD will show ODO, BUZZ, etc.
You can select the function to be set after release button.
2.“BUZZ”(change overspeed buzzer alarm threshold value)
After selecting “BUZZ”, the LCD will show for example “B 80” (buzzer will be on when speed over 80km/h), press the button to change the flashing digit from 10 to 240 to set target overspeed buzzer alarm threshold value.
Please noted: After setting, you should disconnect both Power+ and GND, and then reconnect the two cable, then it will save the setting. If you just cut Power +, then it’ll not work properly.
3. Switch Odometer & Trip Odometer
The LCD will show Total Odometer as default. Quick press the button to switch show Trip Odometer.
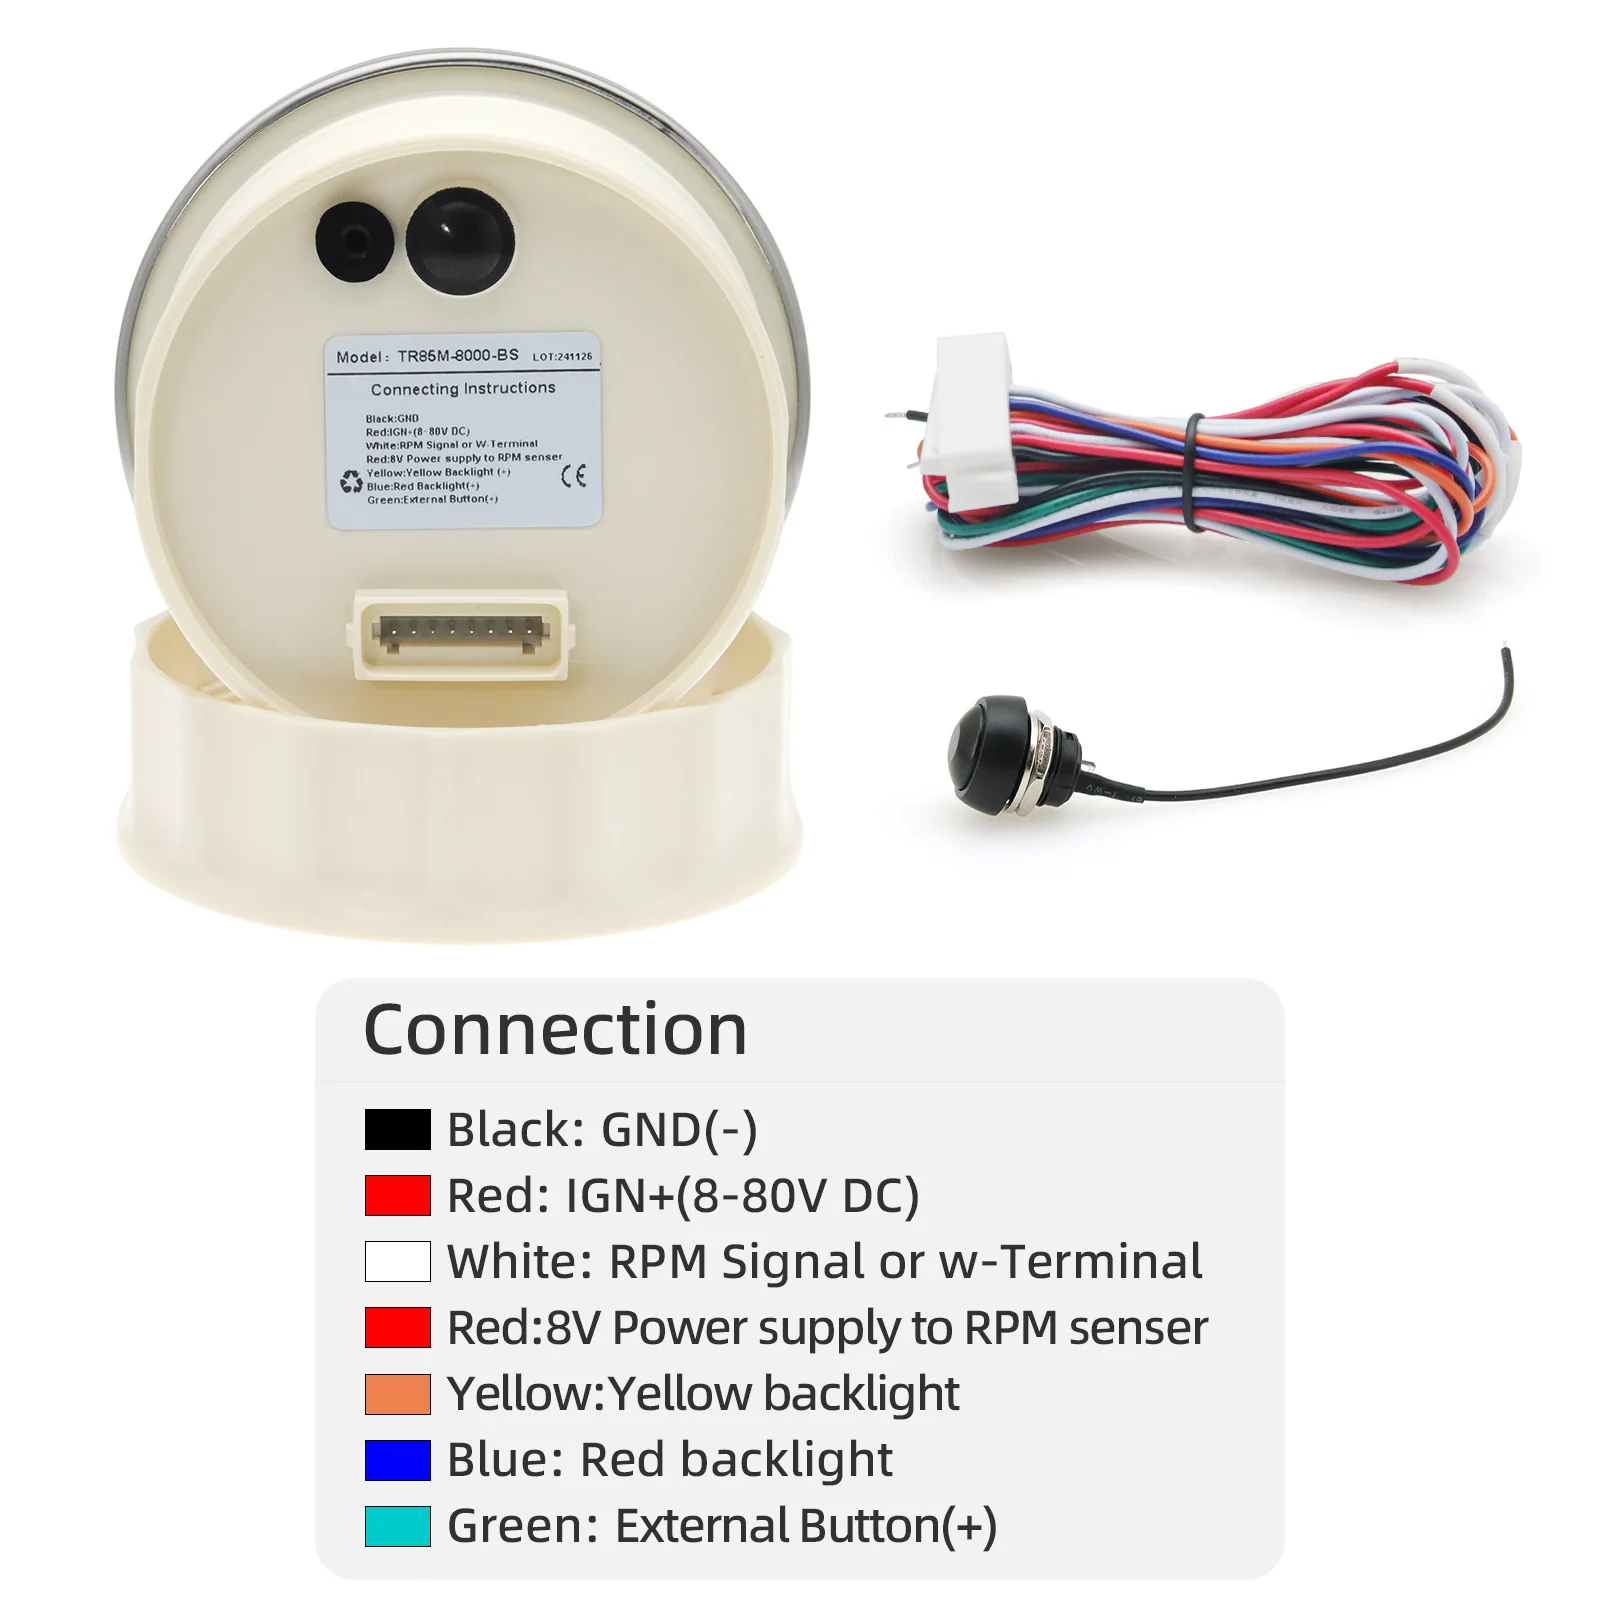
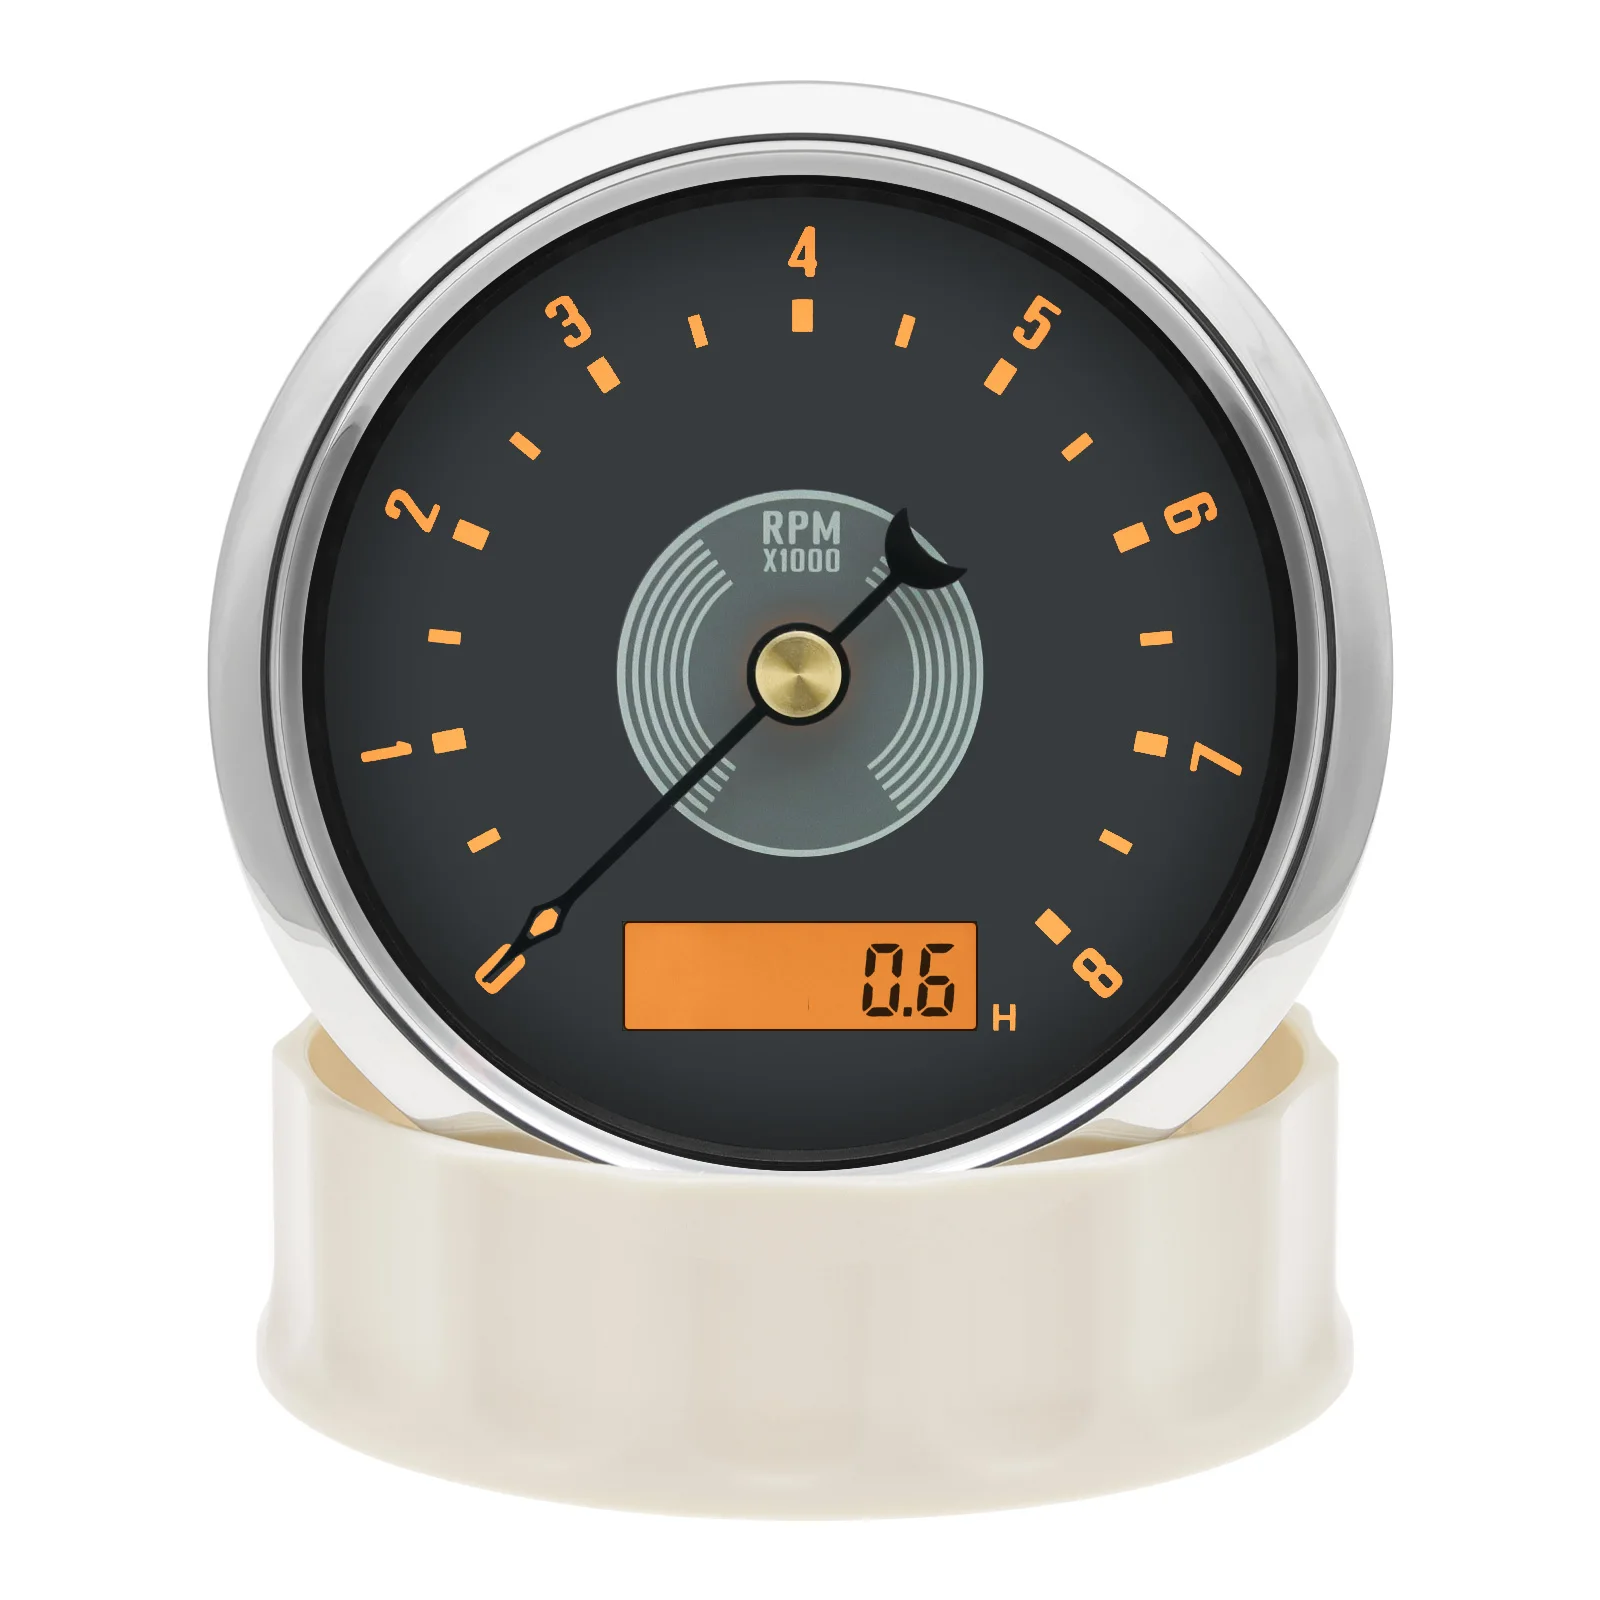
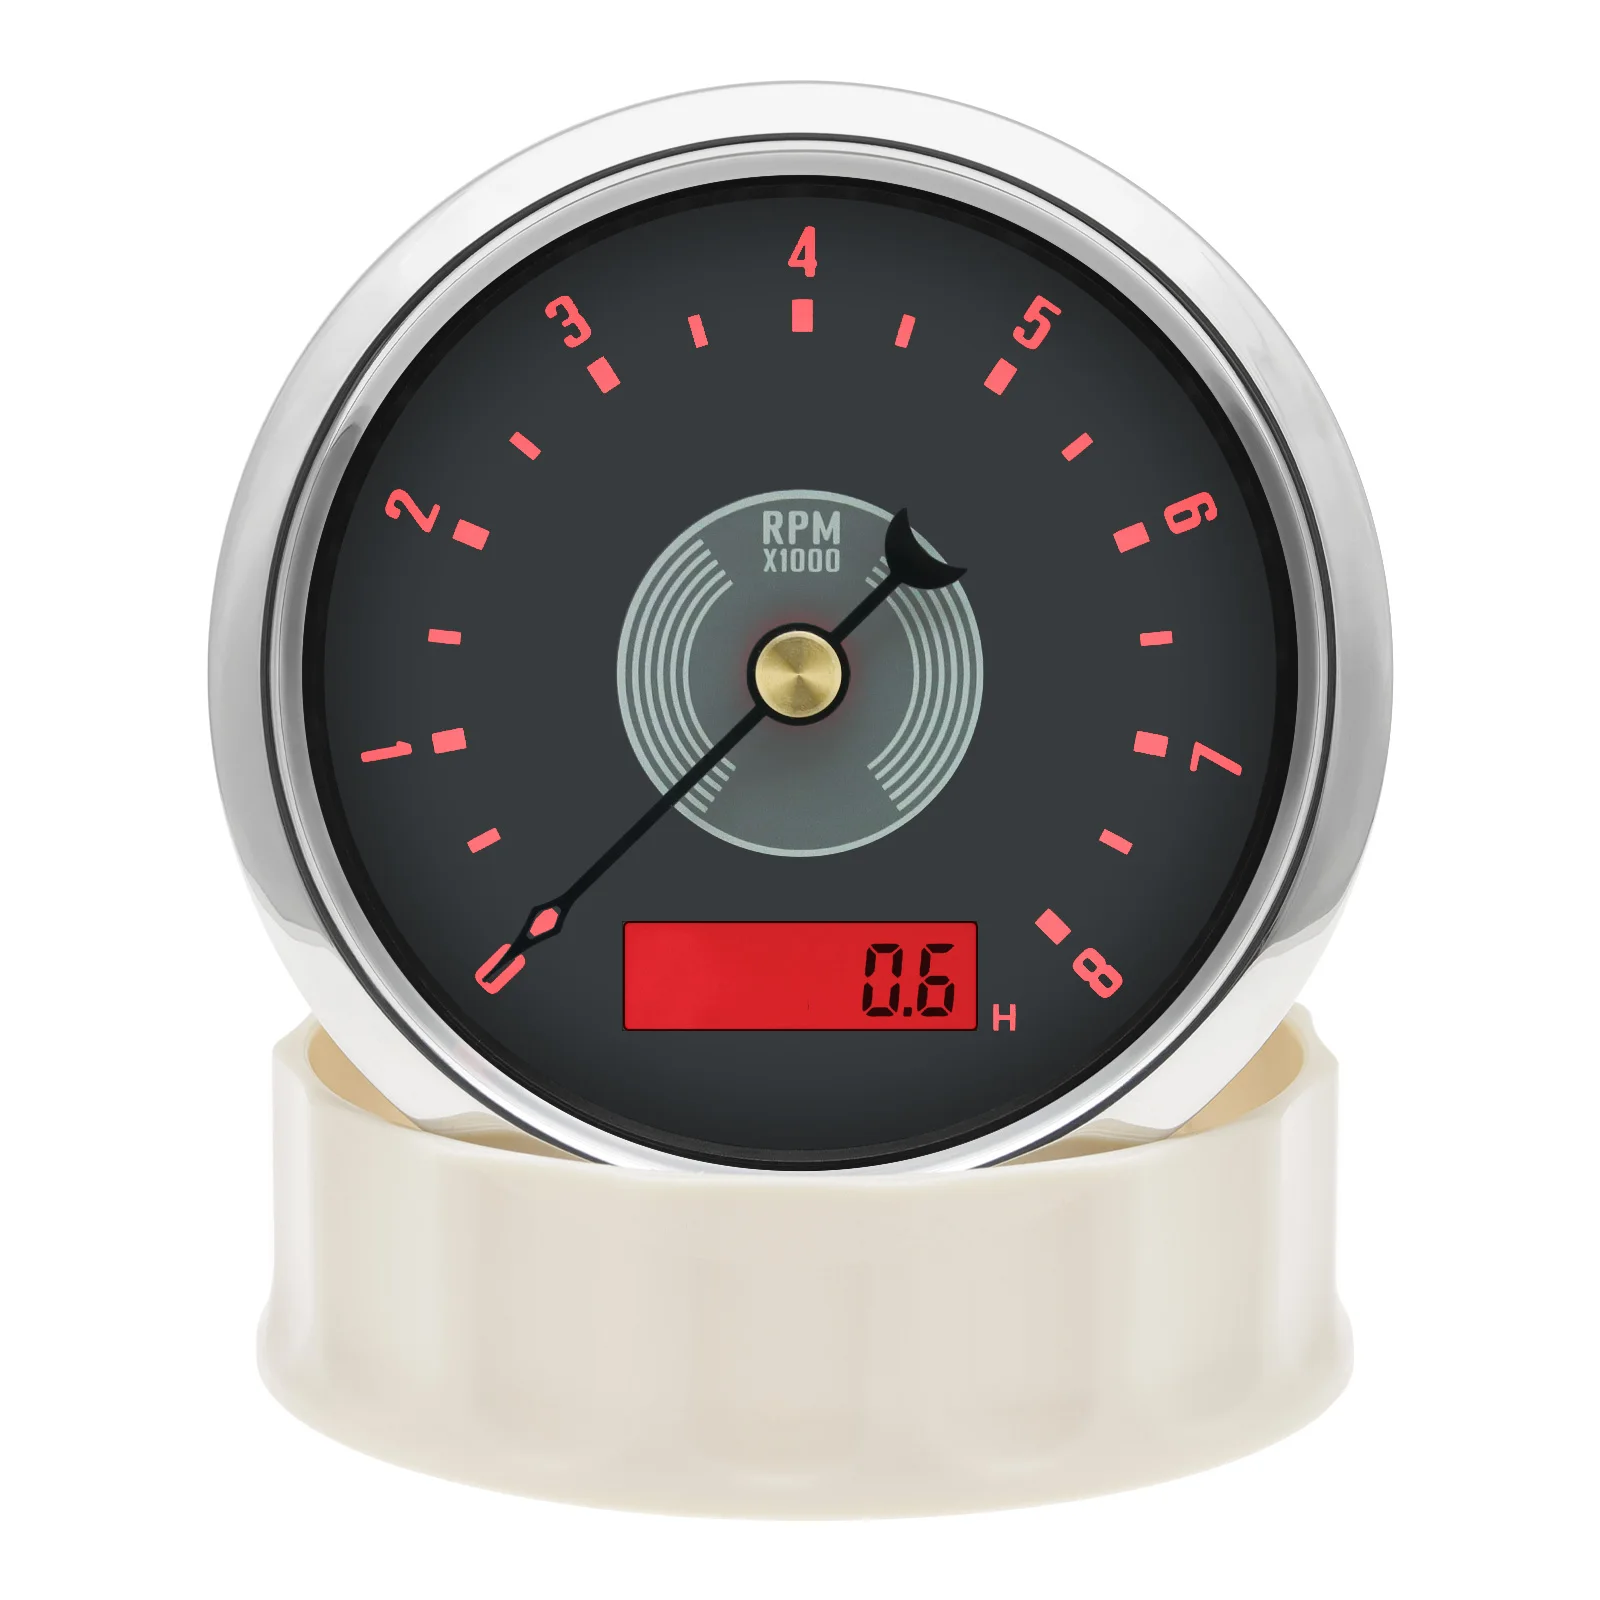
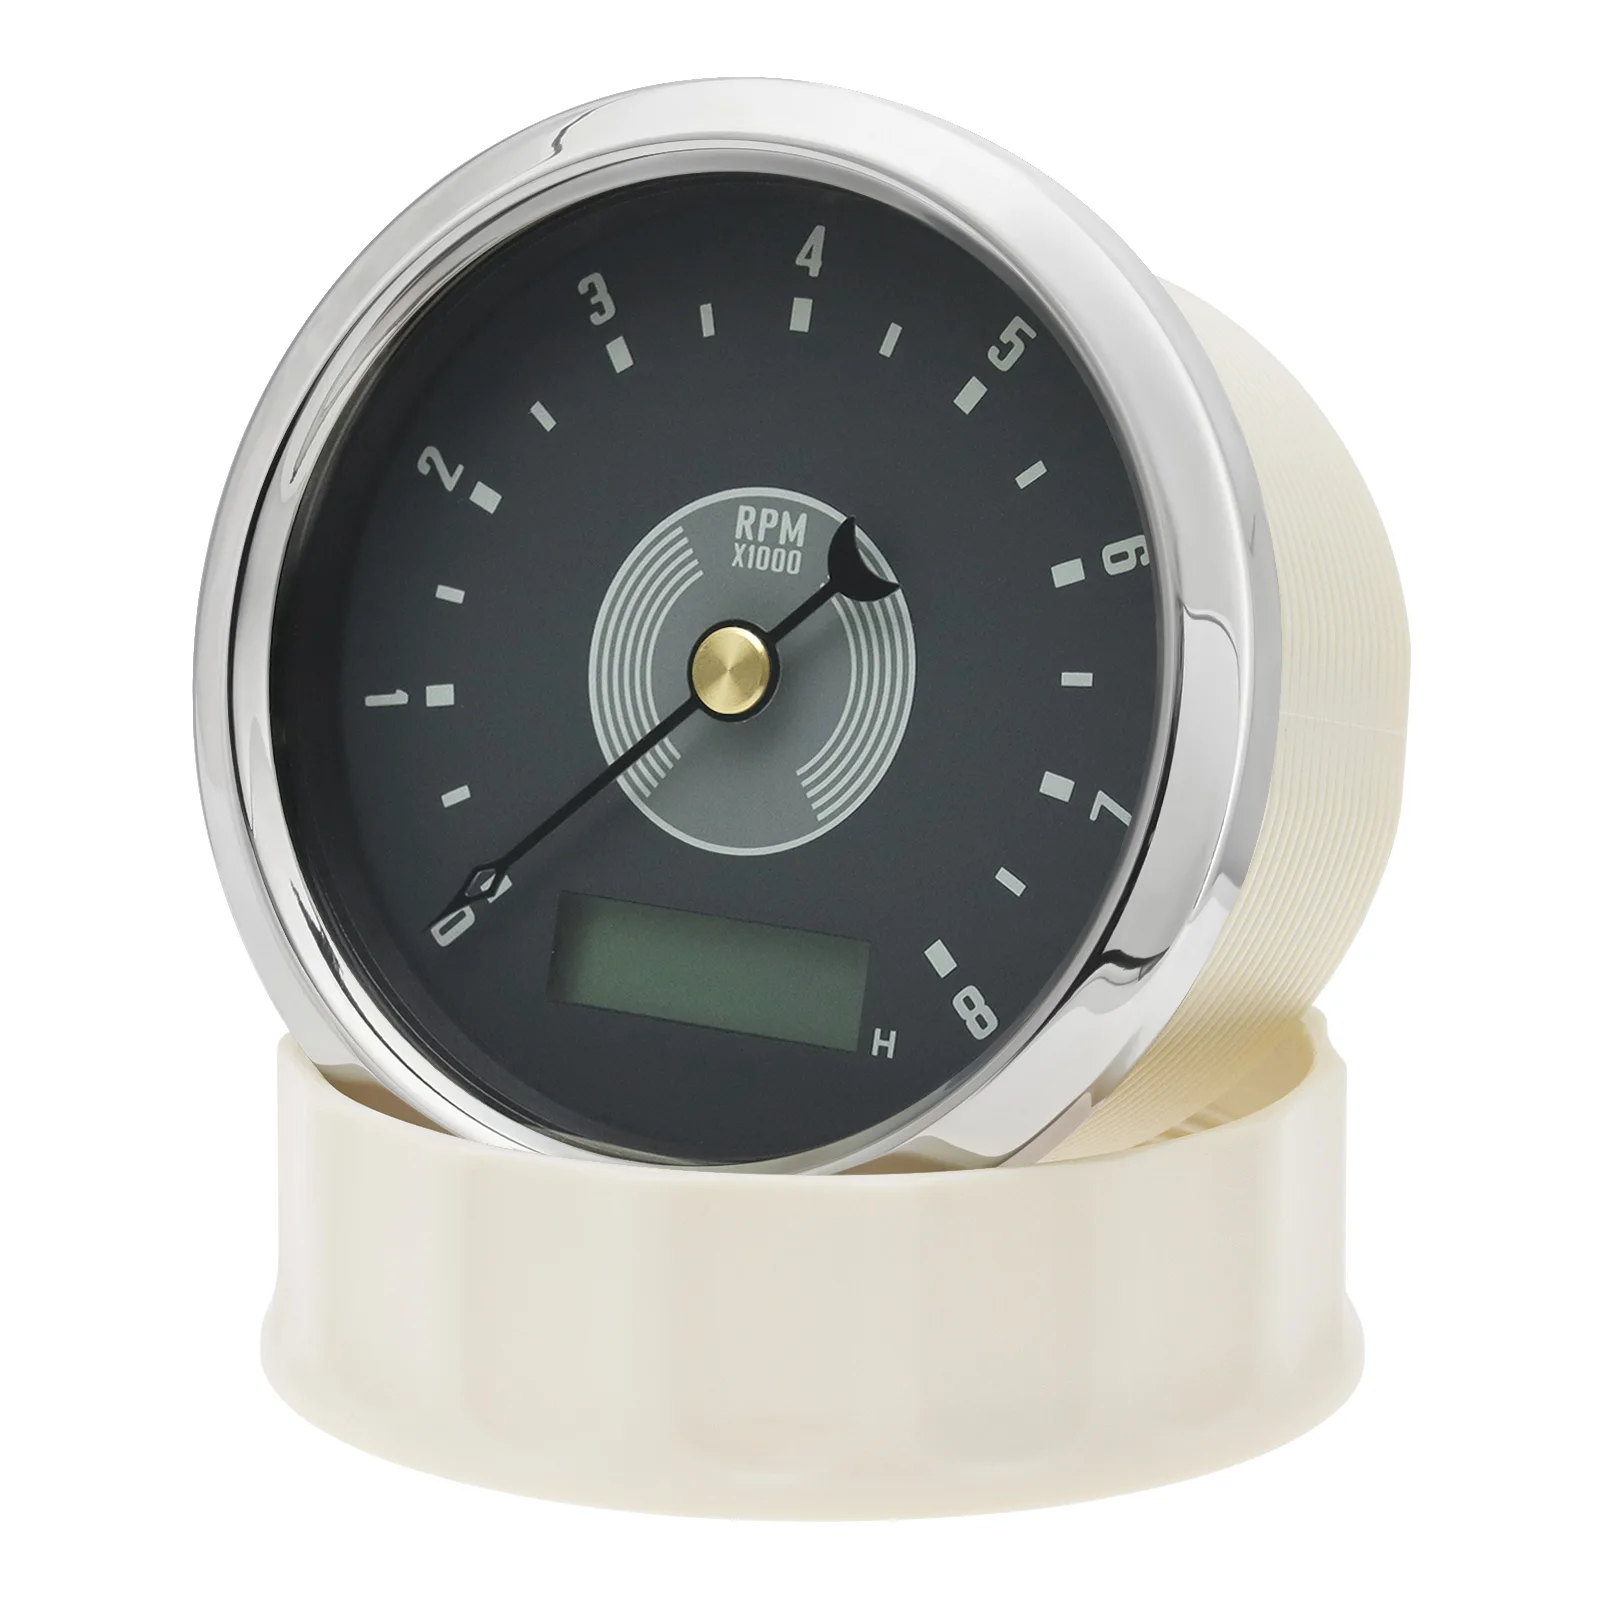
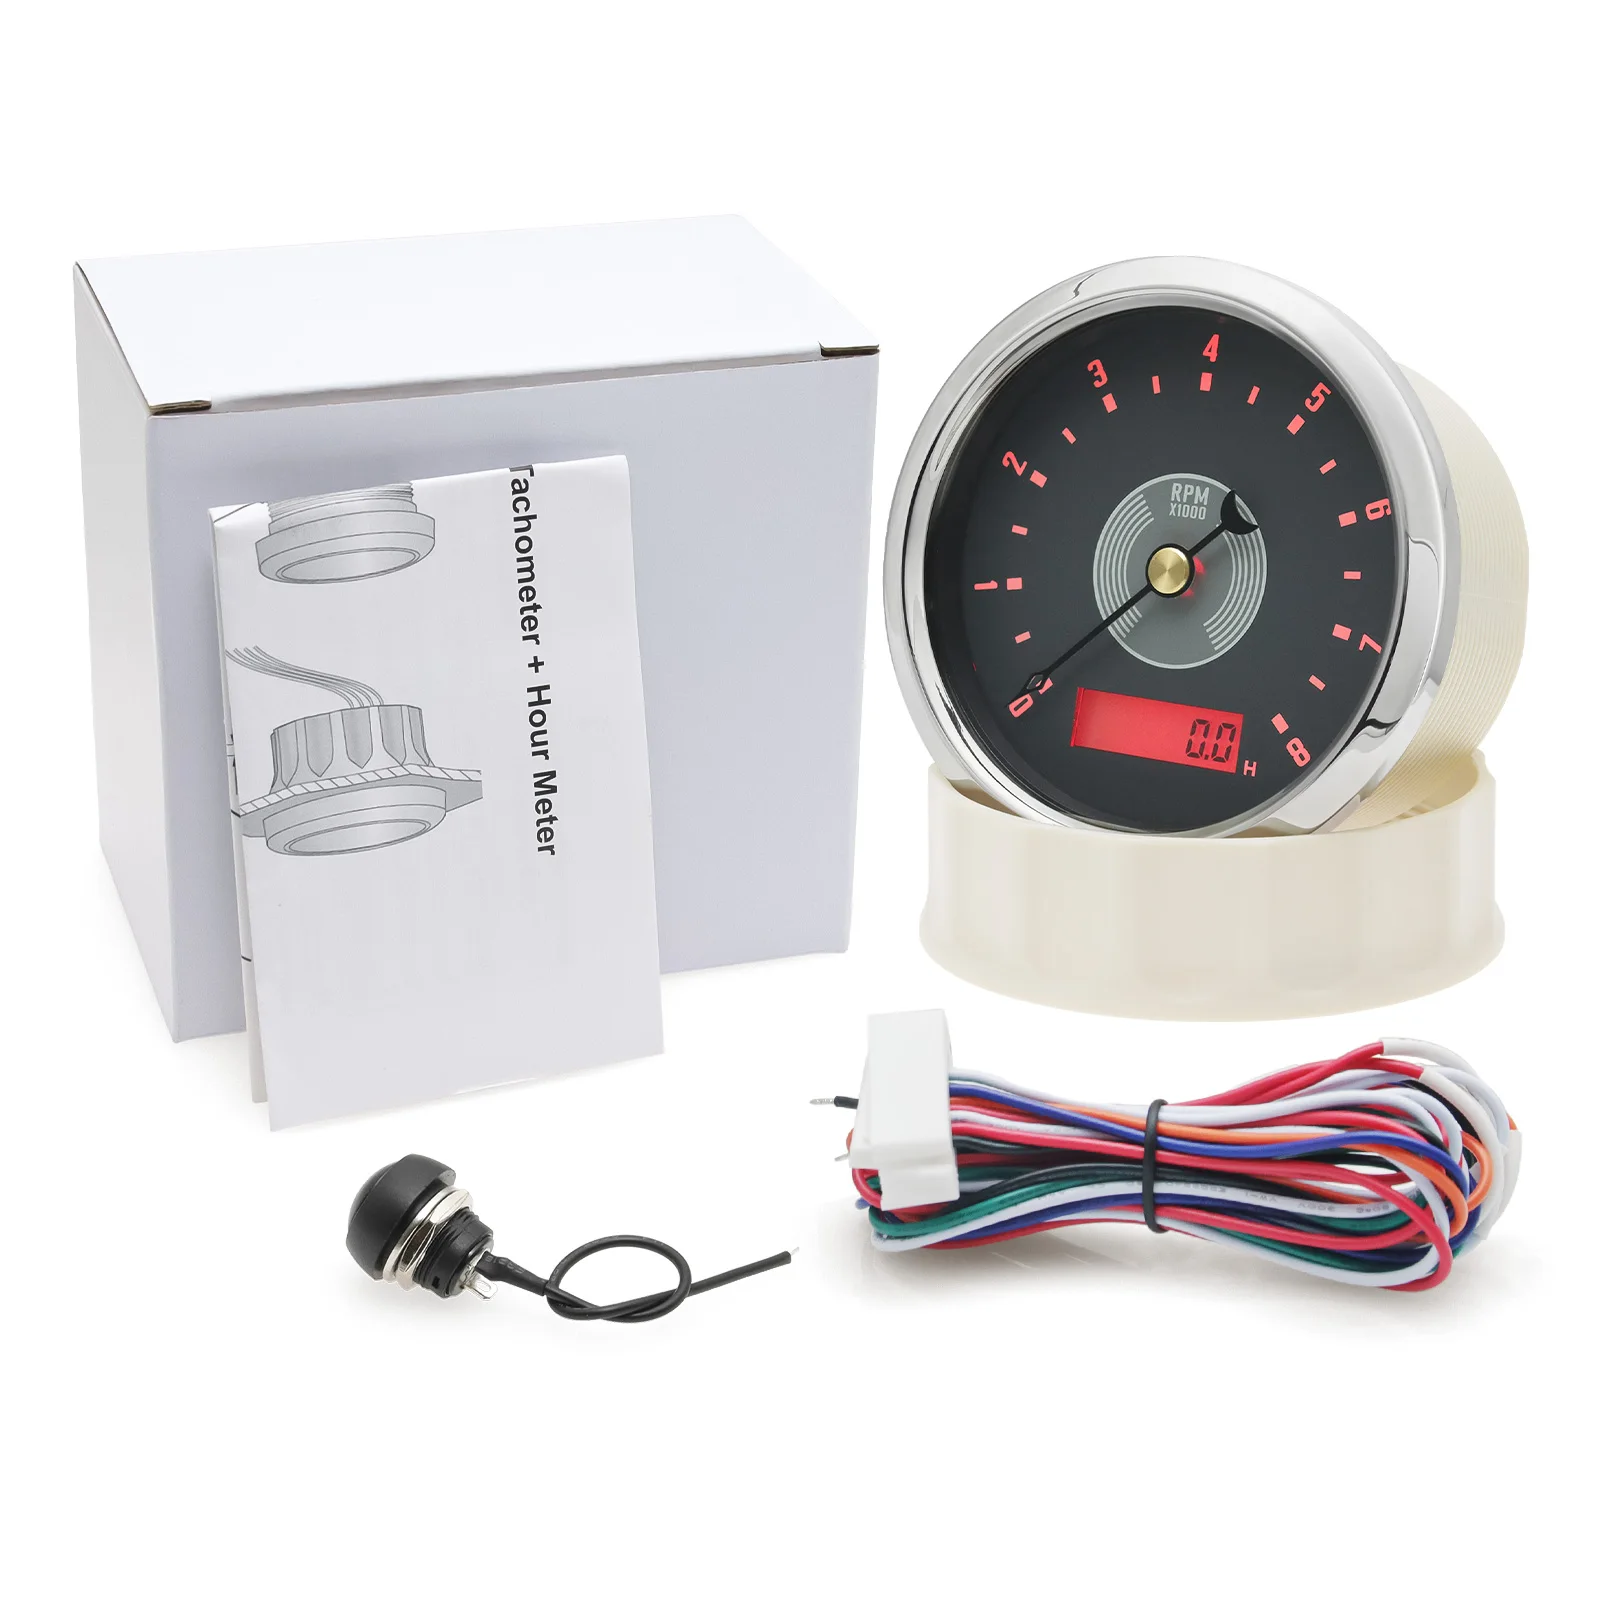
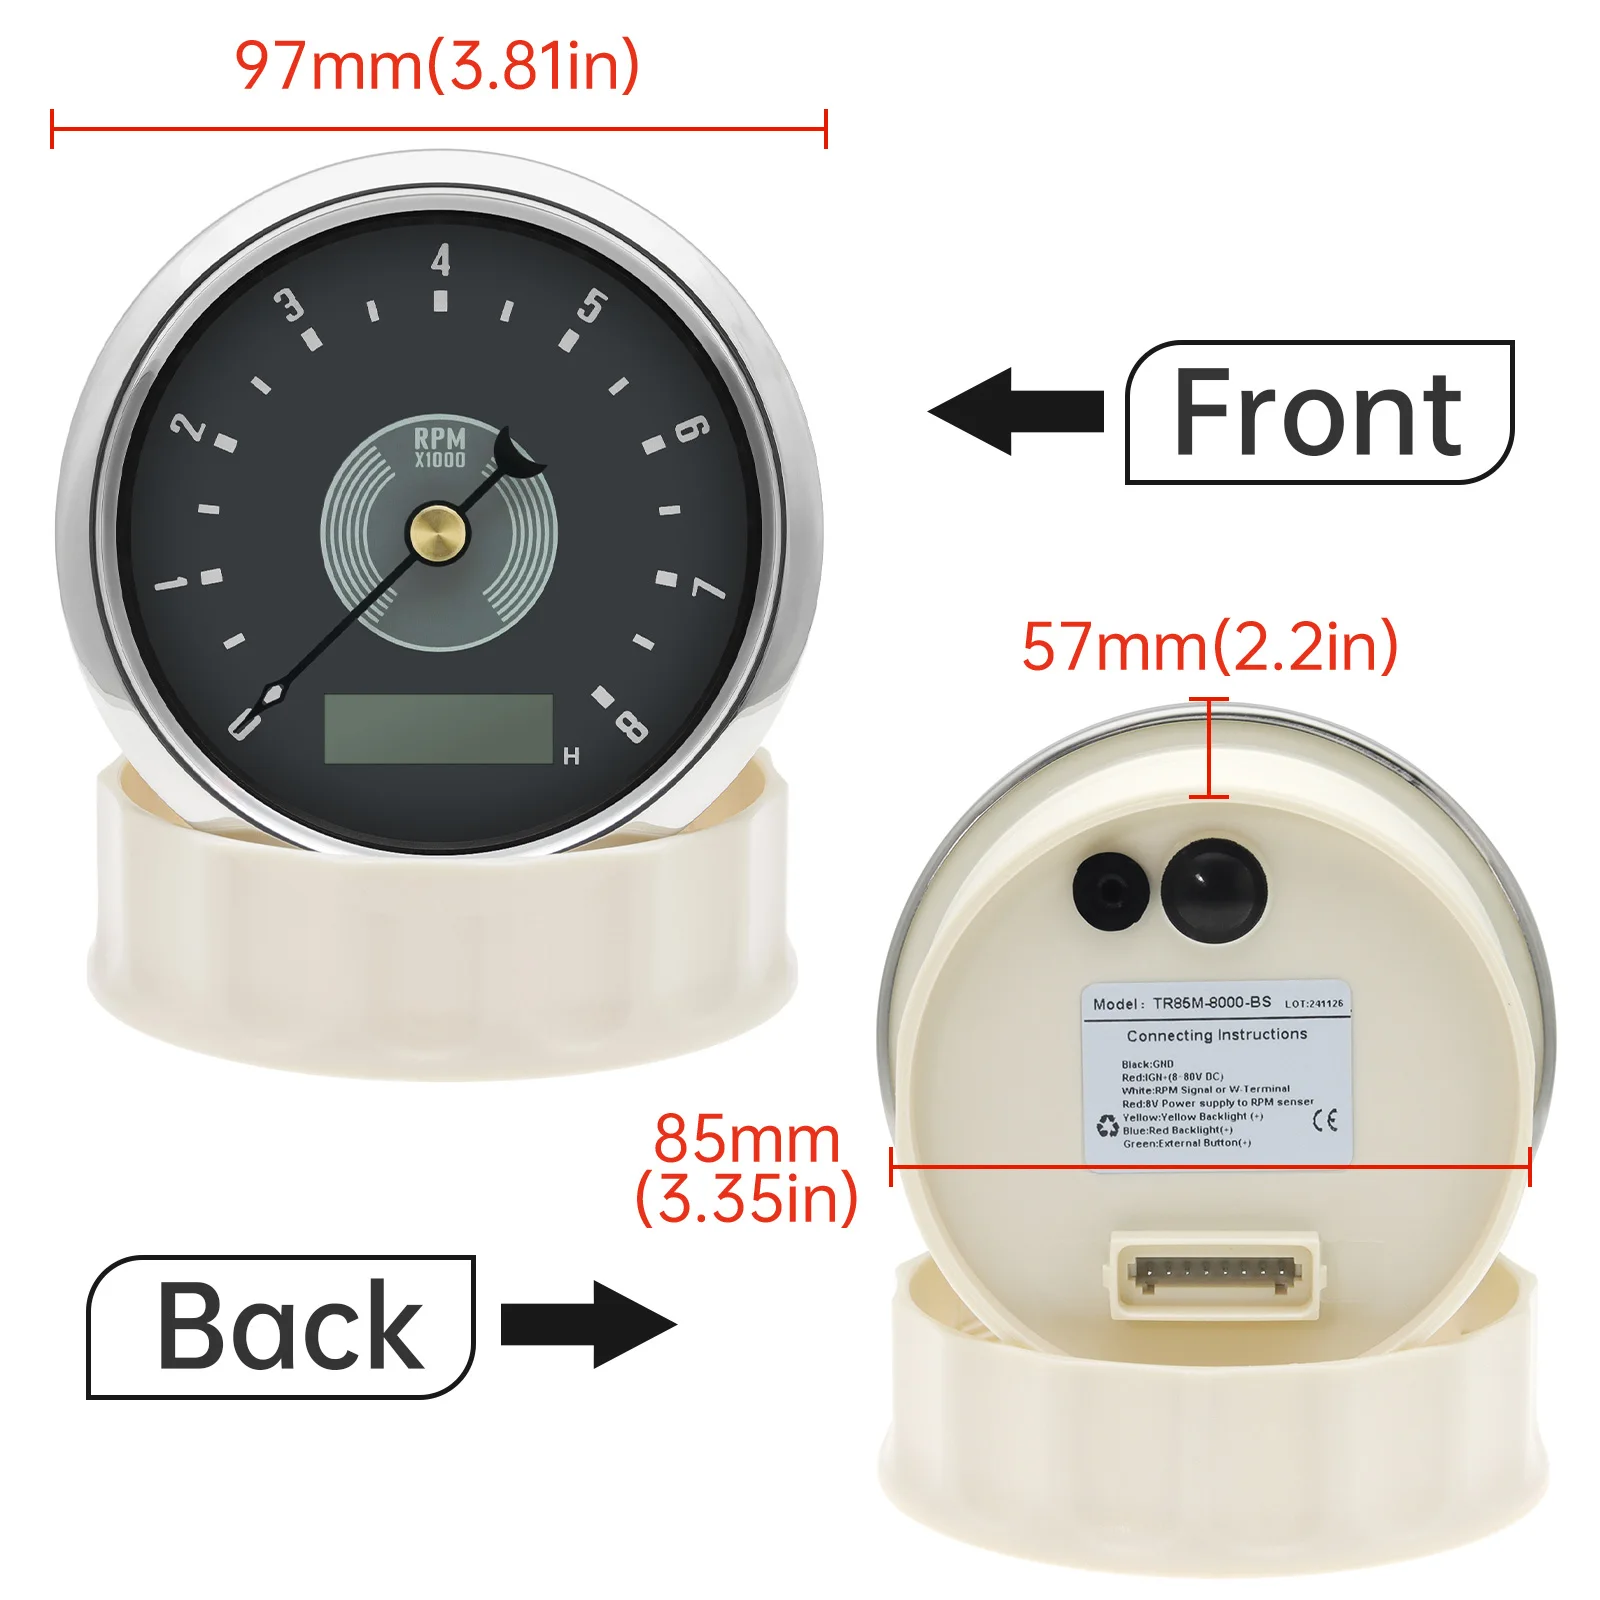
85mm Tachometer
Black line connect to the GND(-)
Red line connect to the DC12V24V(+)
White line connect to the RPM signal or W-terminal
Red line connect to 8V Power supply to RPM sensor
Yellow line: yellow backlight(connect to DC12V24V+)
Blue line: Red backlight(connect to DC12V24V+)
Green line: external button(+)
85mm Tachometer
How to install?
1. Cut an 85mm (3 3/8") hole in the panel (II) allow a clearance of . behind the panel.
2. Remove fastening ring (I), insert gauge from front. Tighten gauge (III) using fastening ring ( I)
3. Connect cables according to the diagram.
Function Select: “PULSE”,“HOUR”,“BUZZ”
Press and hold on the back button or external button, then turn on the power supply.
The LCD will show PULSE, HOUR, BUZZ, etc.
You can select the function to be set after release button.
1.“PULSE” (change RPM Ratio)
After selecting “PULSE”, unit is 0.01 pulses/round. For example, if LCD shows 100, it means 1 pulse per round
You can select “PULSE” again to confirm the setting is done.
How to confirm RPM Ratio?
a.If your sensor is installed on the flying wheel panel, the RPM ratio is equal to the number of gears of the engine.
b.If the speed signal takes from W-Terminal, the RPM ratio is equal to the half of the
number of poles.
1)Wiring guide to get RPM Tach signal from RPM tach Sensor (3rd pin)
2)Wiring guide to get RPM Tach signal from ignition coil directly (8th pin)
2.“BUZZ”(change overspeed buzzer alarm threshold value)
After selecting “BUZZ”, the LCD will show for example “B 3000” (buzzer will be on when speed over 3000RPM), press the button to change the flashing digit from 0 to 8000 to set target overs RPM buzzer alarm threshold value.
Please noted: After setting, you should disconnect both Power+ and GND, and then reconnect the two cable, then it will save the setting. If you just cut Power +, then it’ll not work properly.
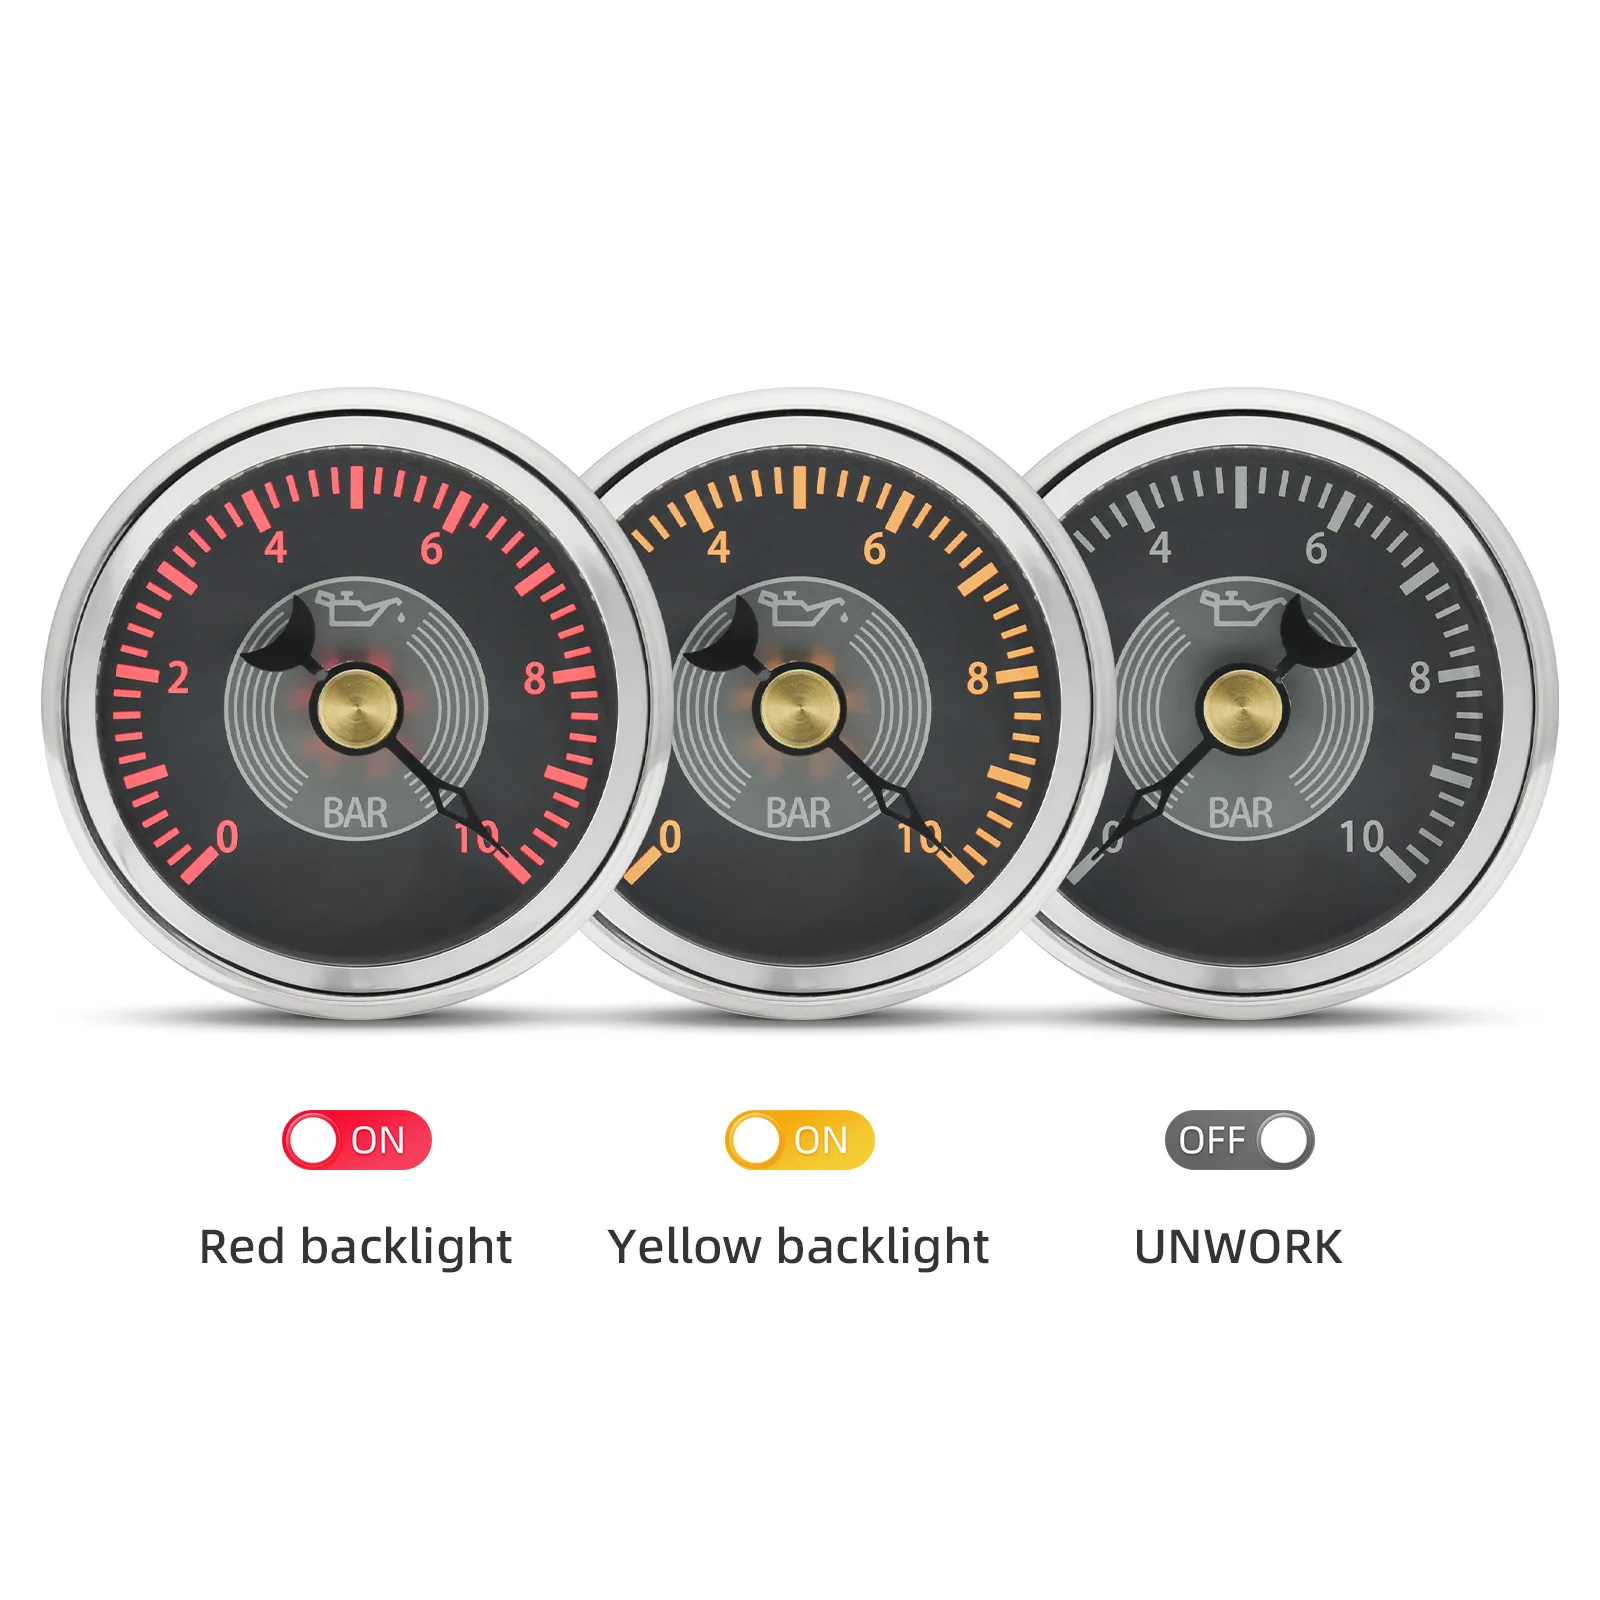
Feature:
Backlight: Red/Yellow LED
work on DC12V24V
Range: 0~8000RPM,
Waterproof
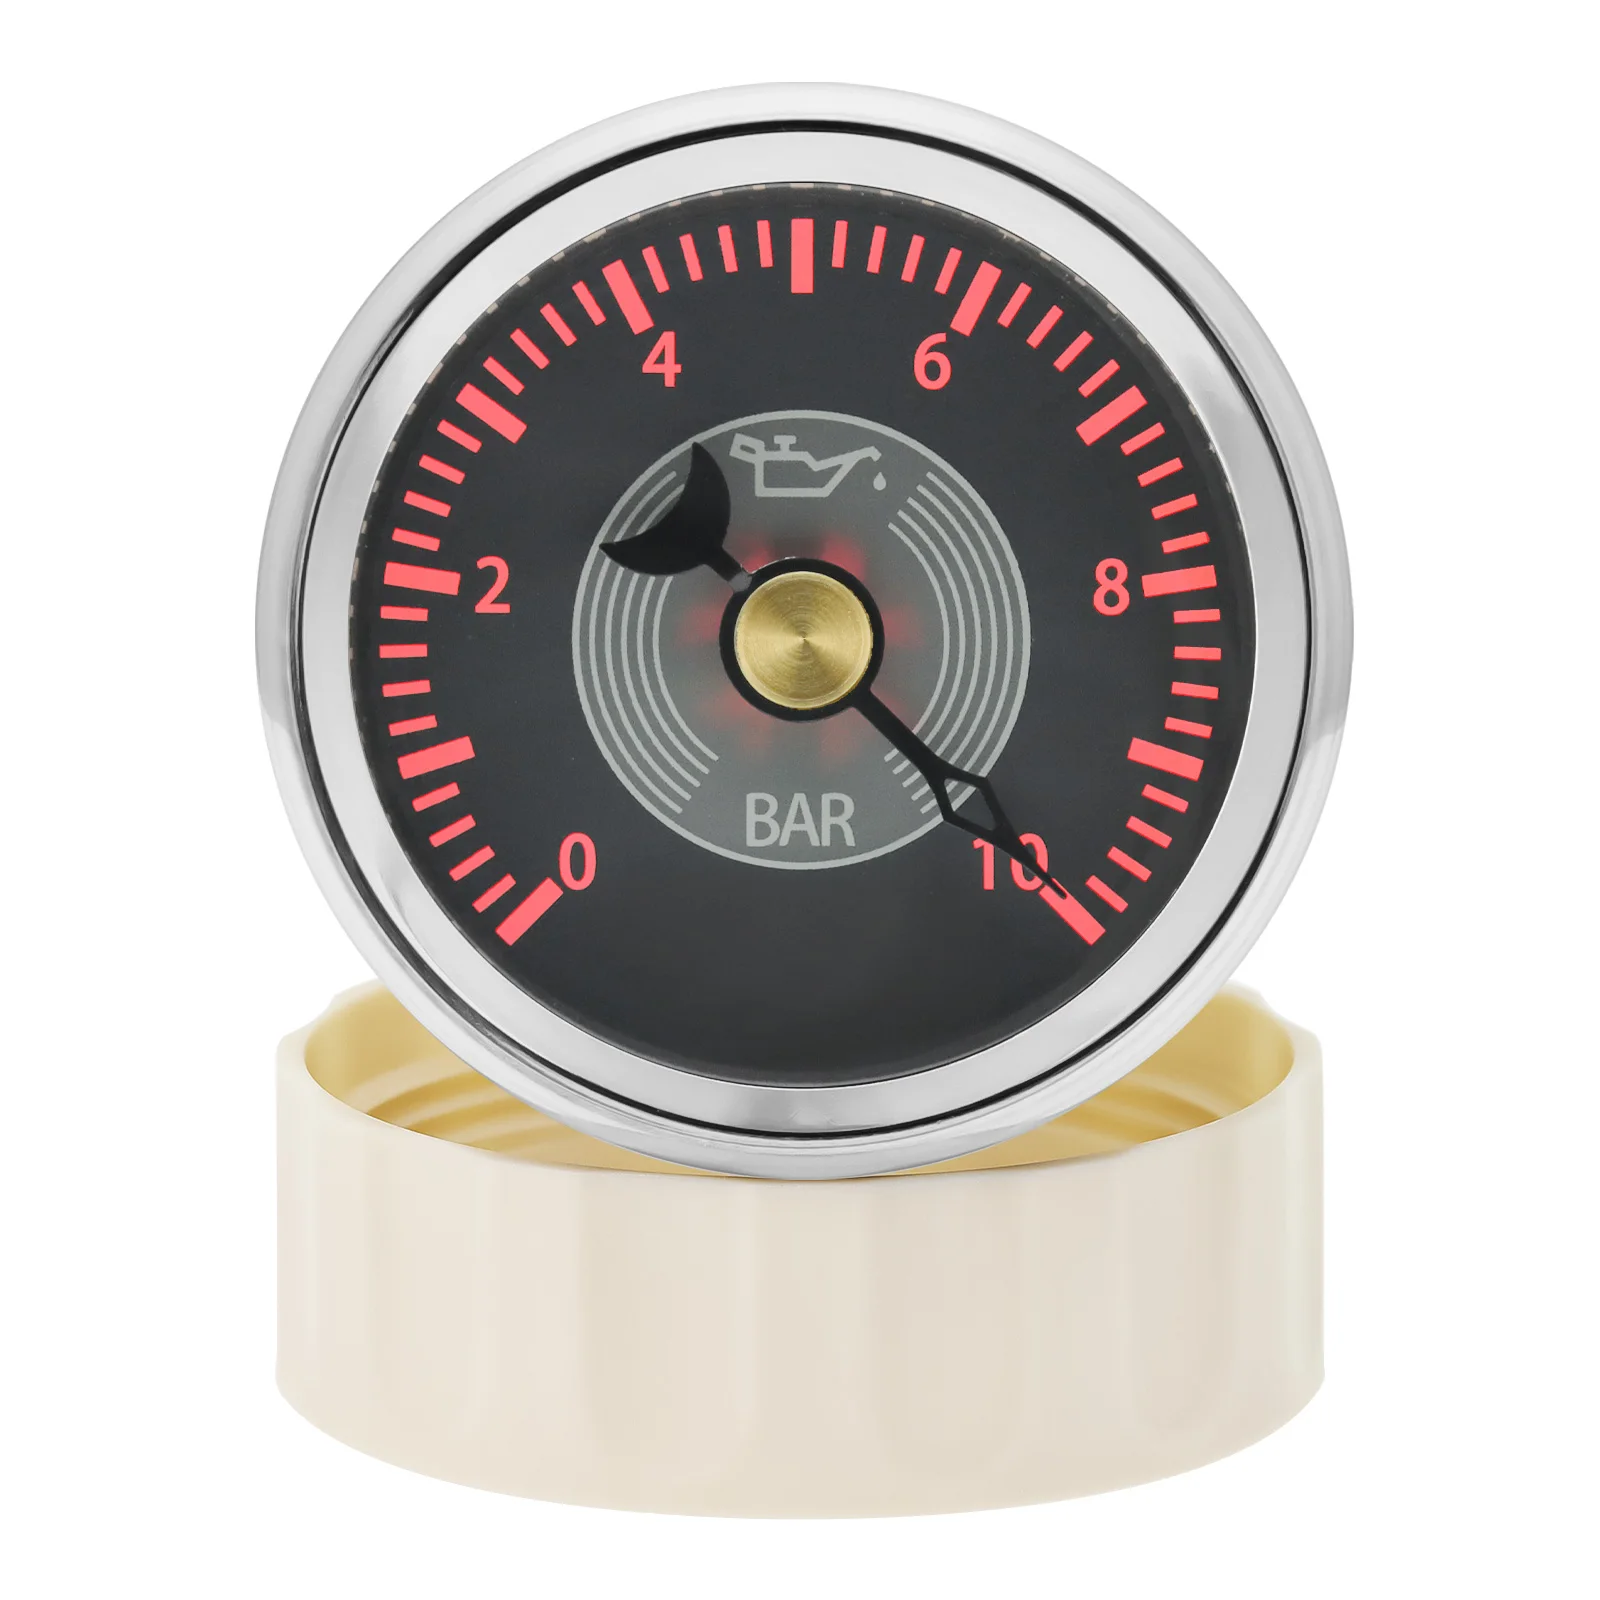
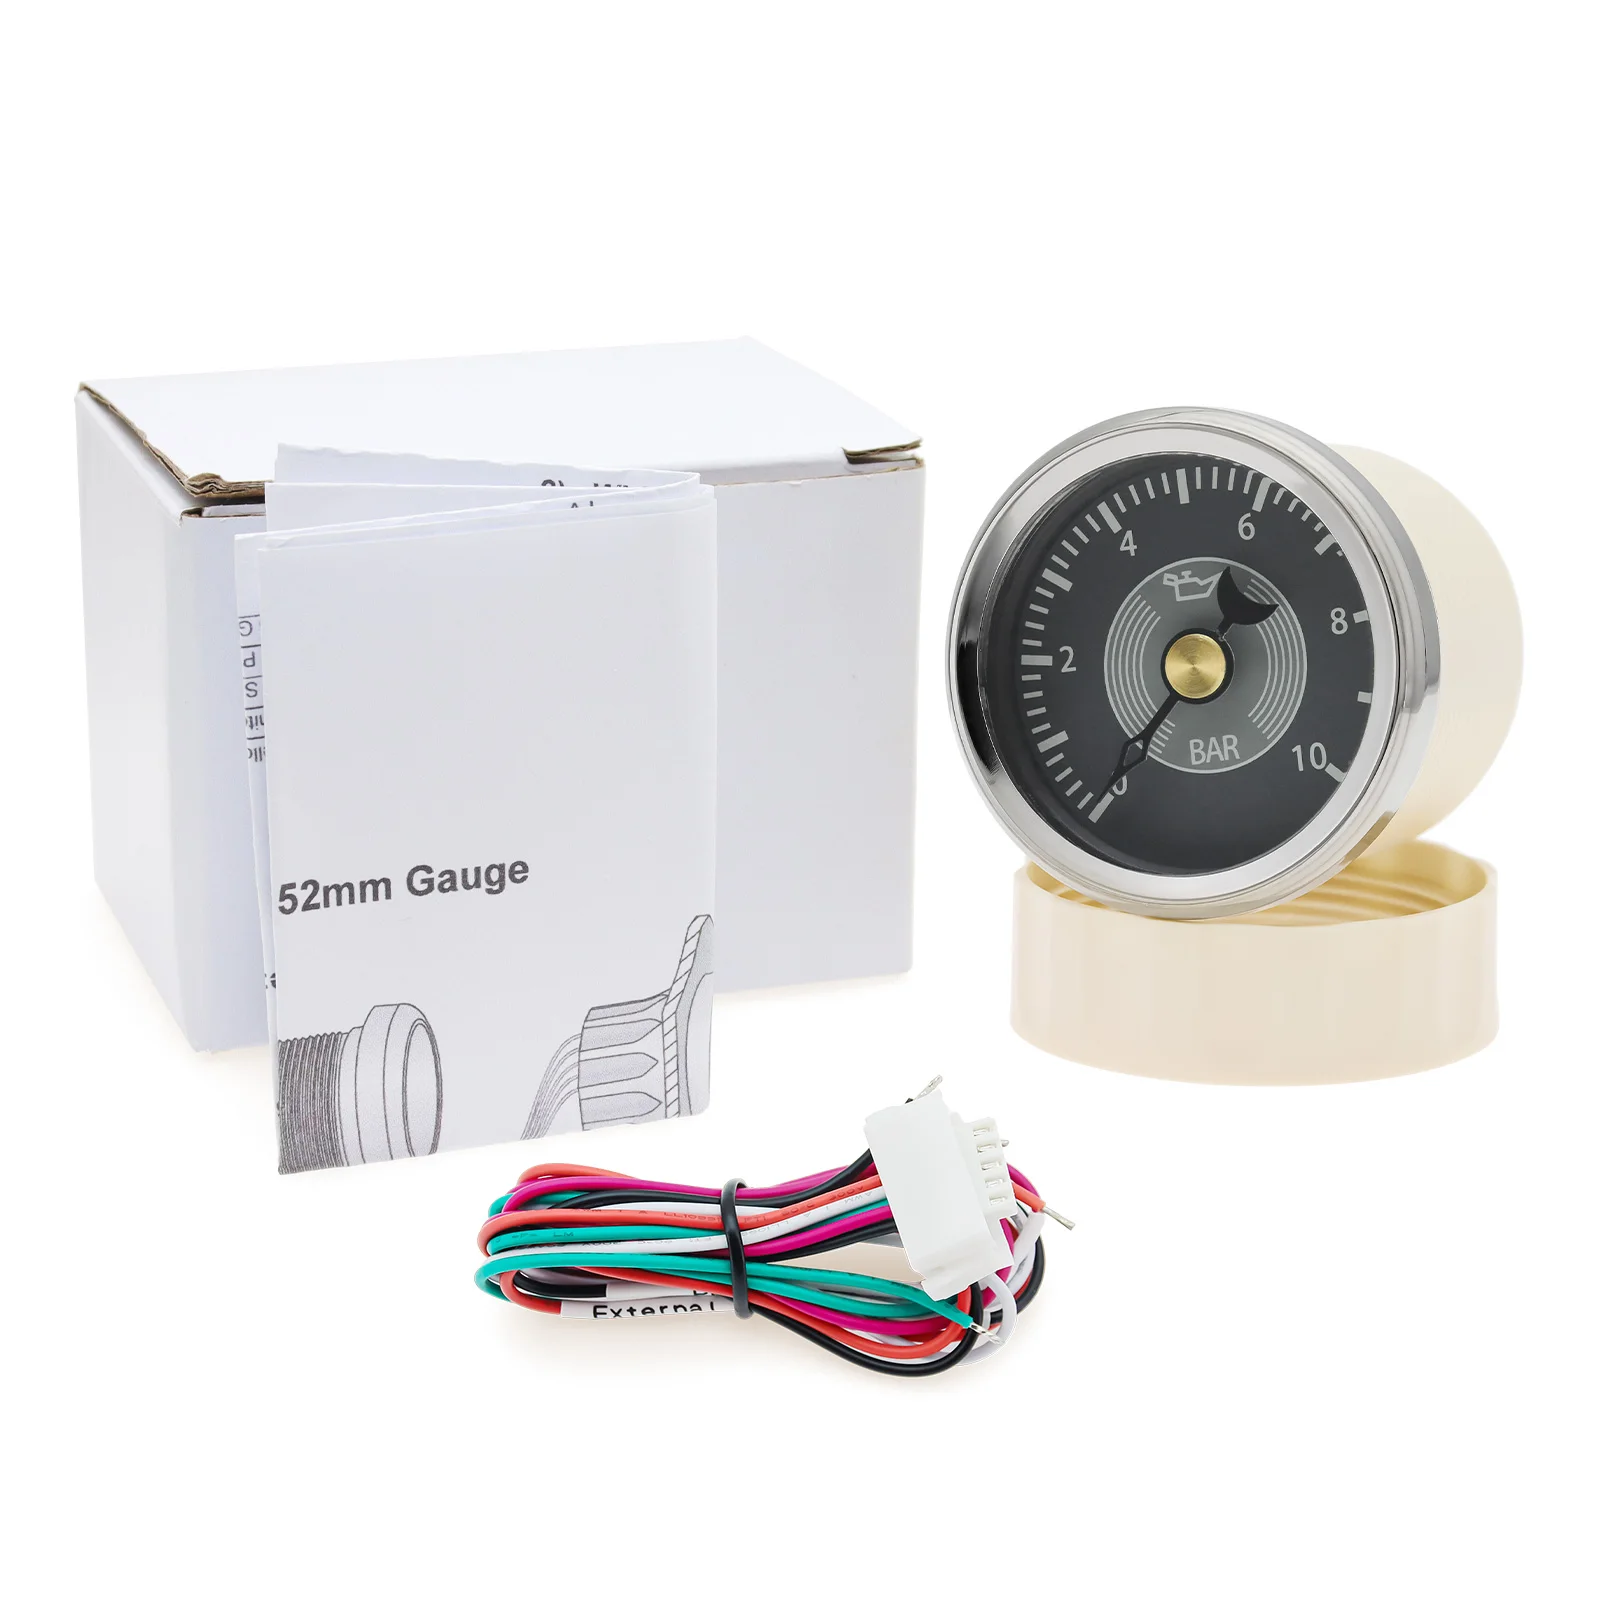
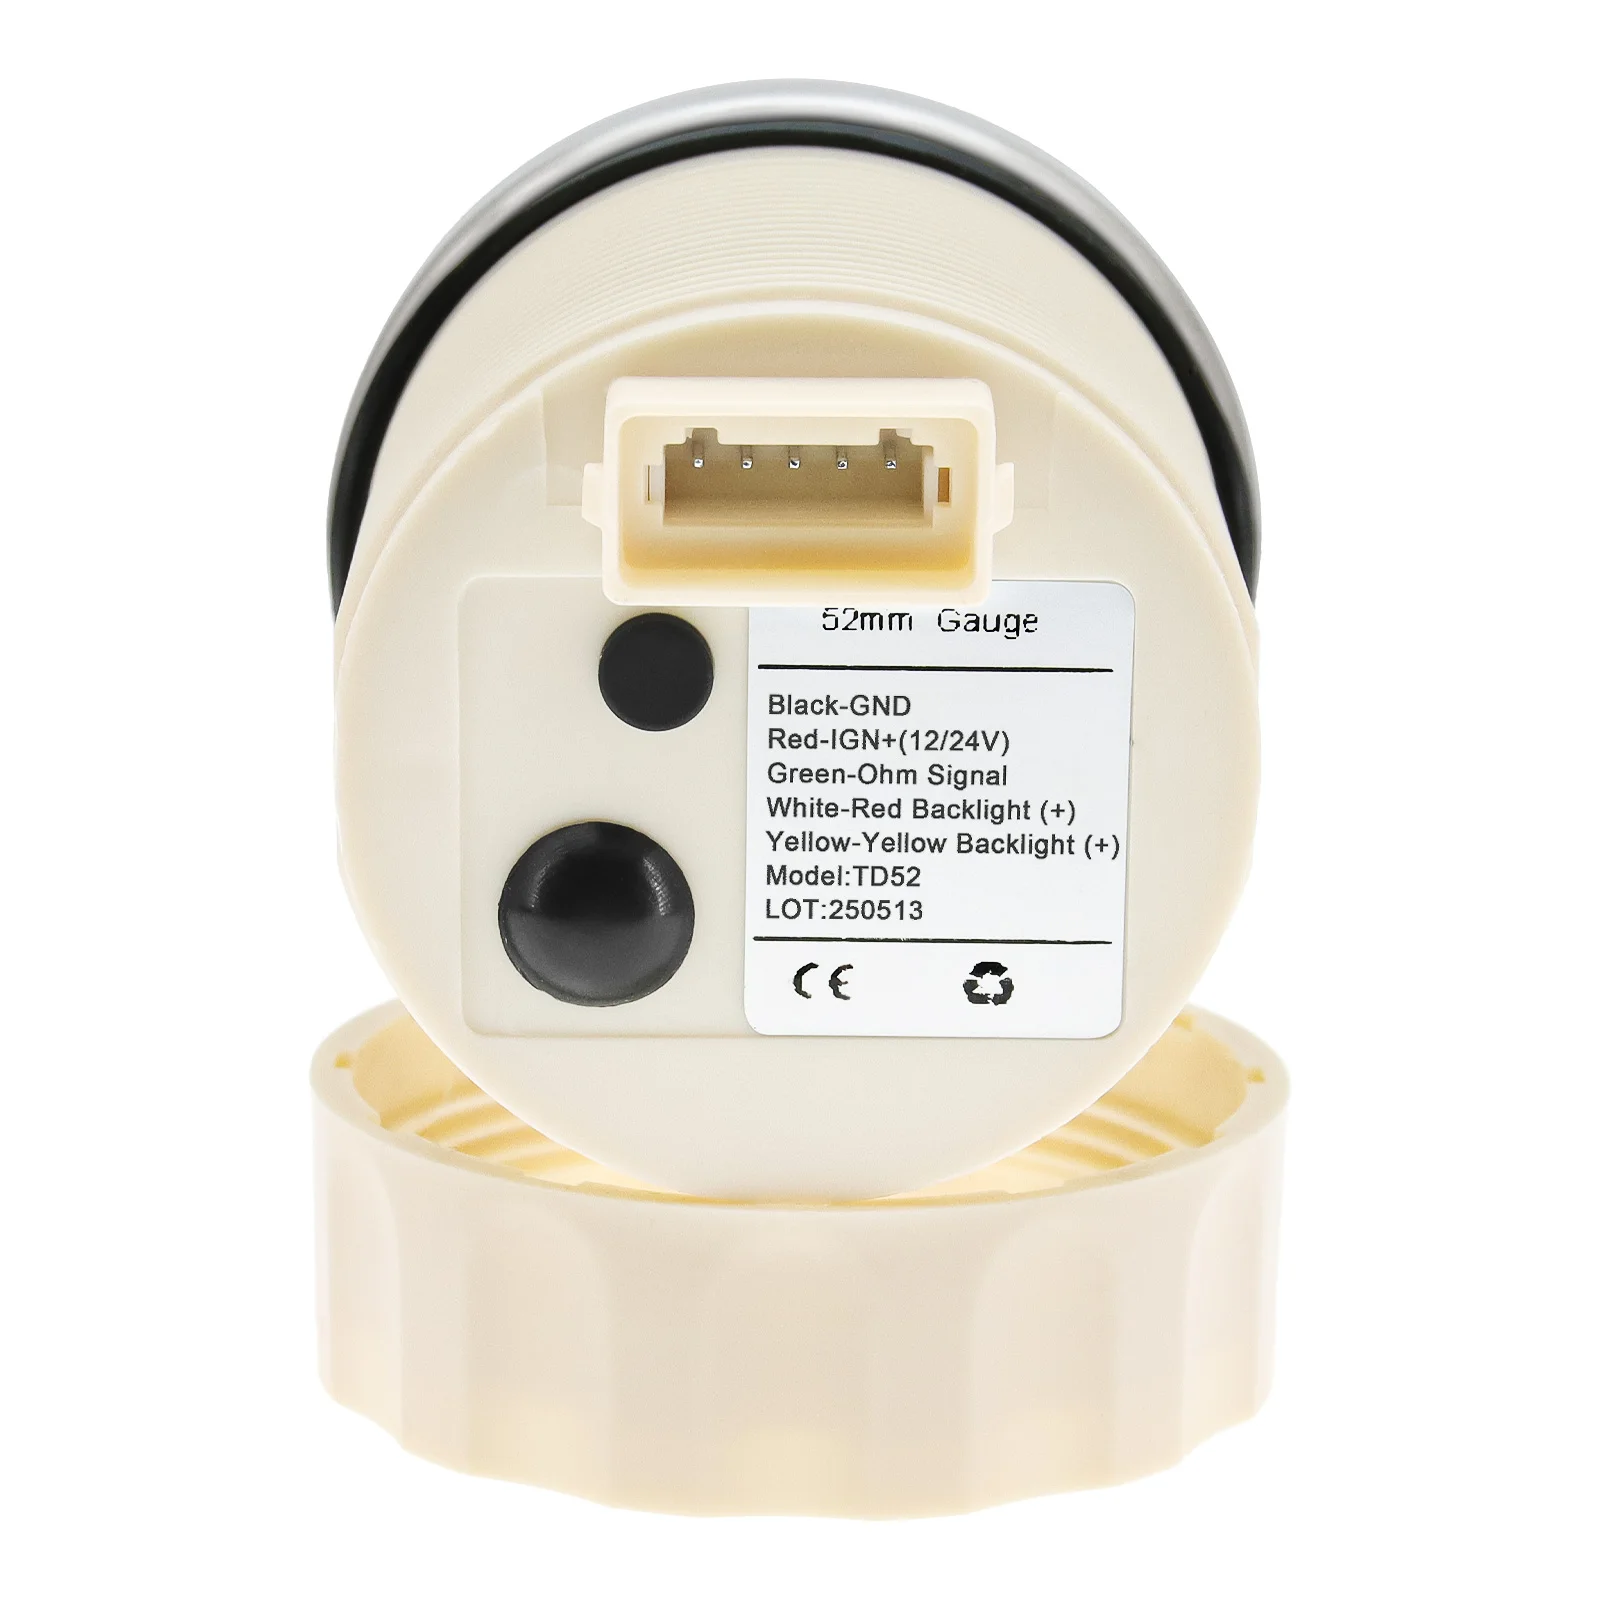
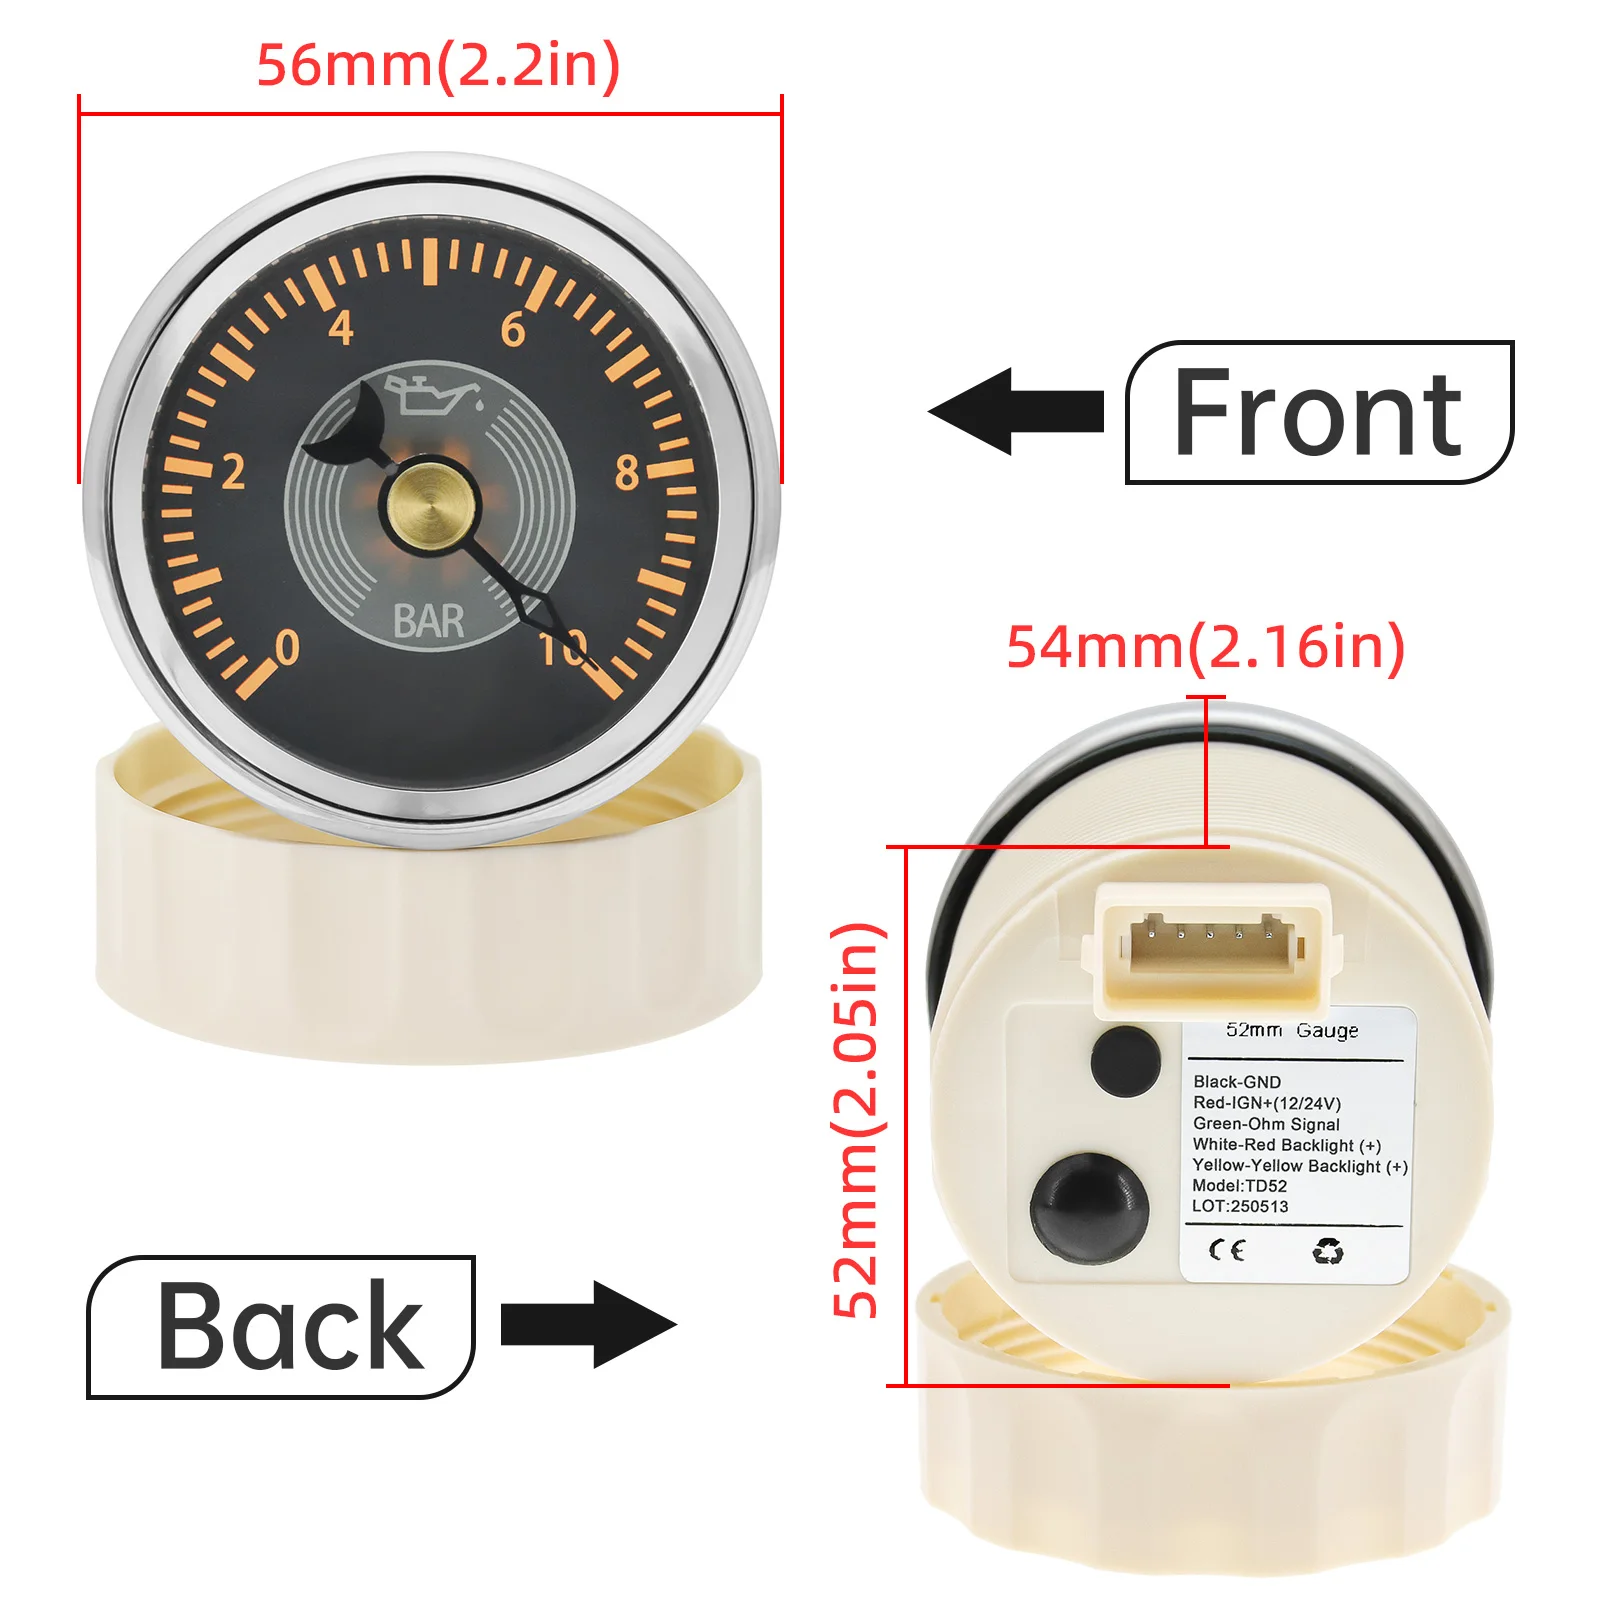
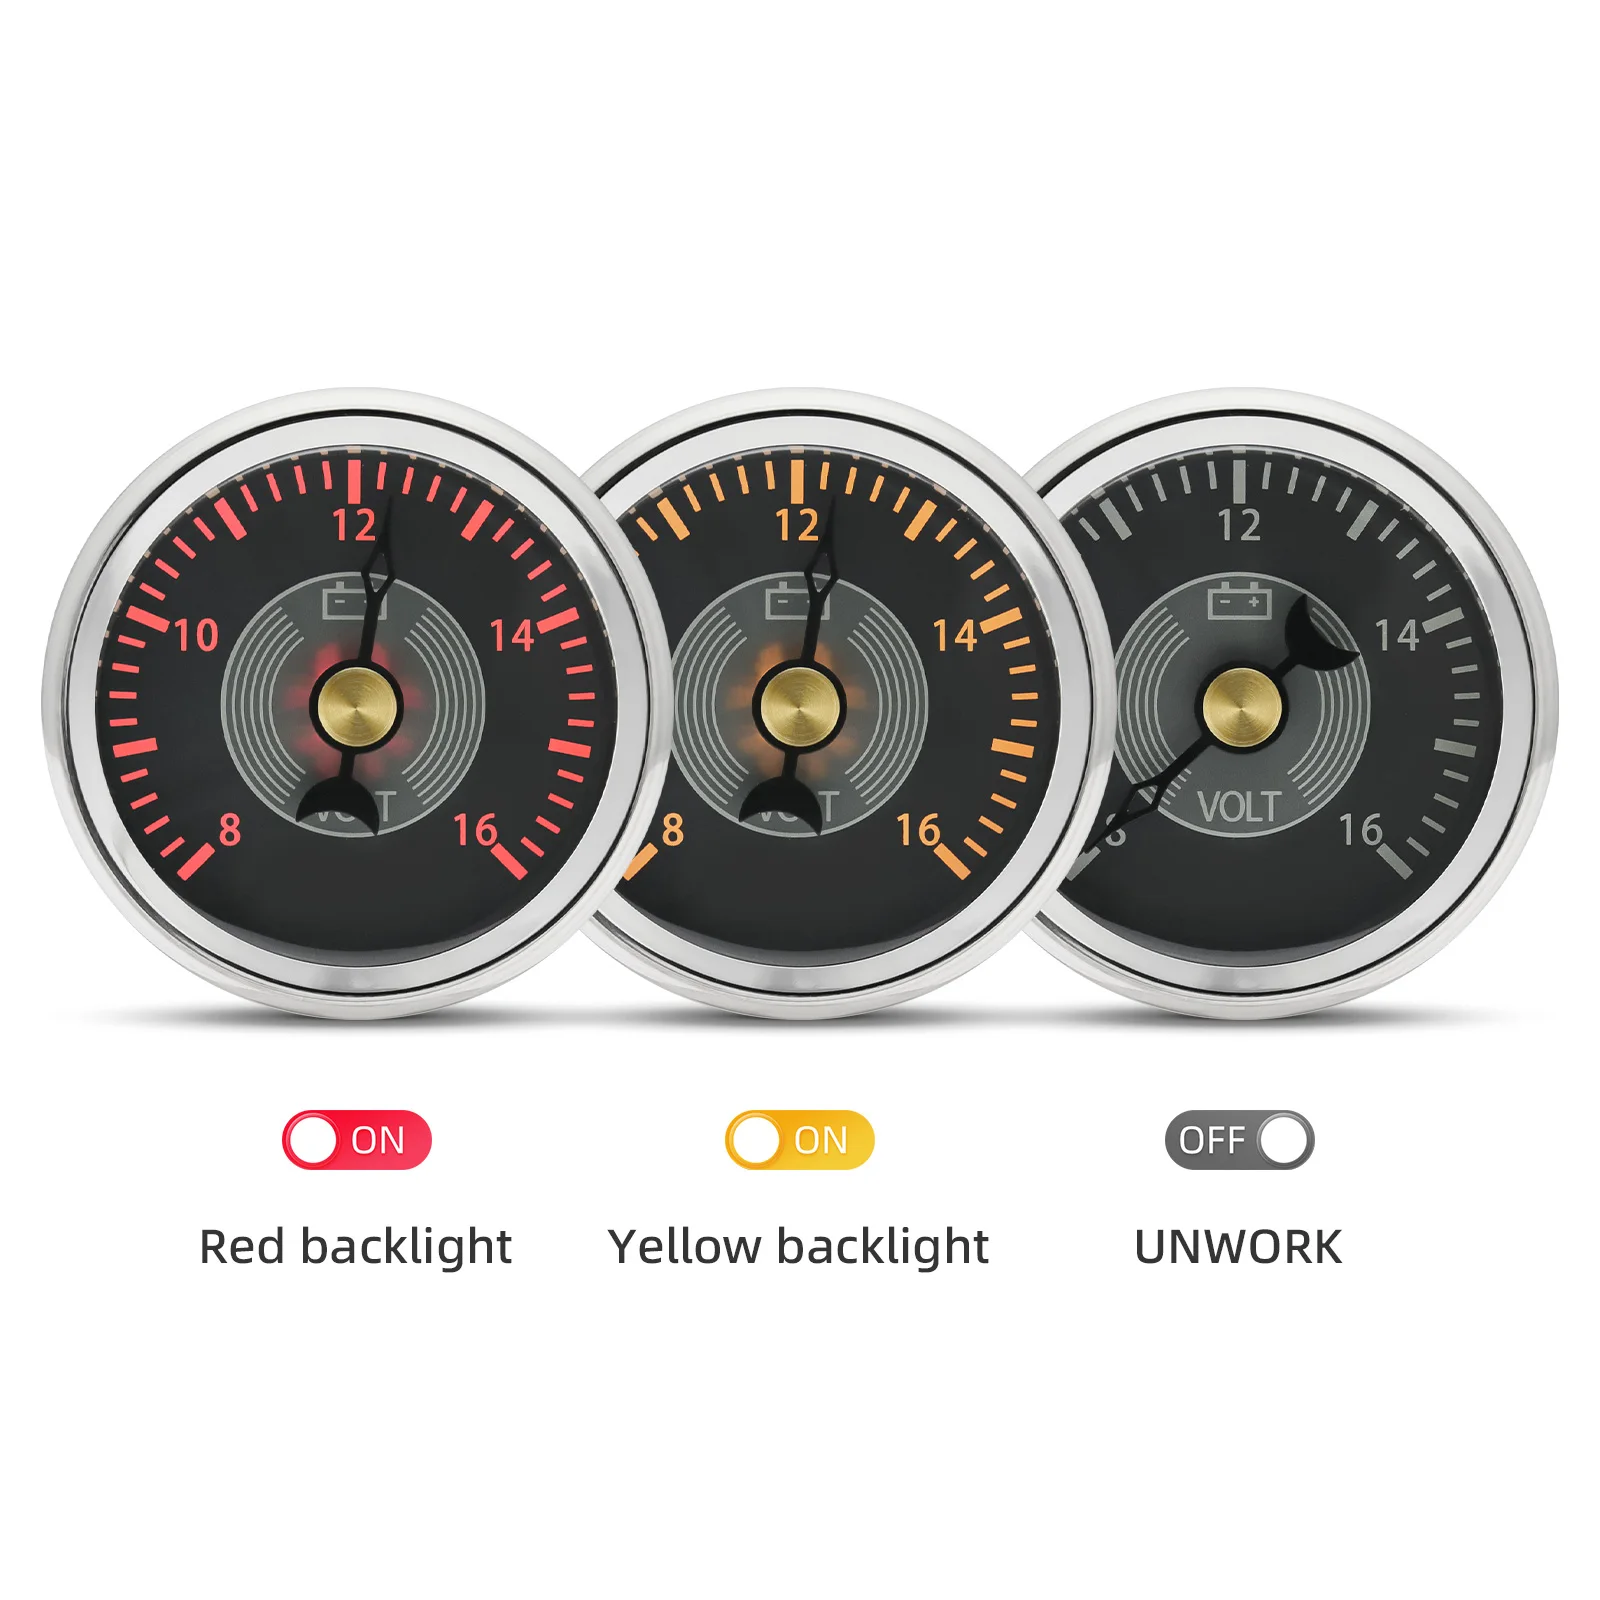
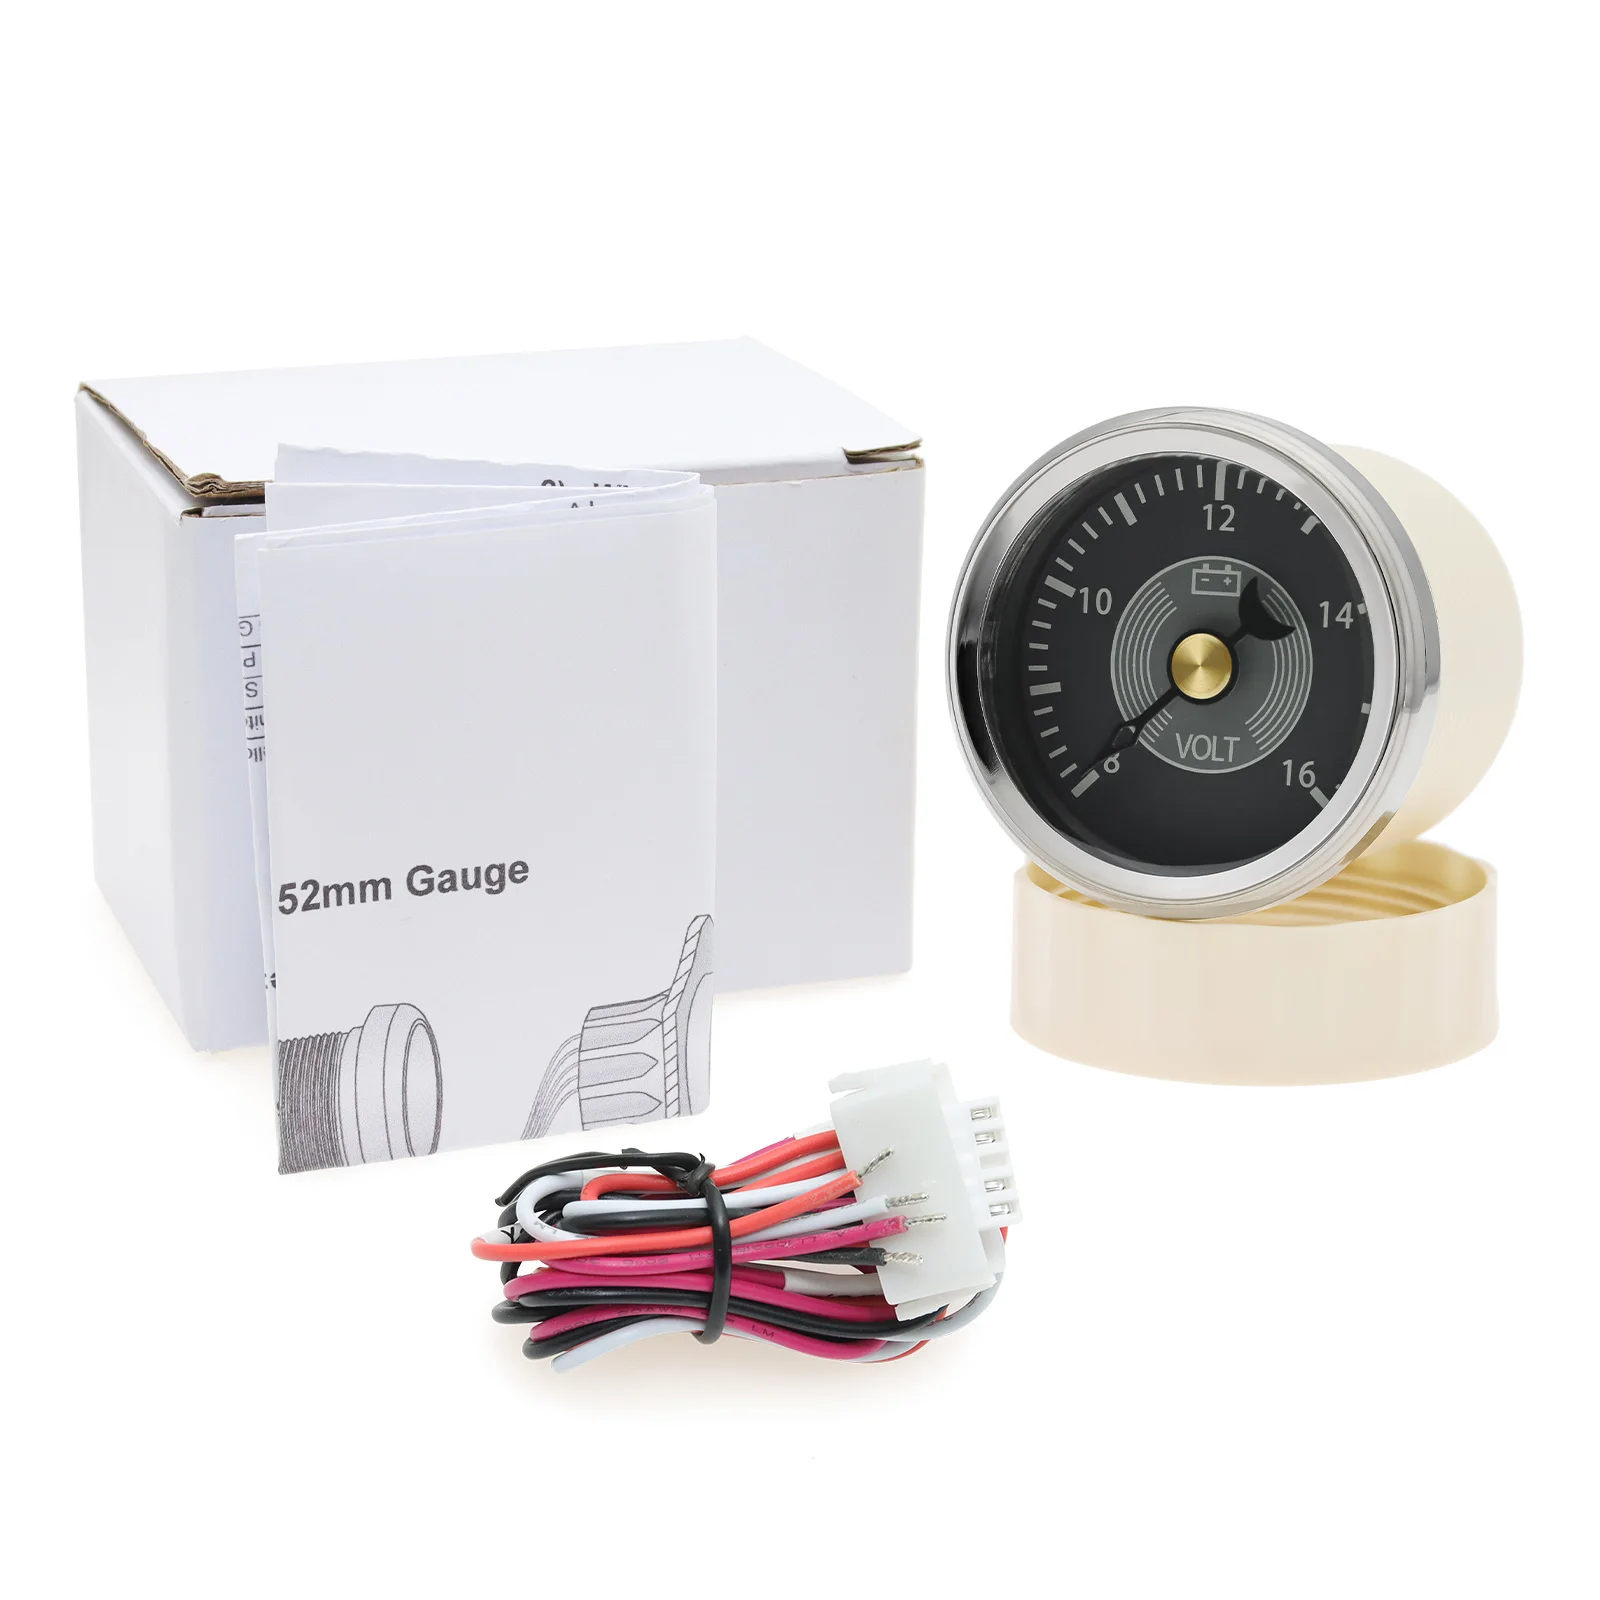
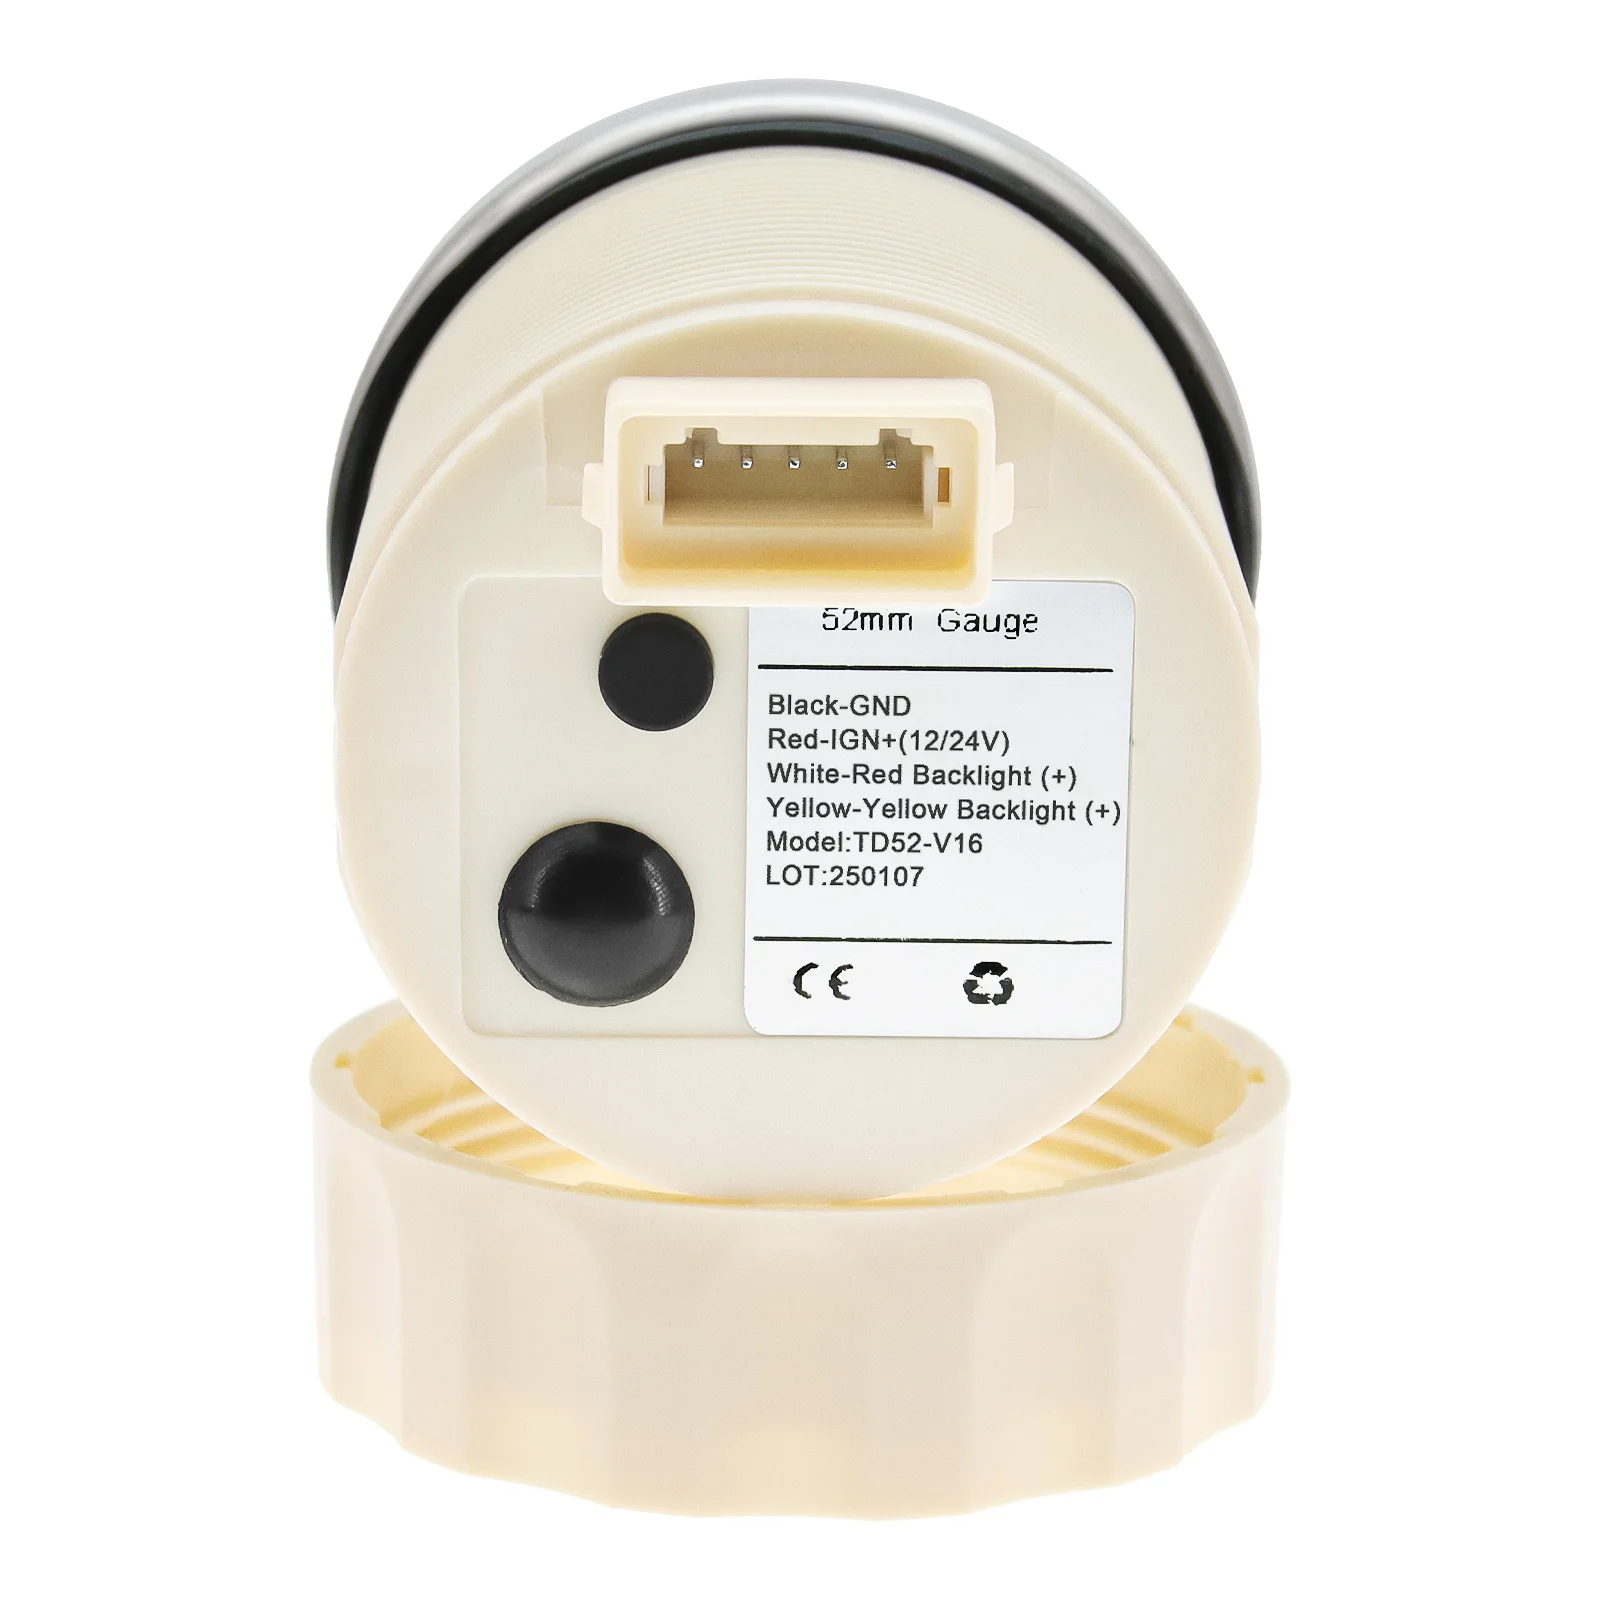
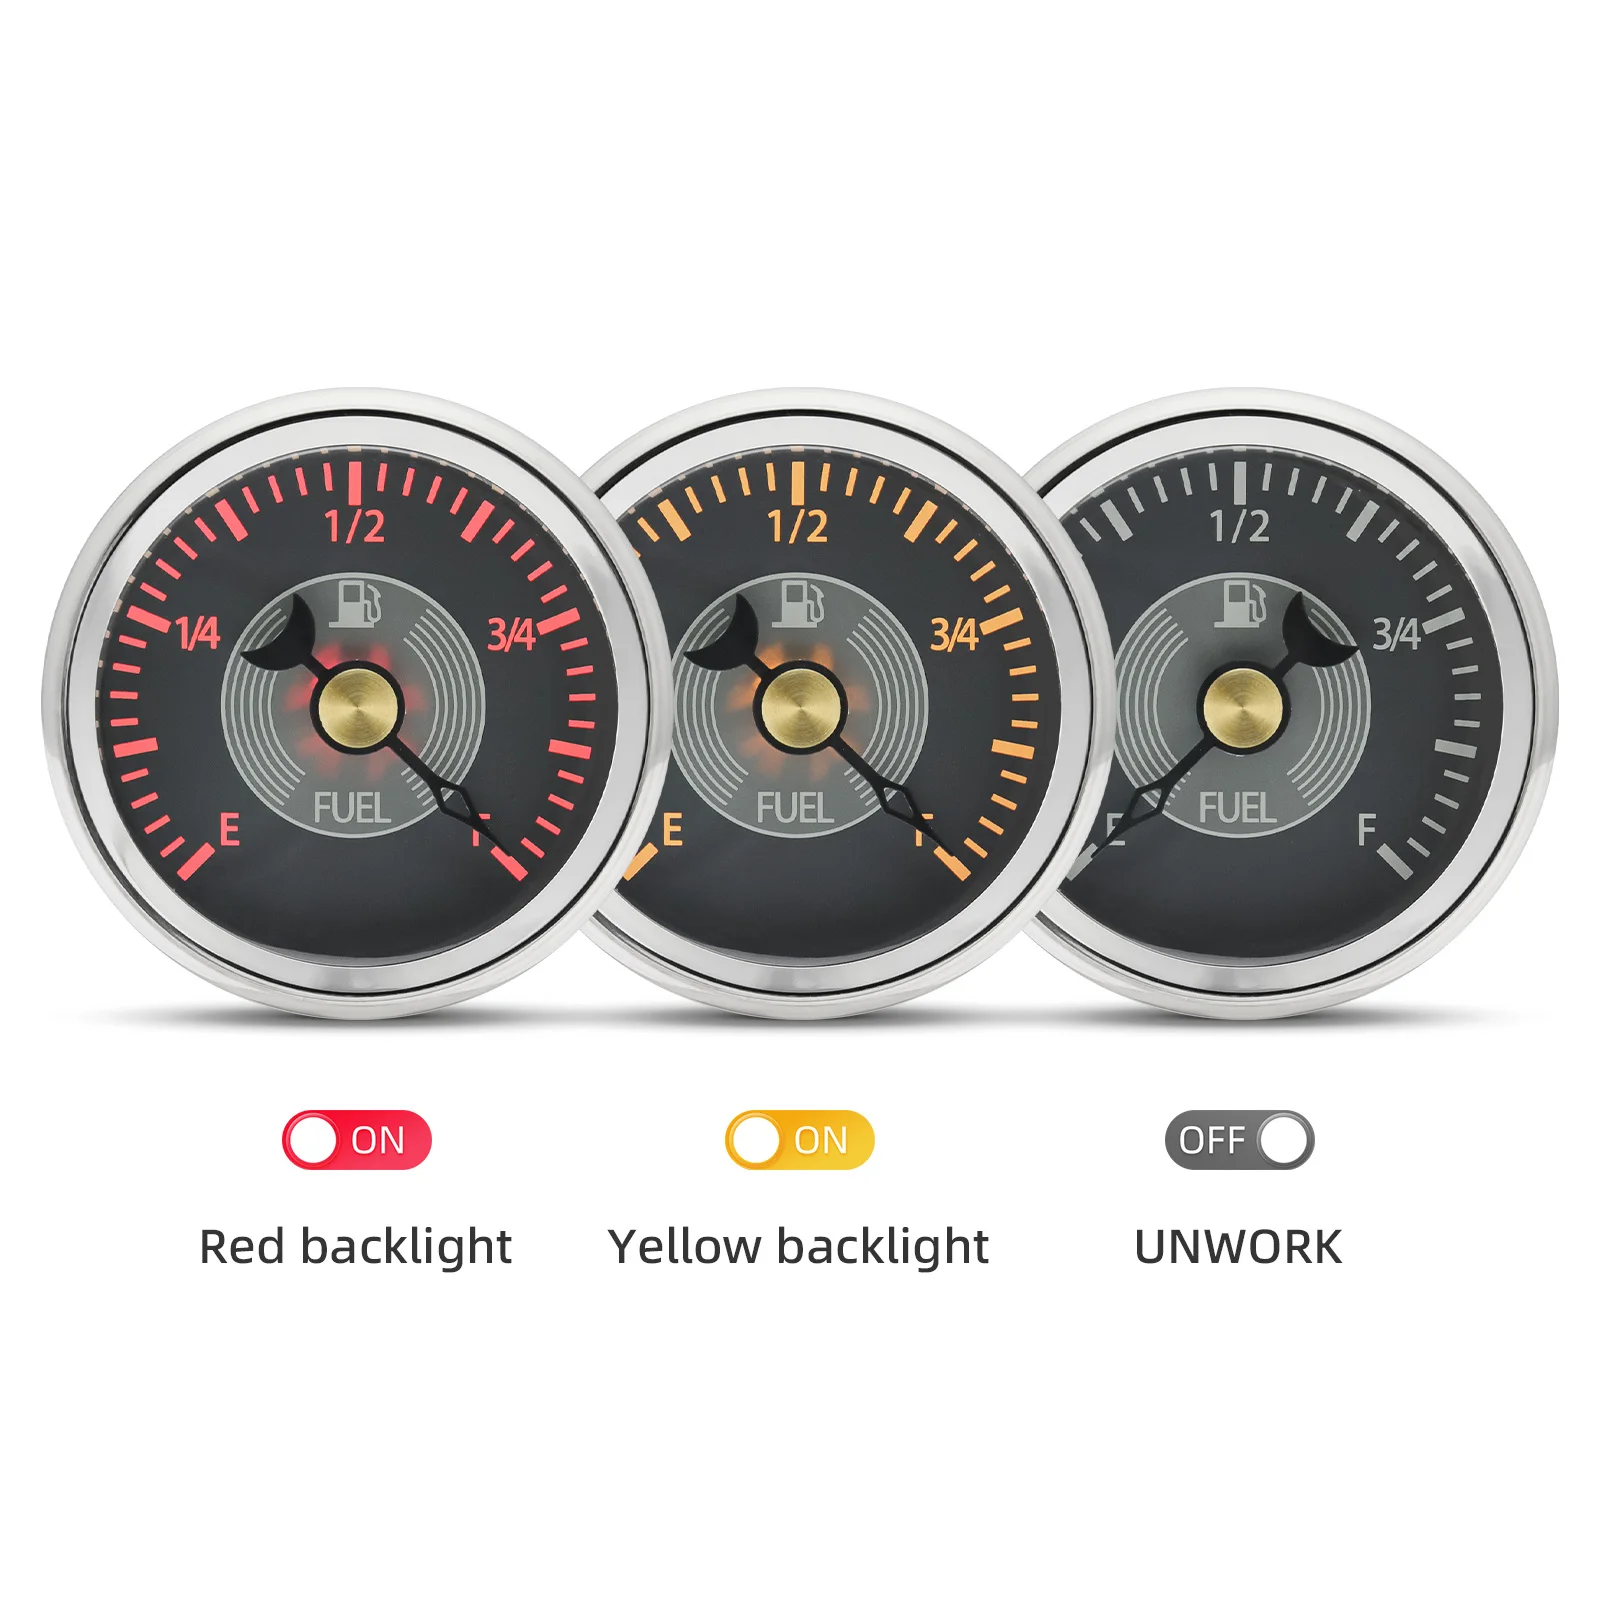
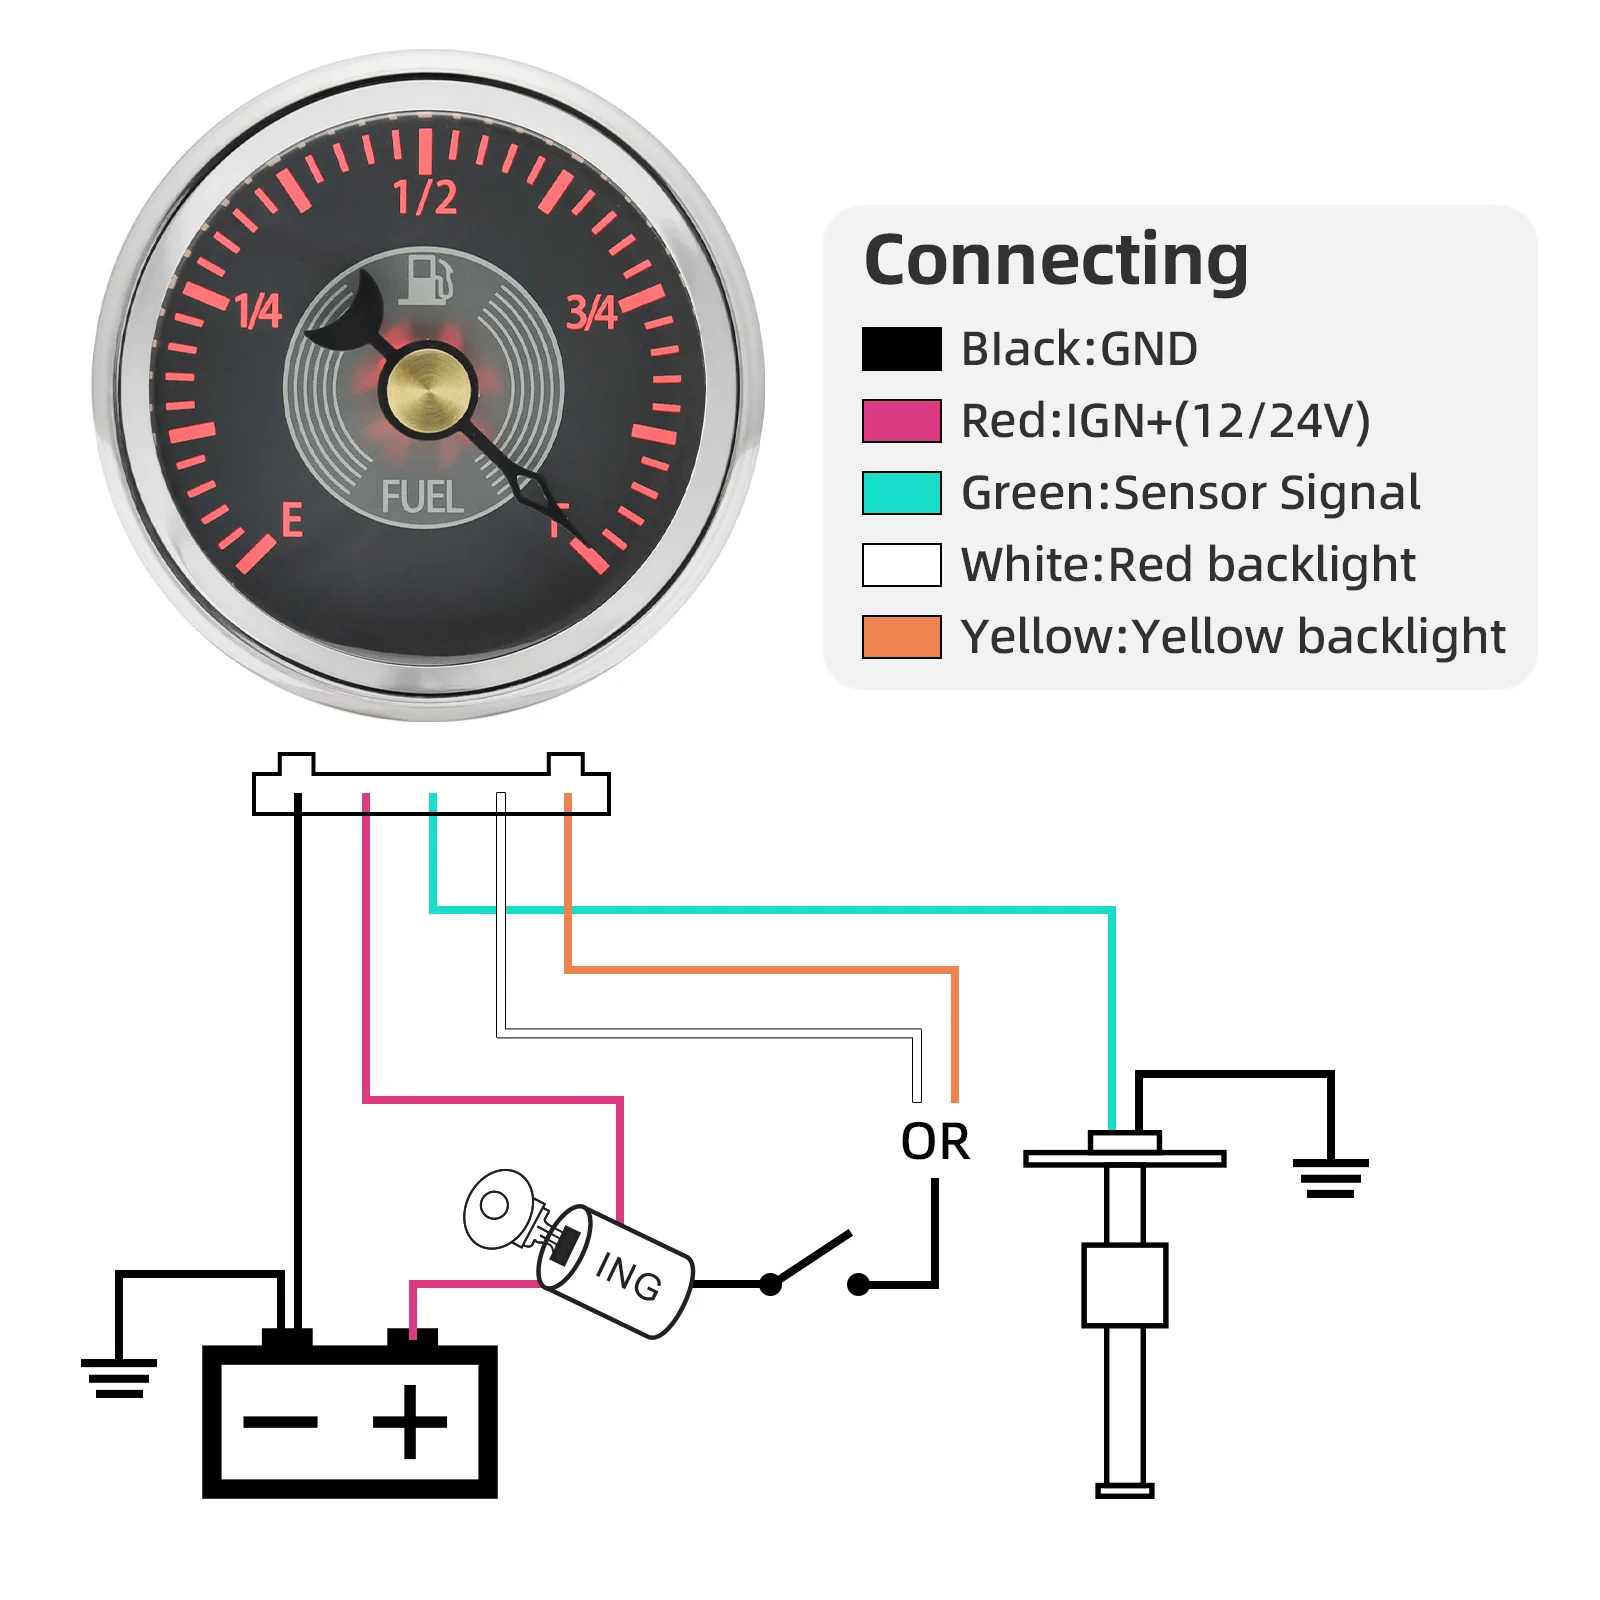
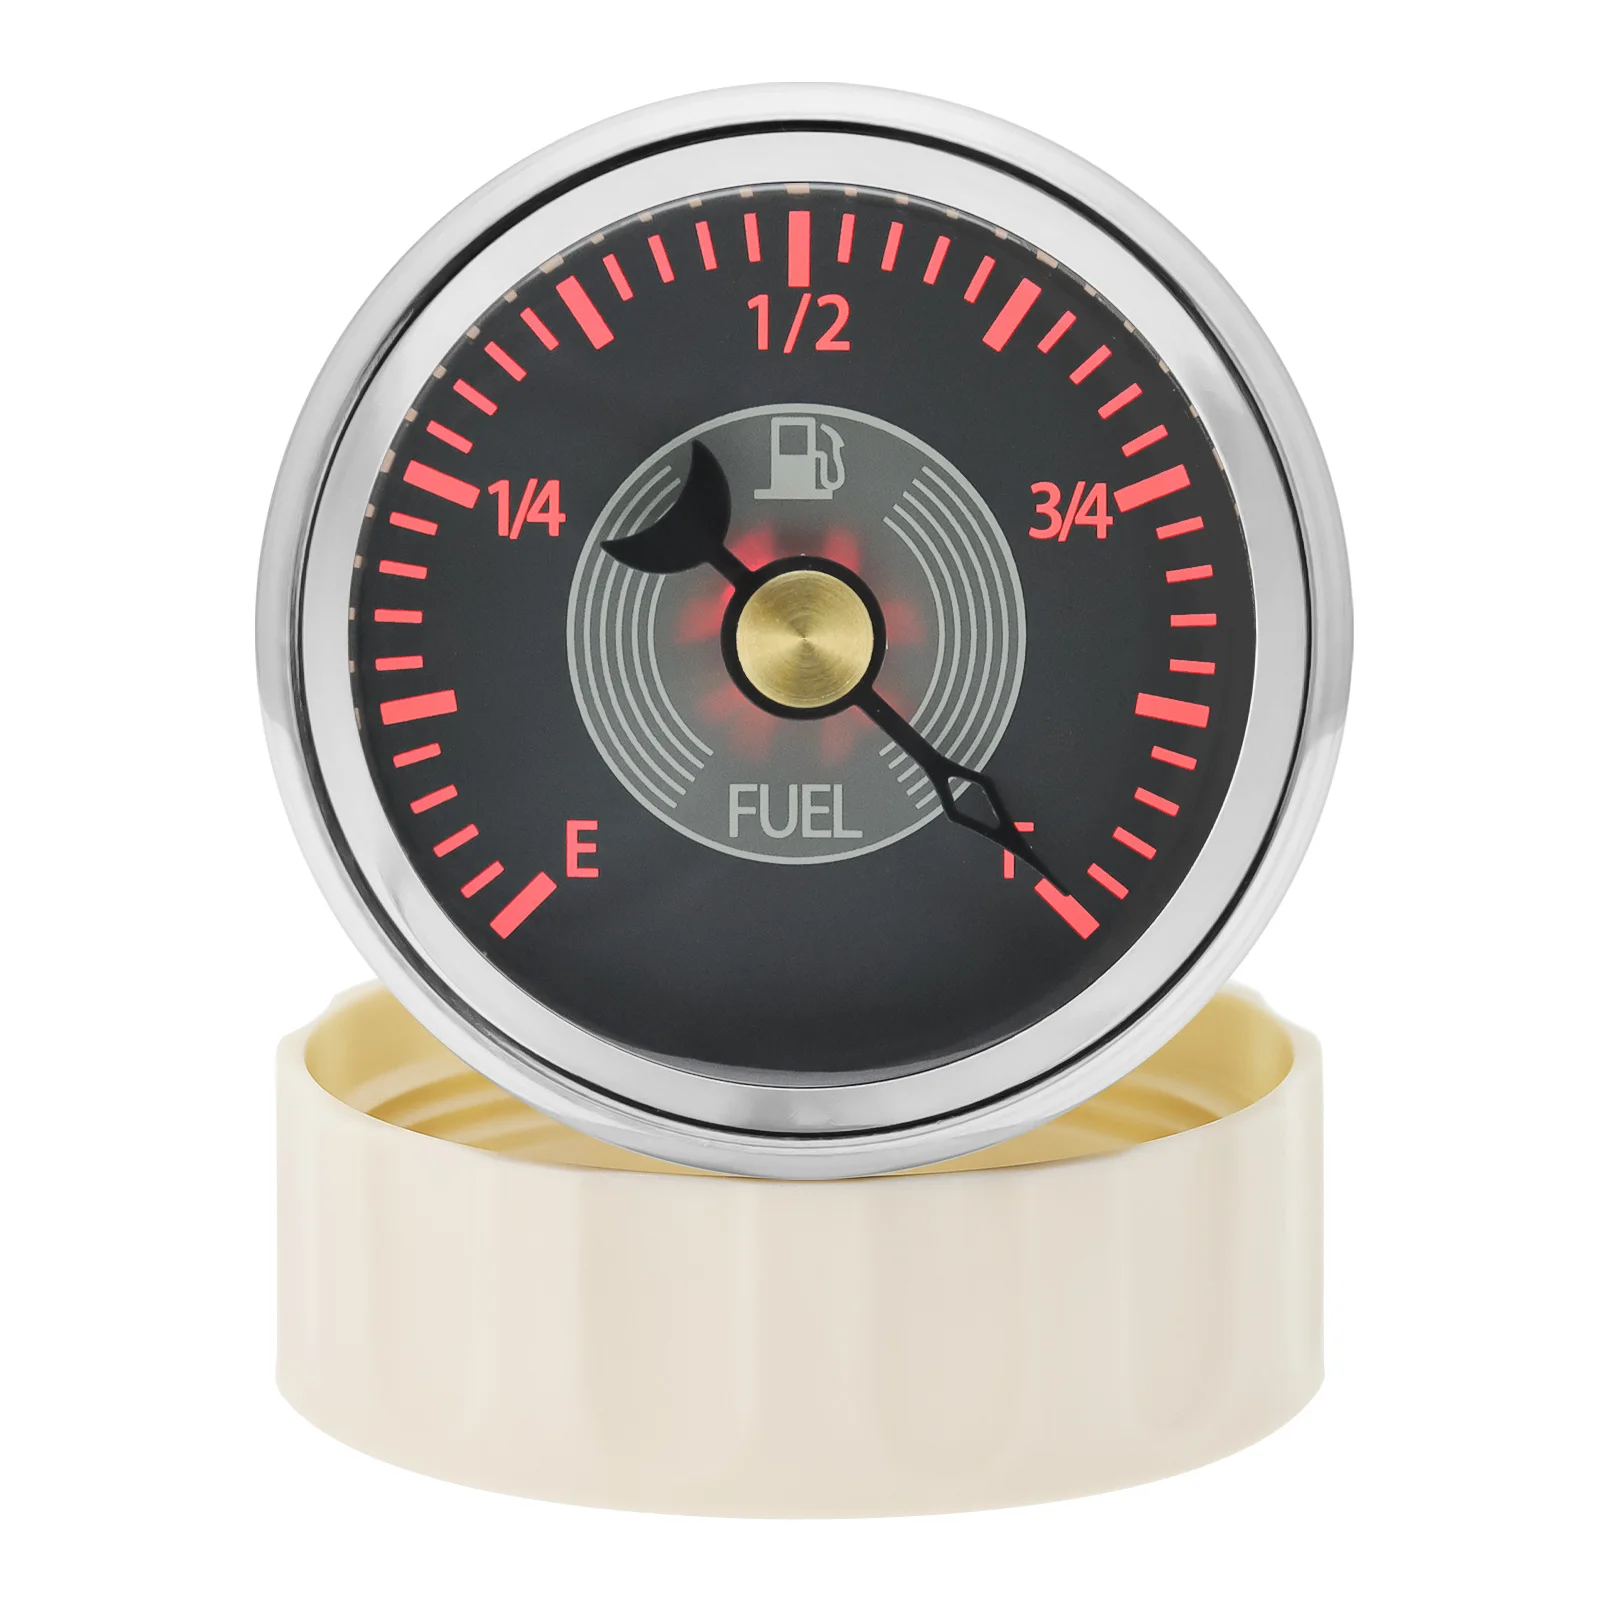
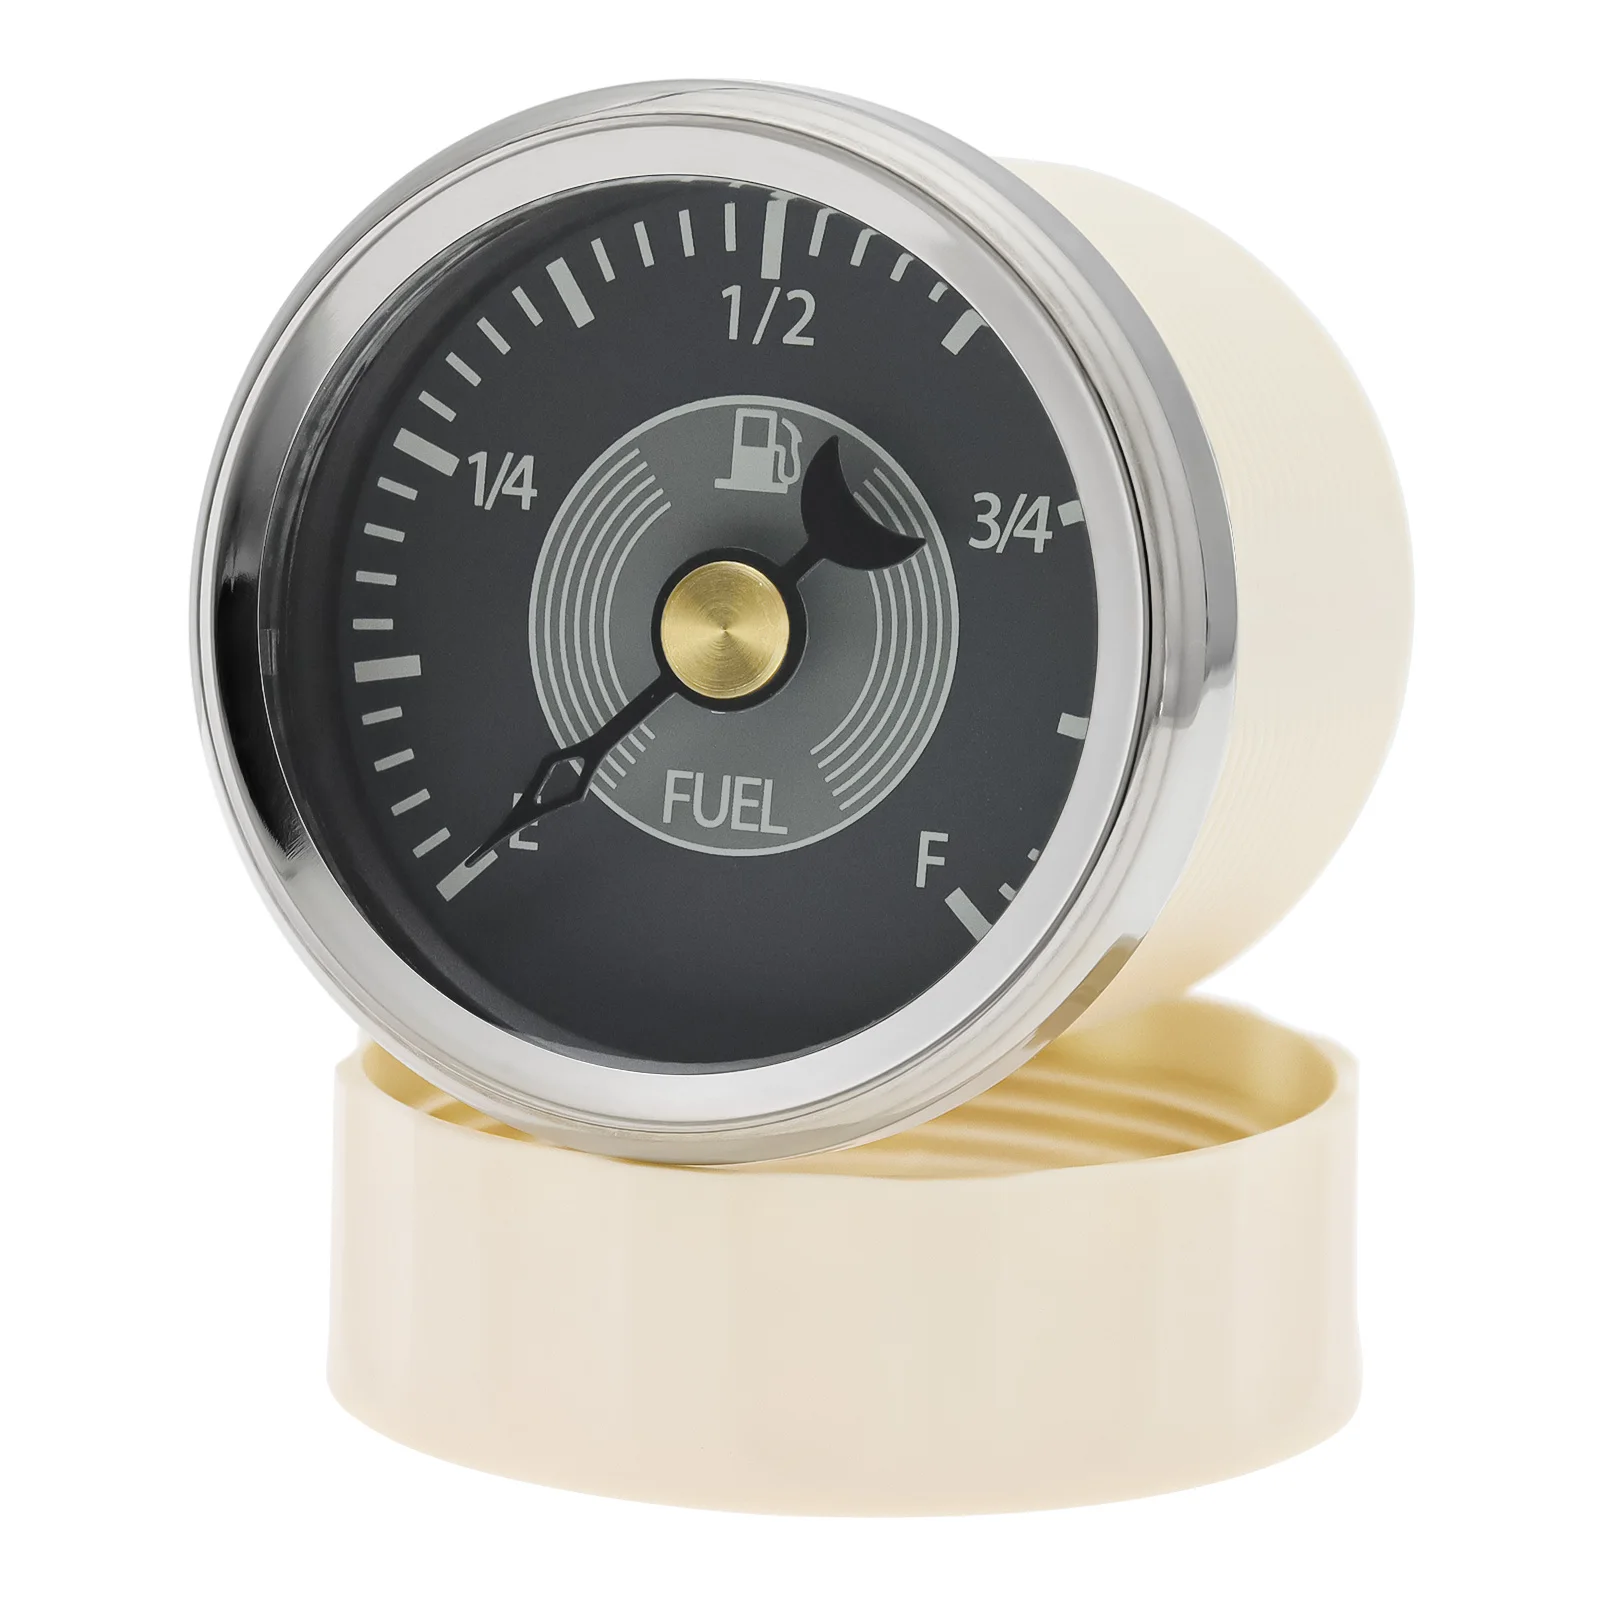
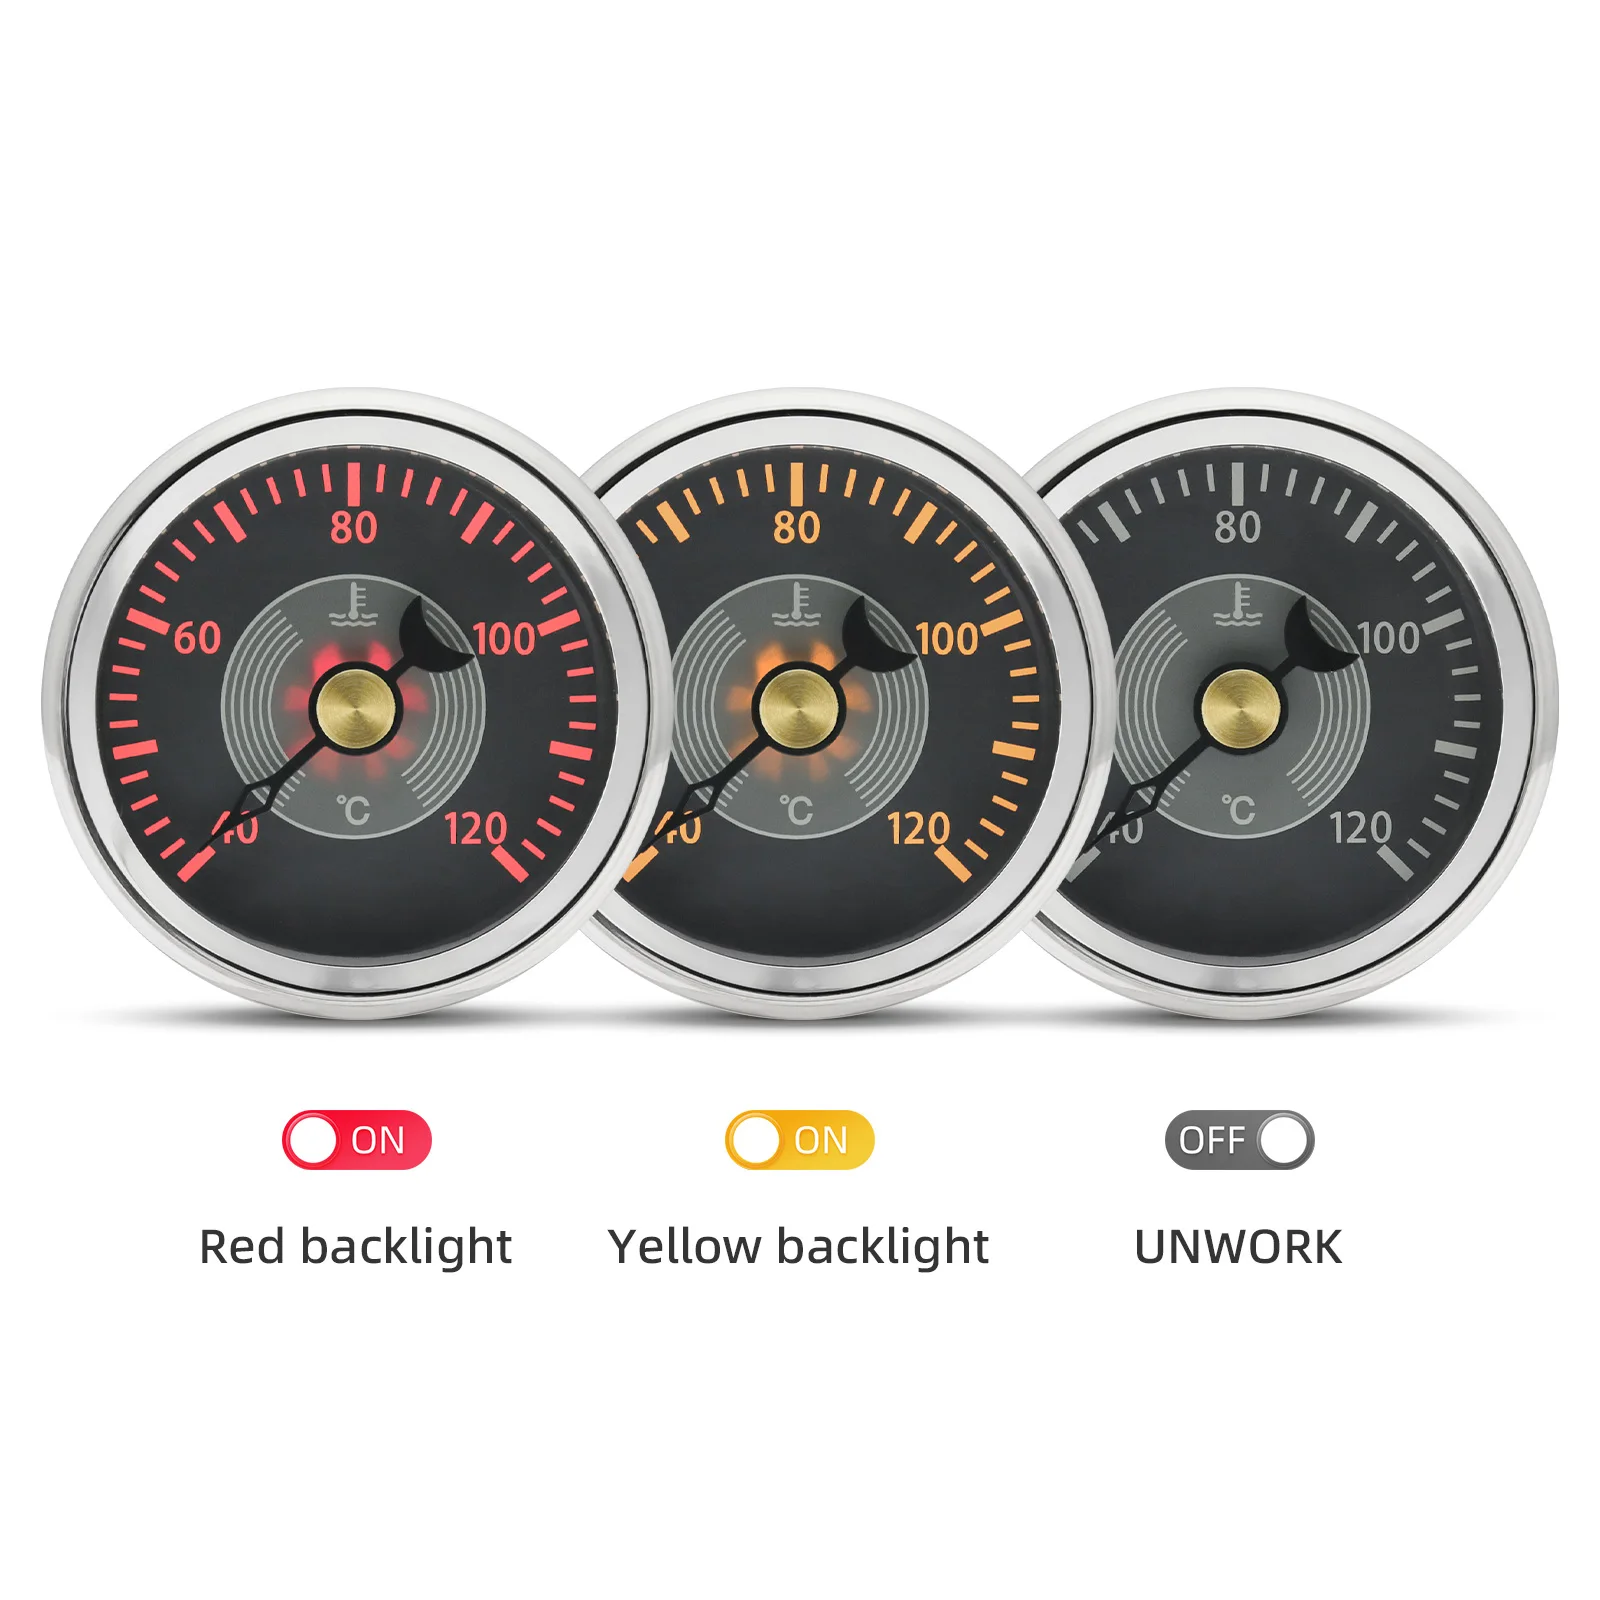
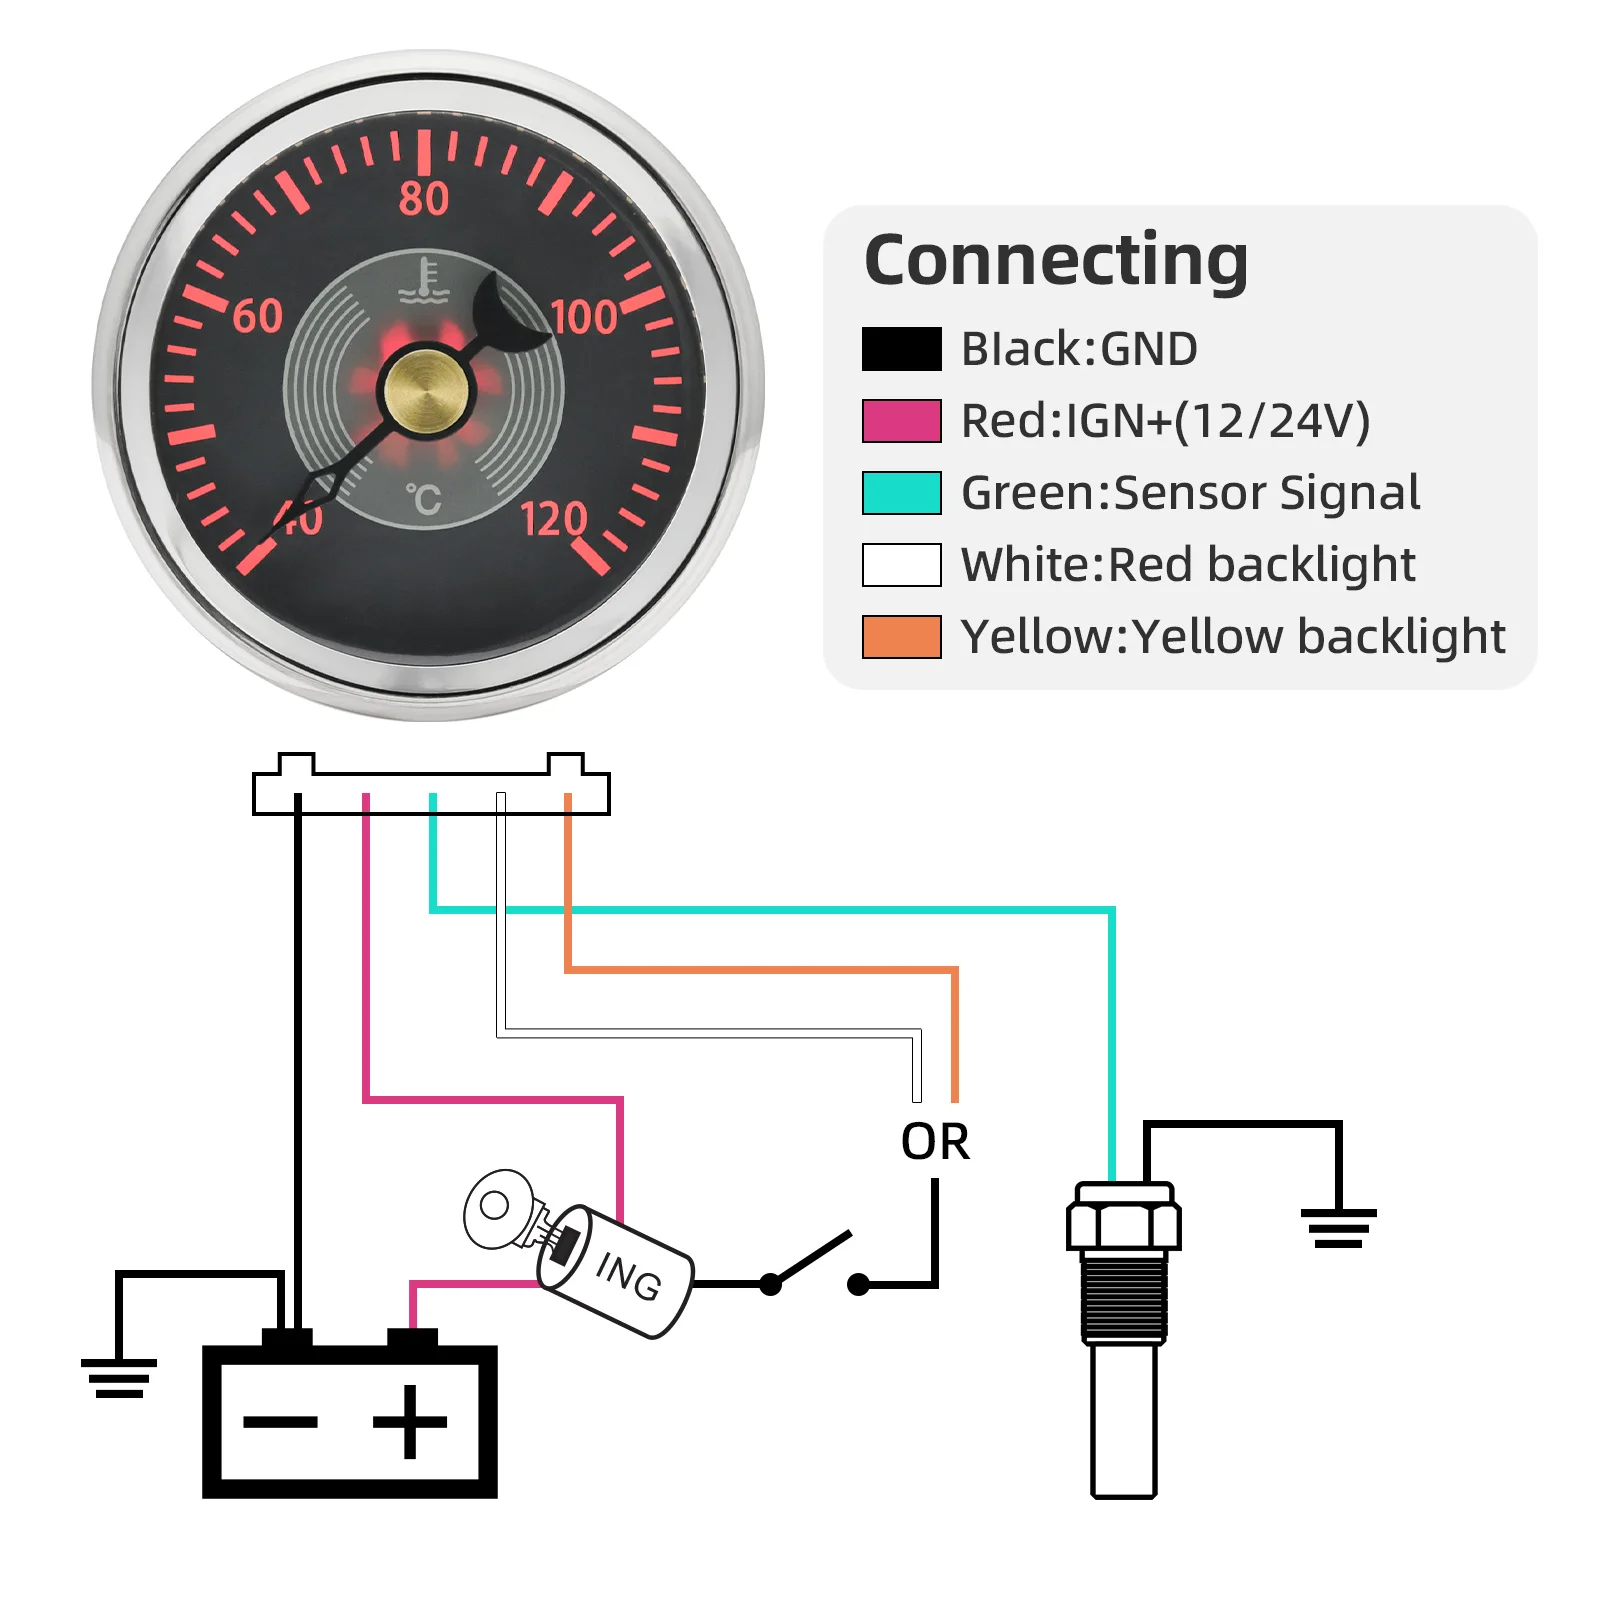
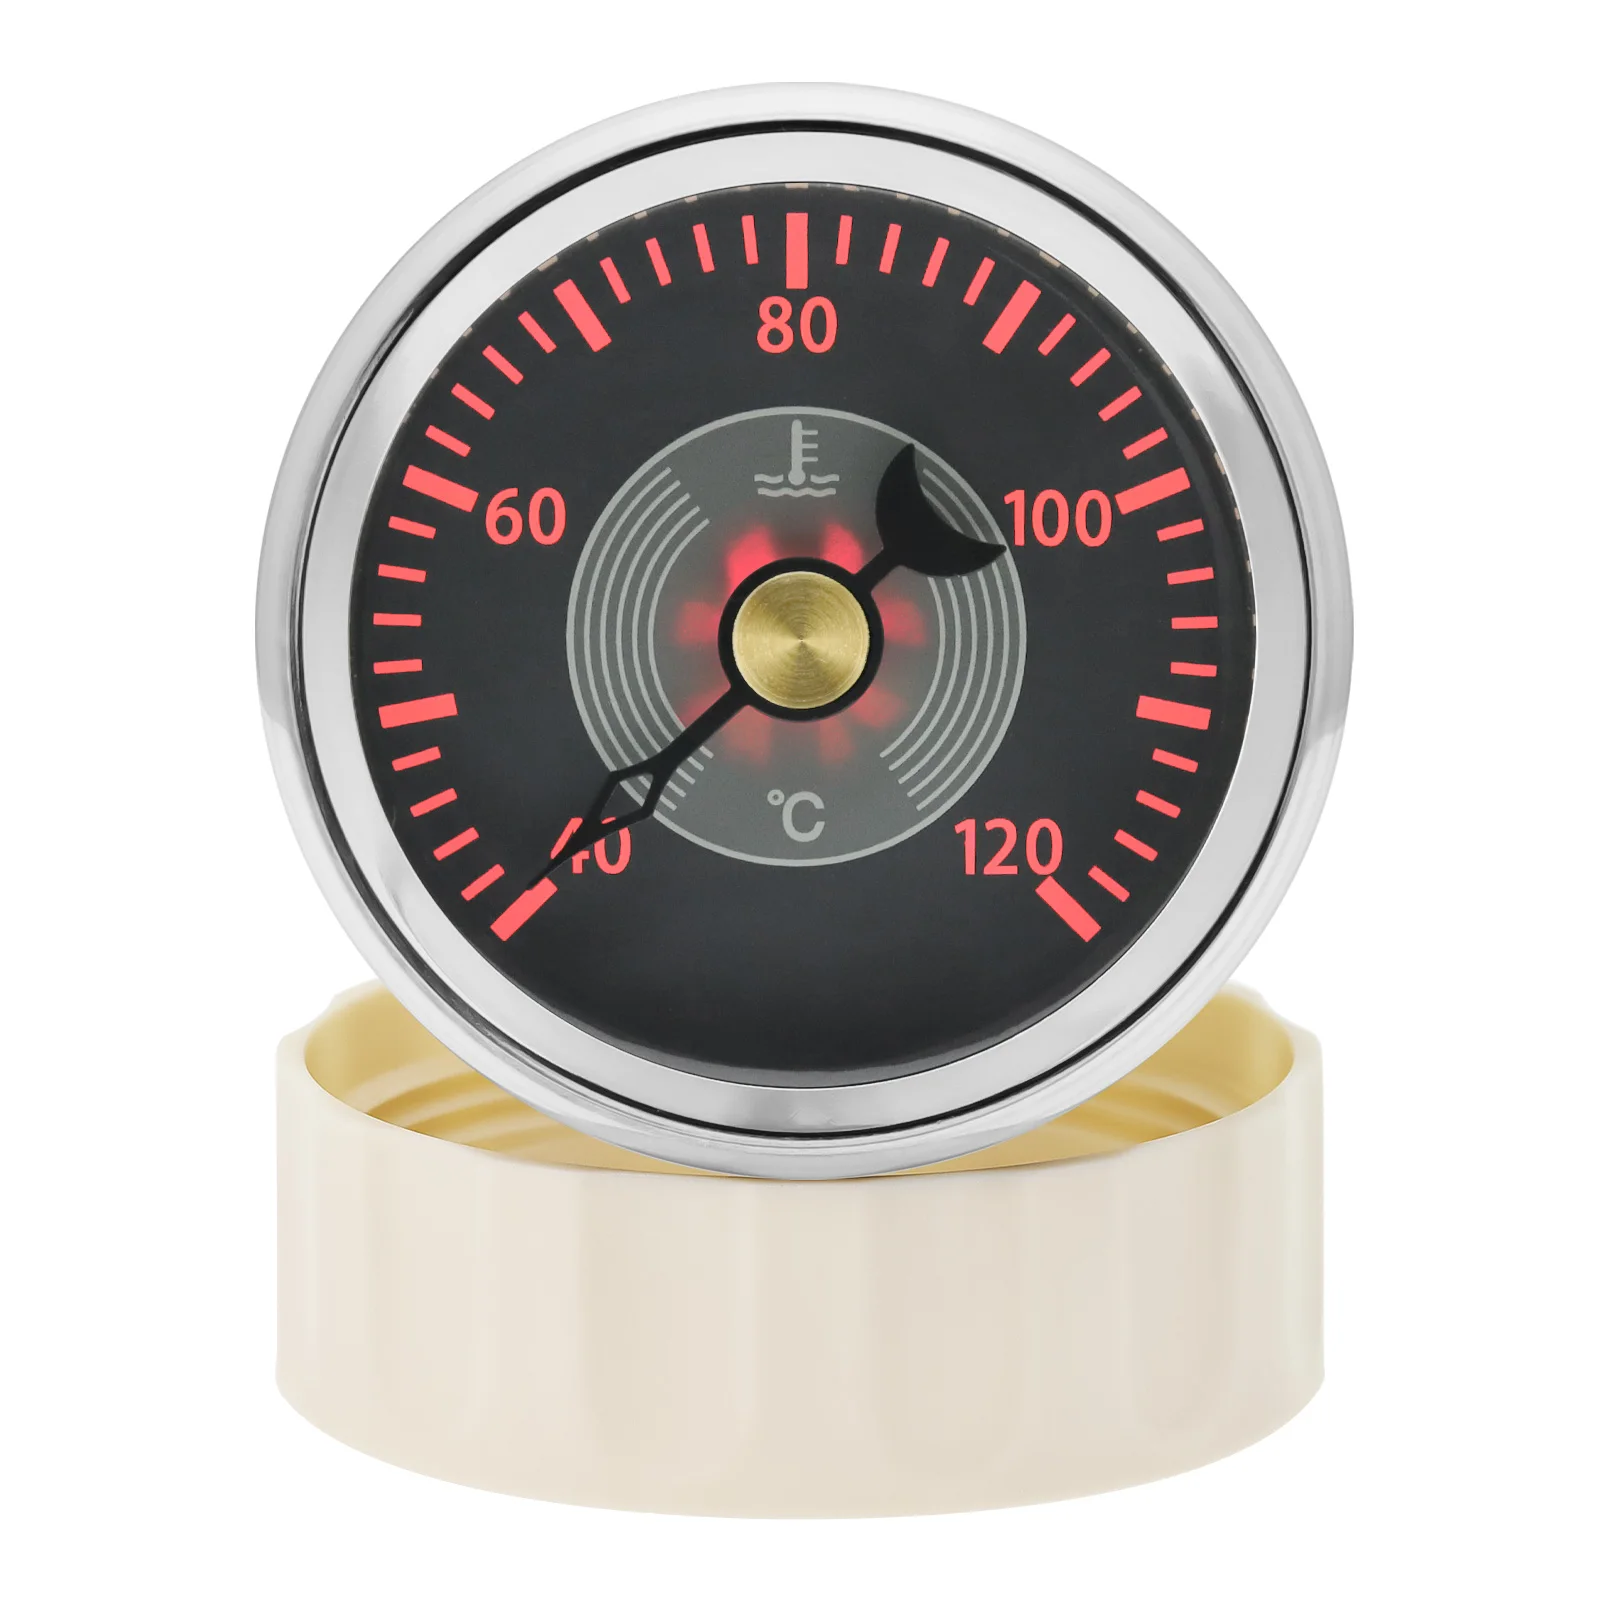
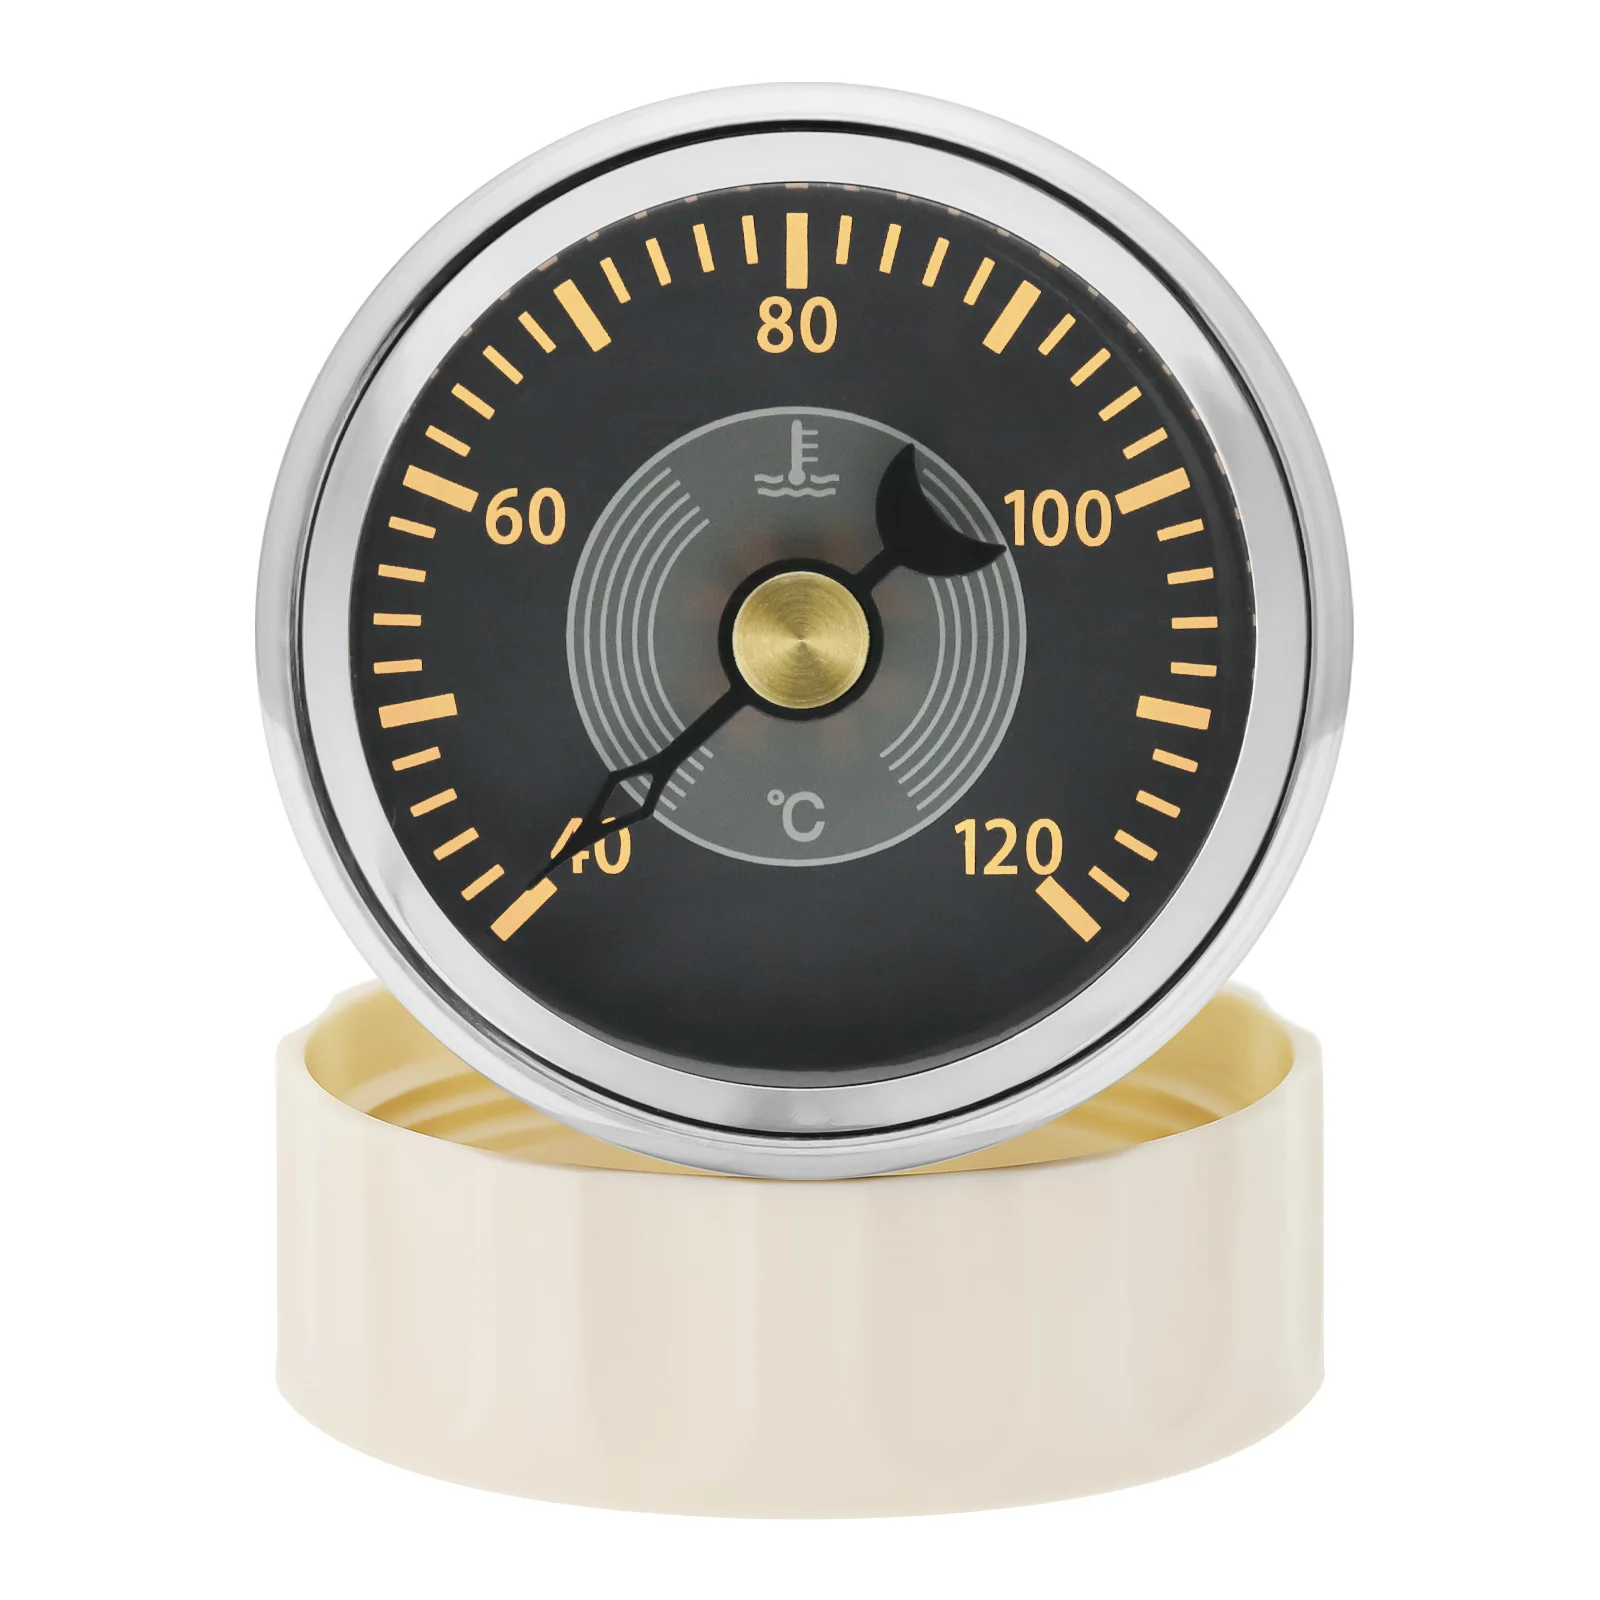
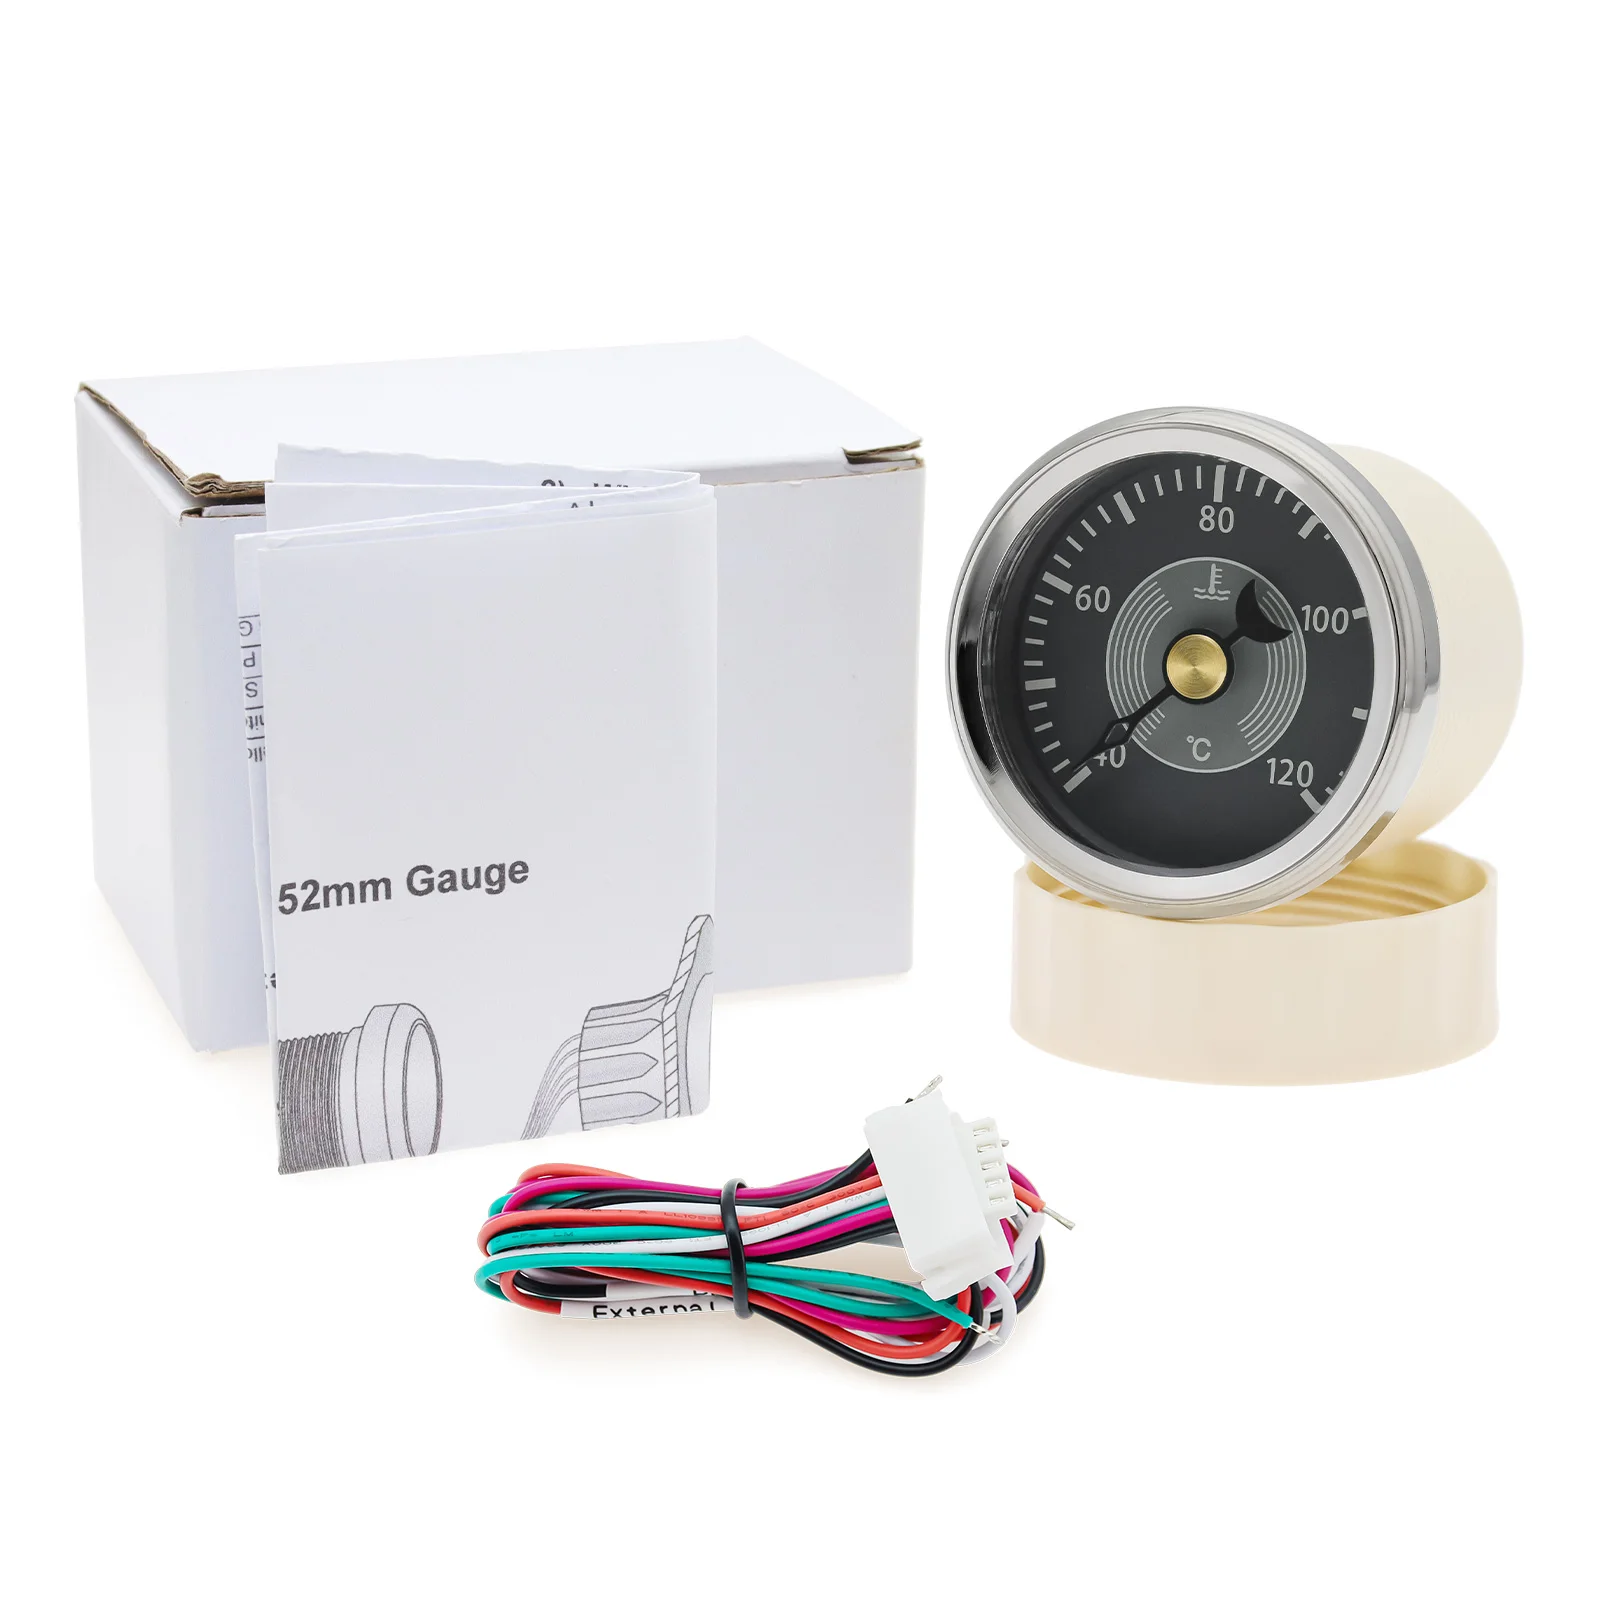
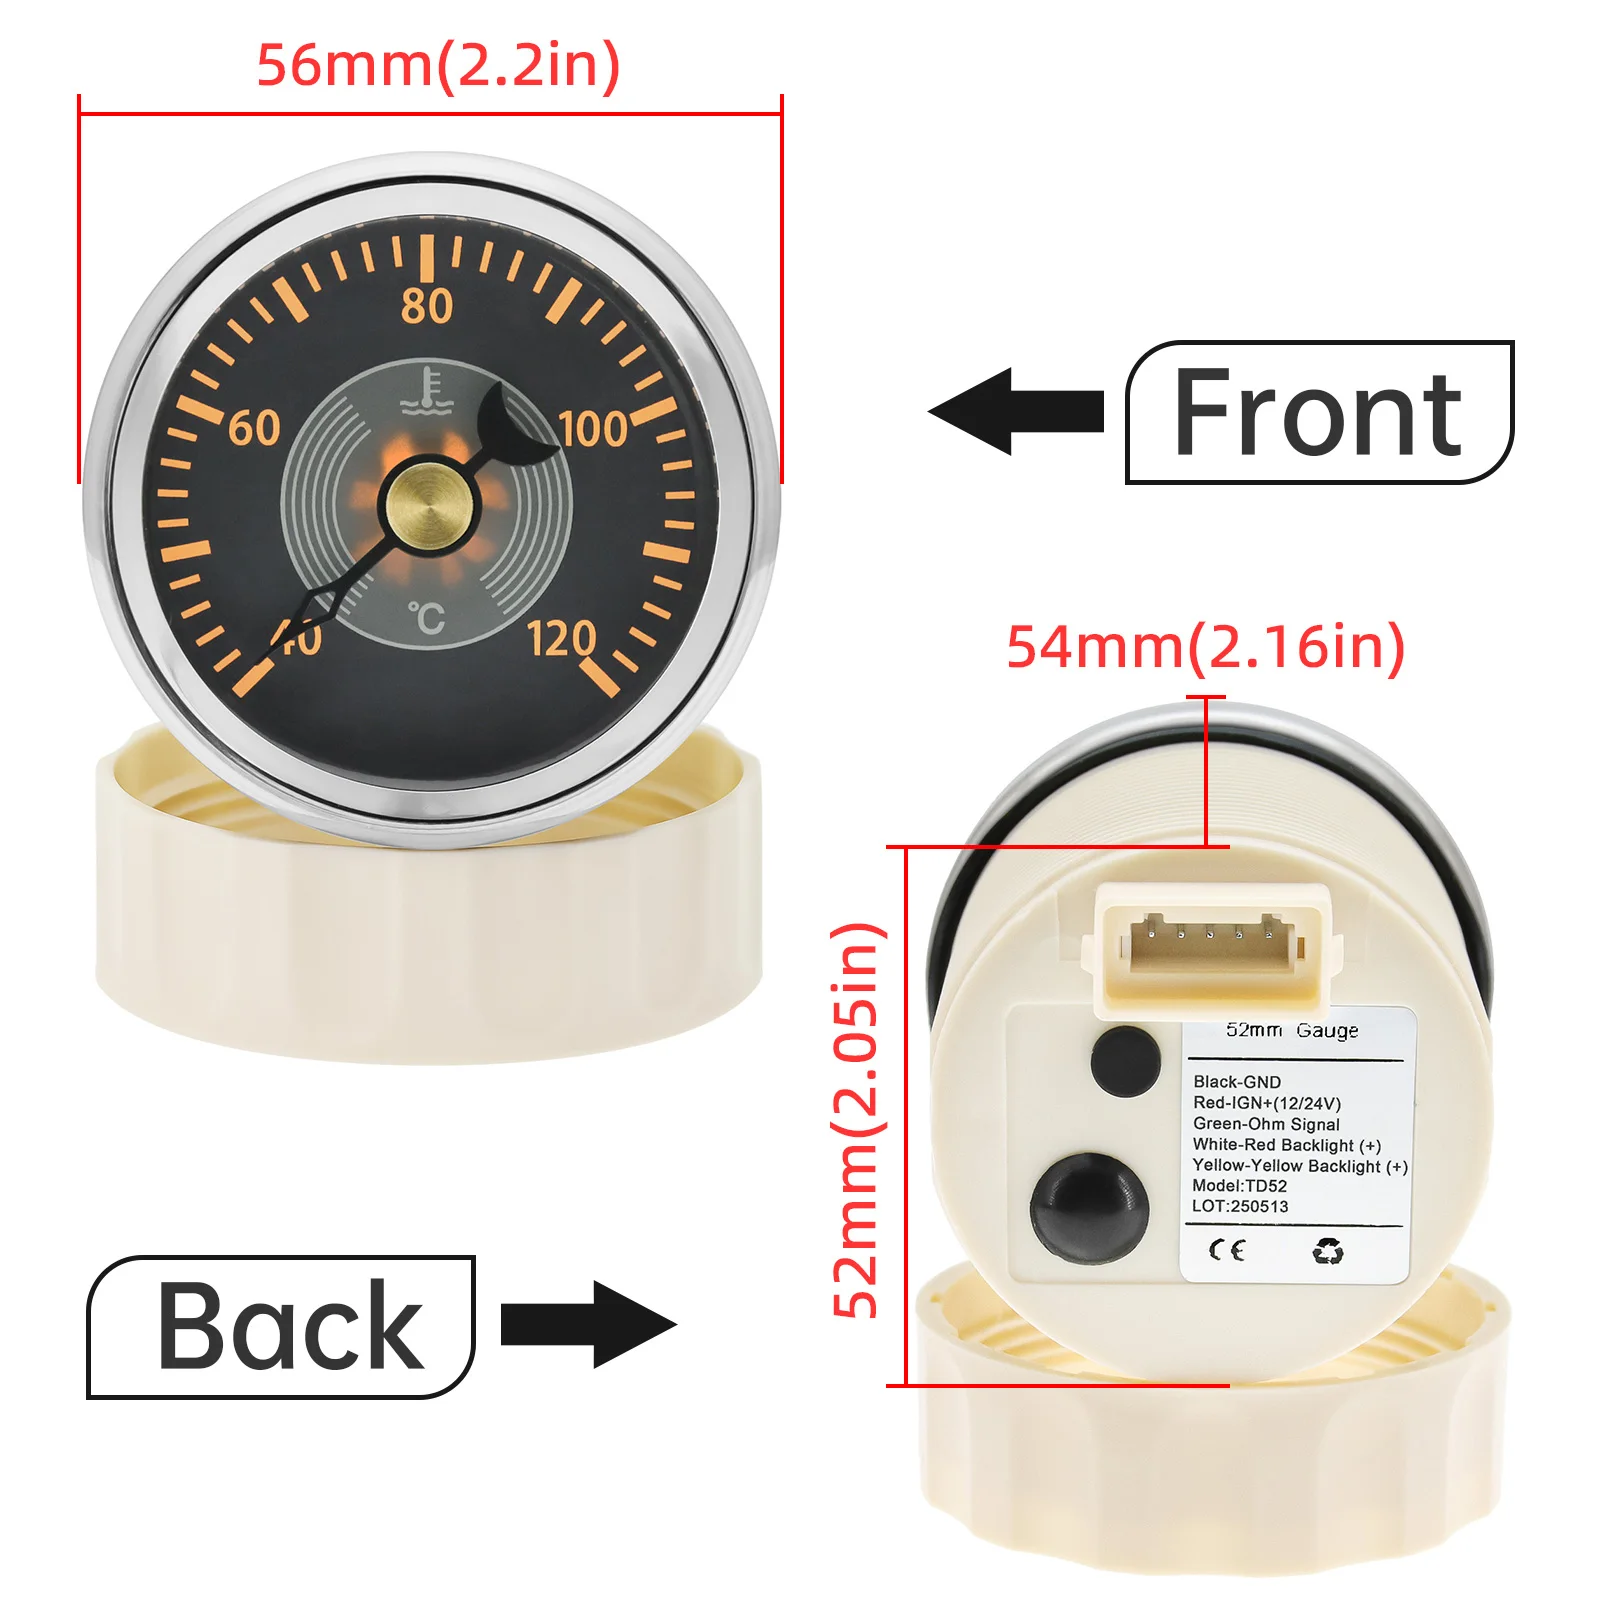
52MM Gauge
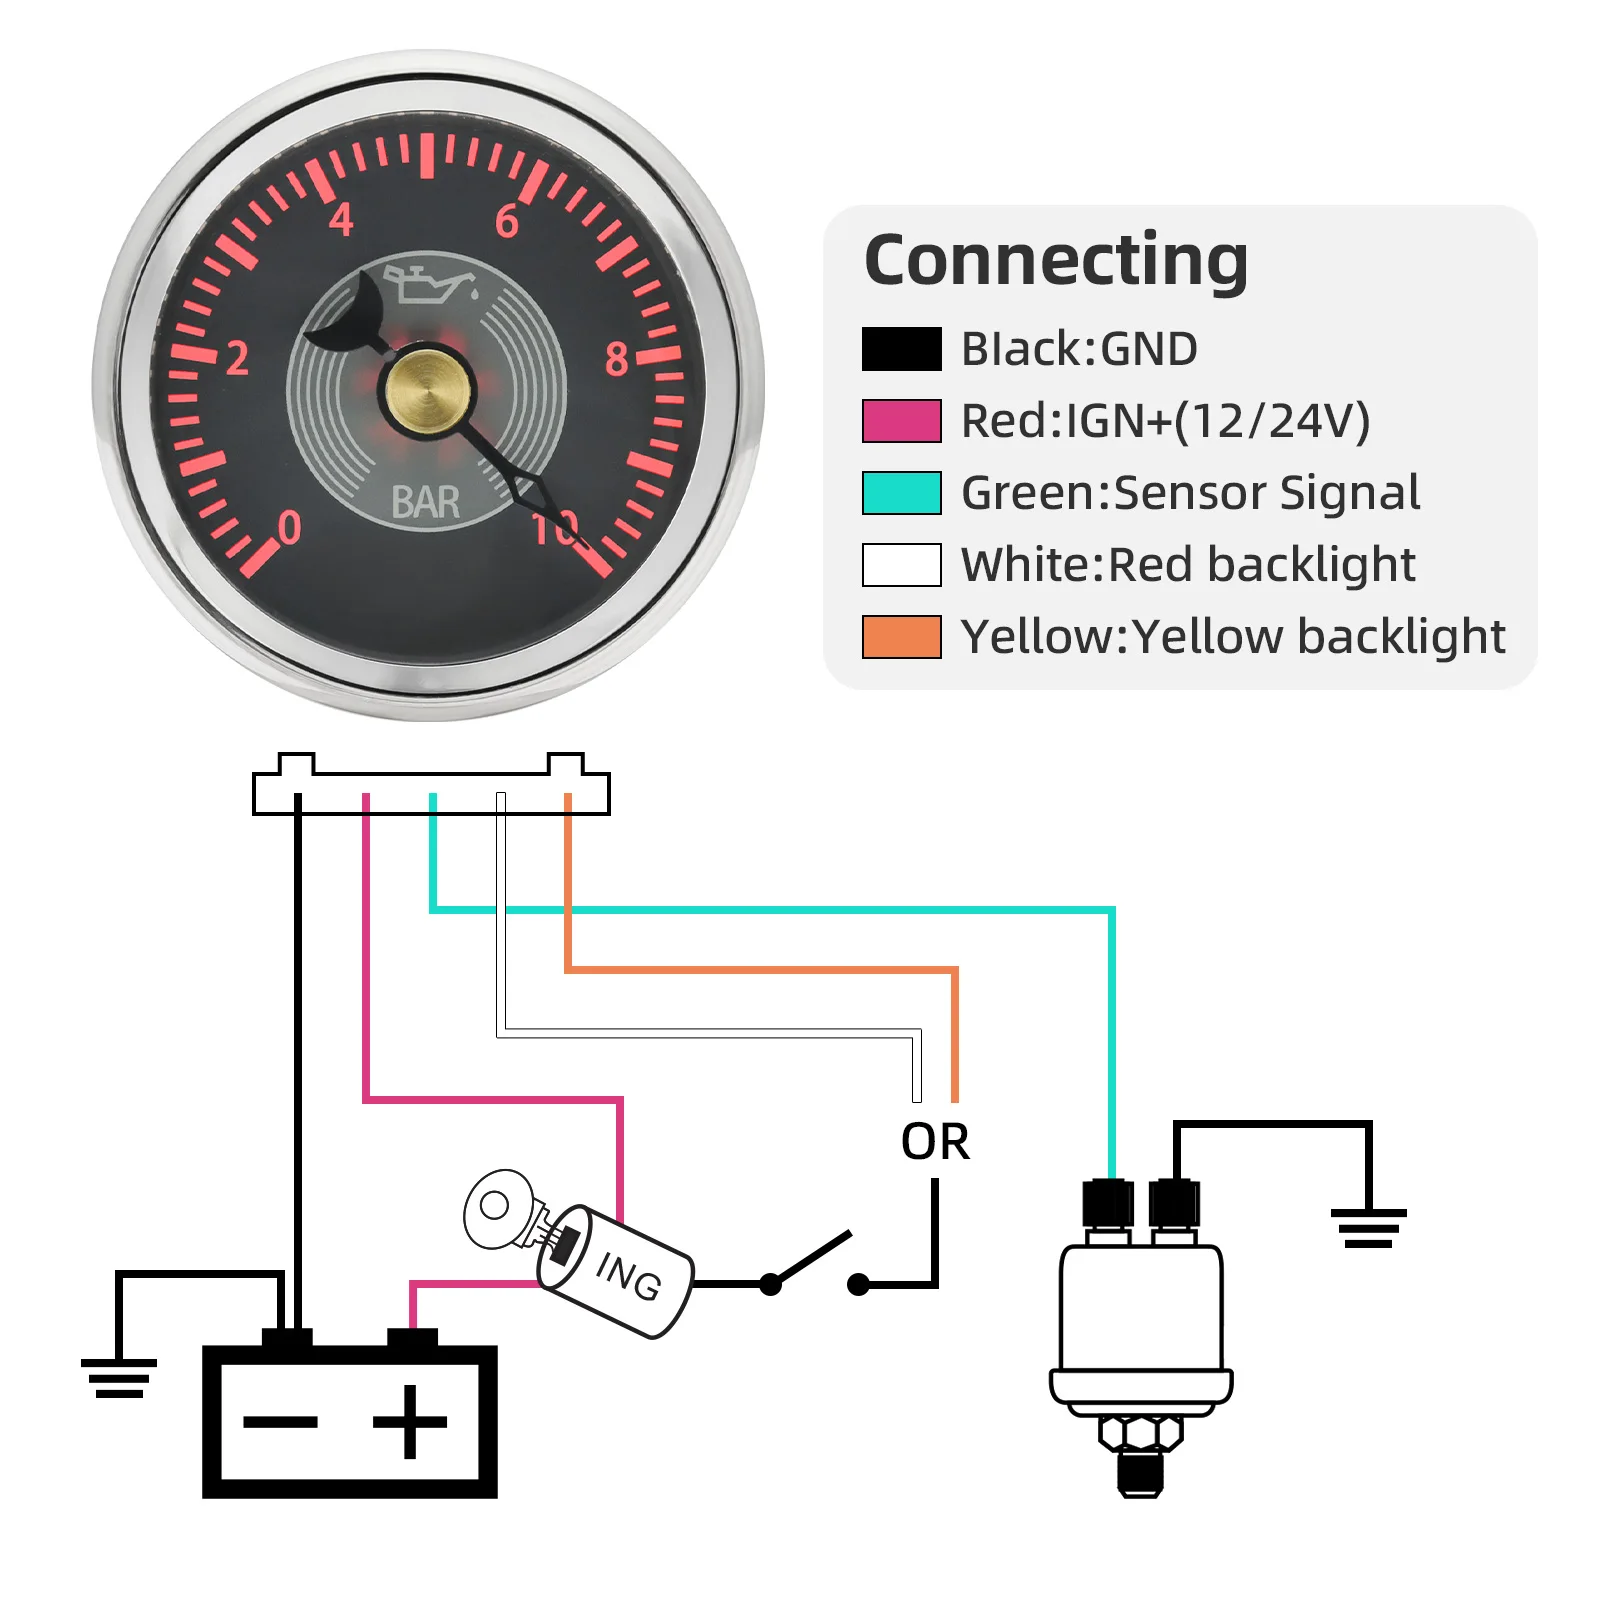
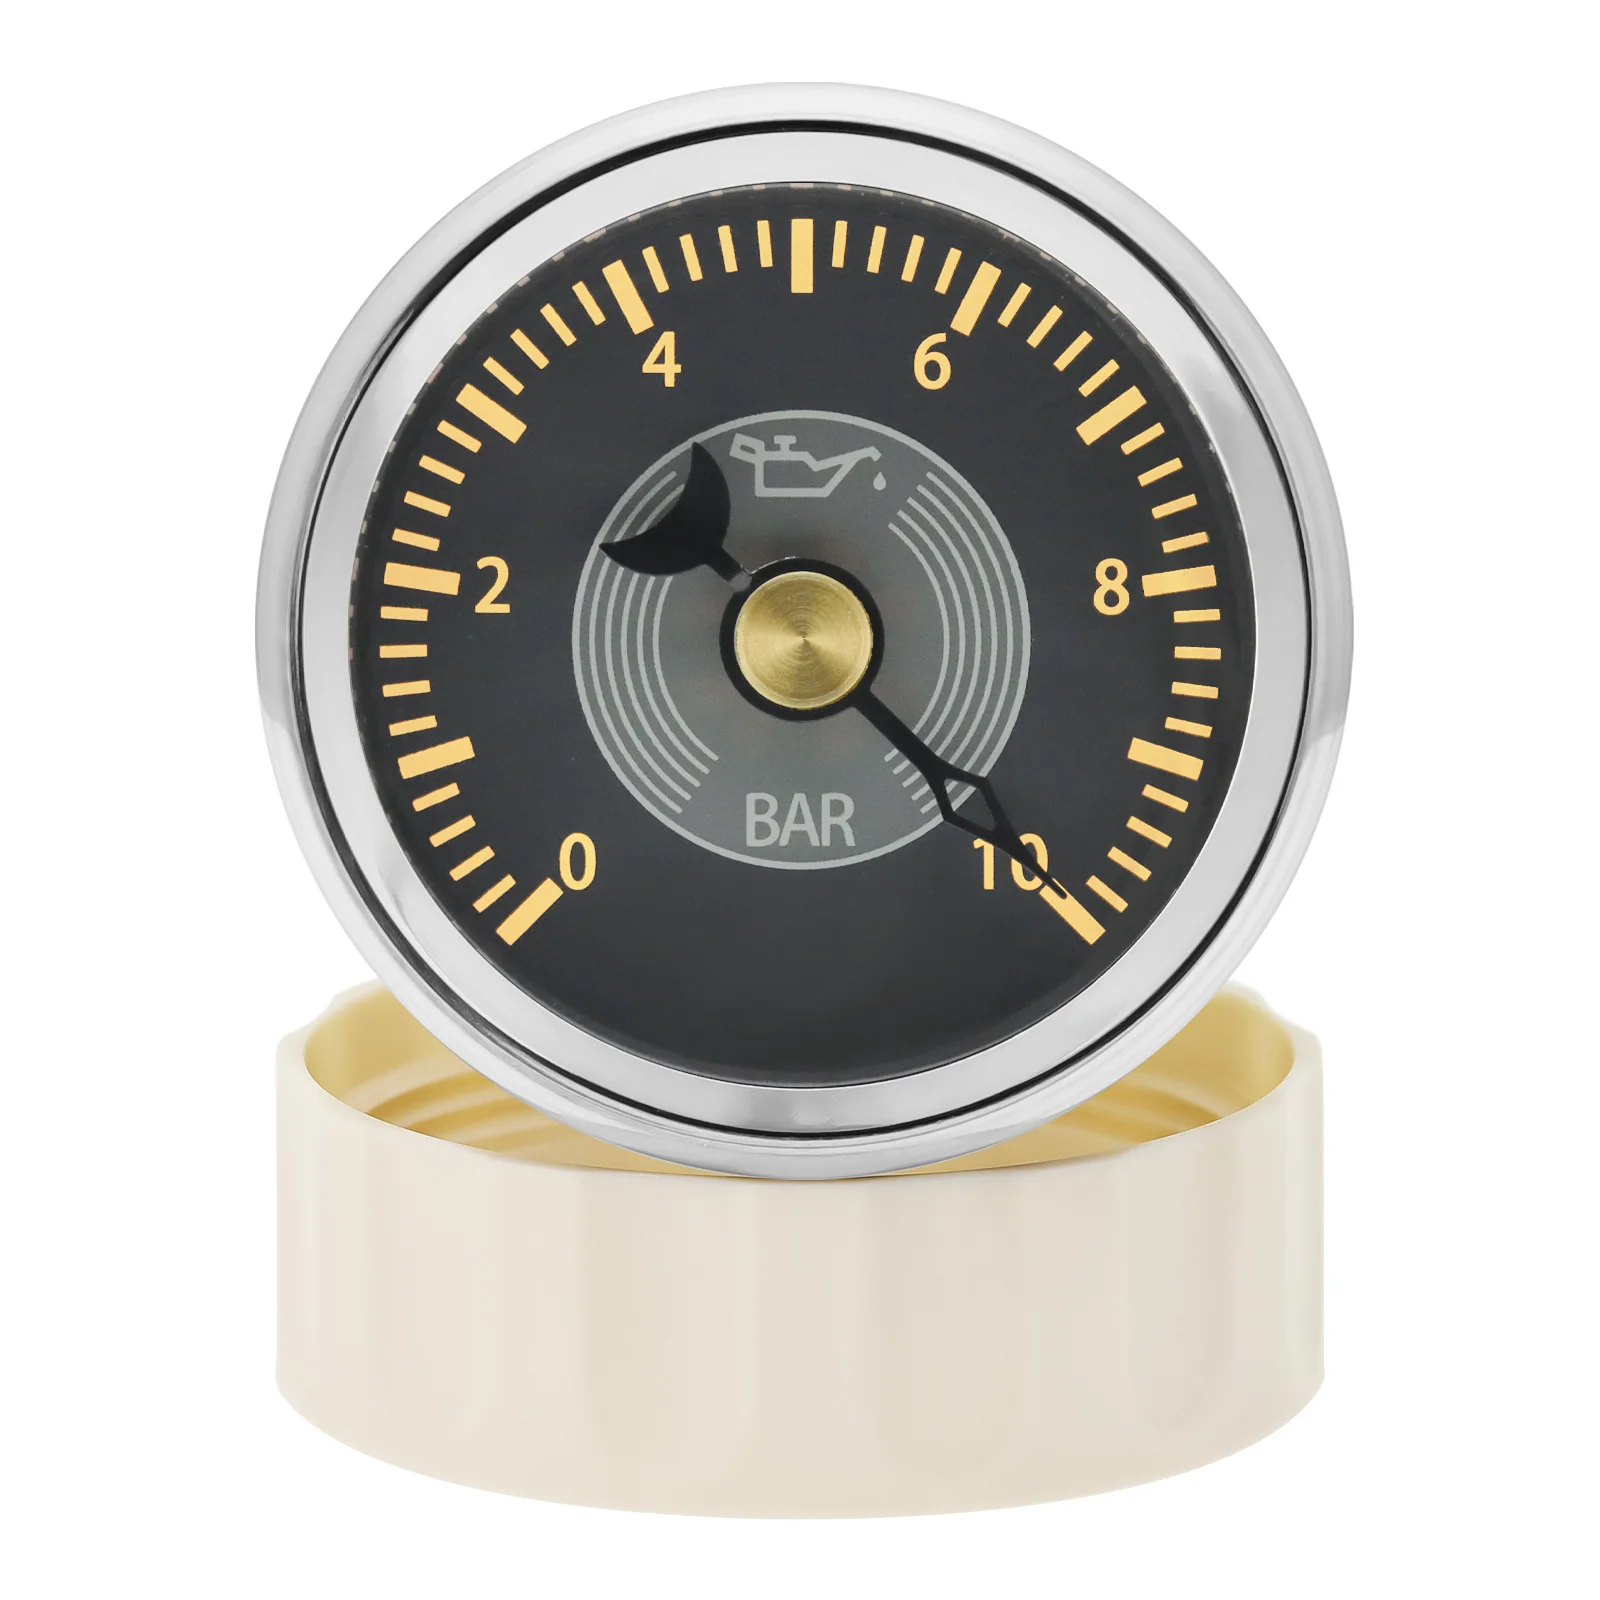
- Oil Pressure Gauge: 0~10 Bar
- Fuel Level Gauge: 0~190 ohm
- Water Temperature Gauge: 40~120℃
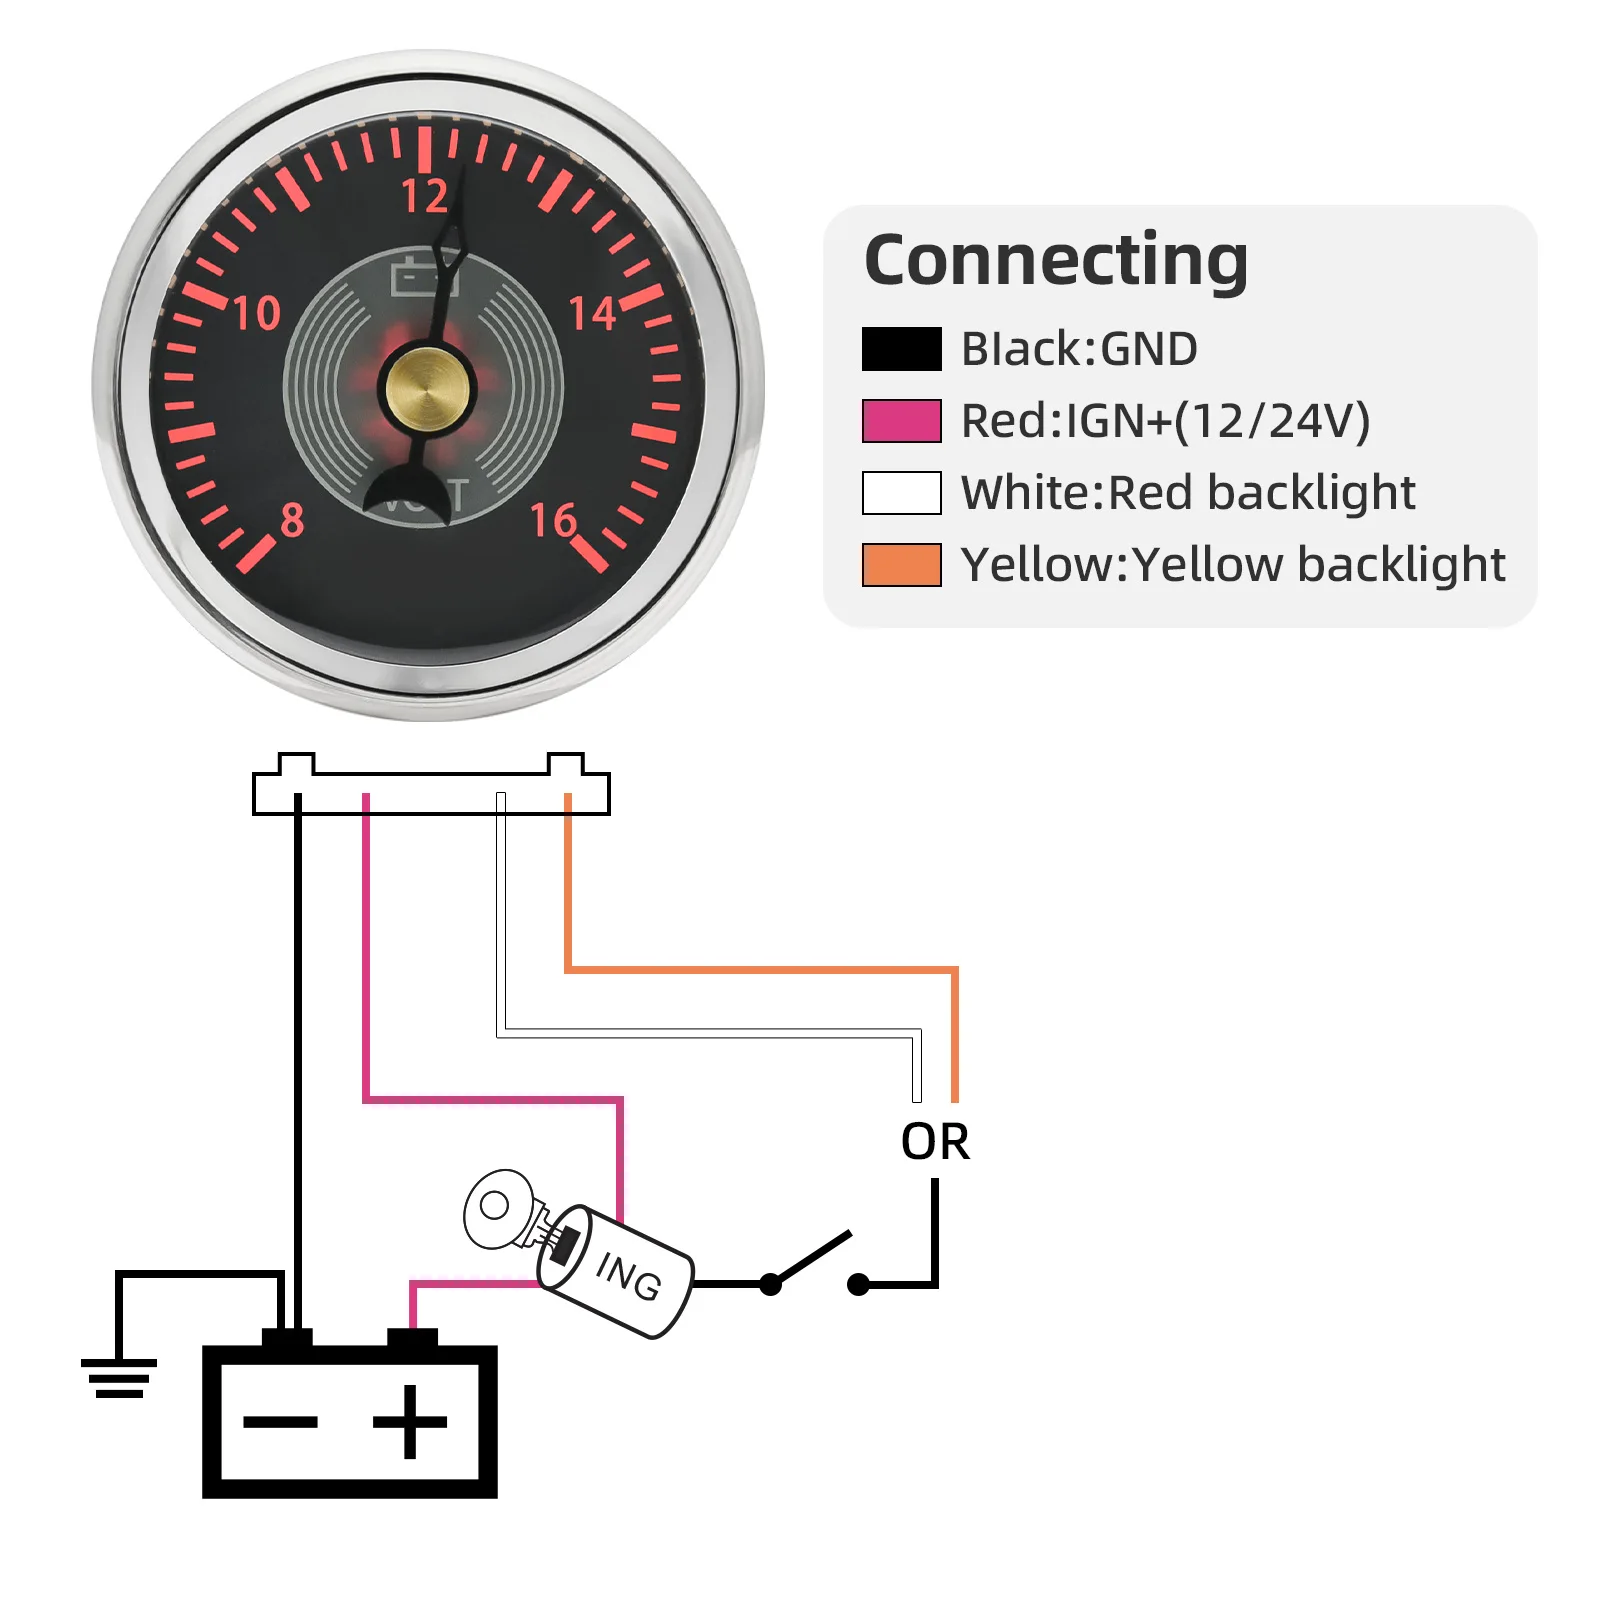
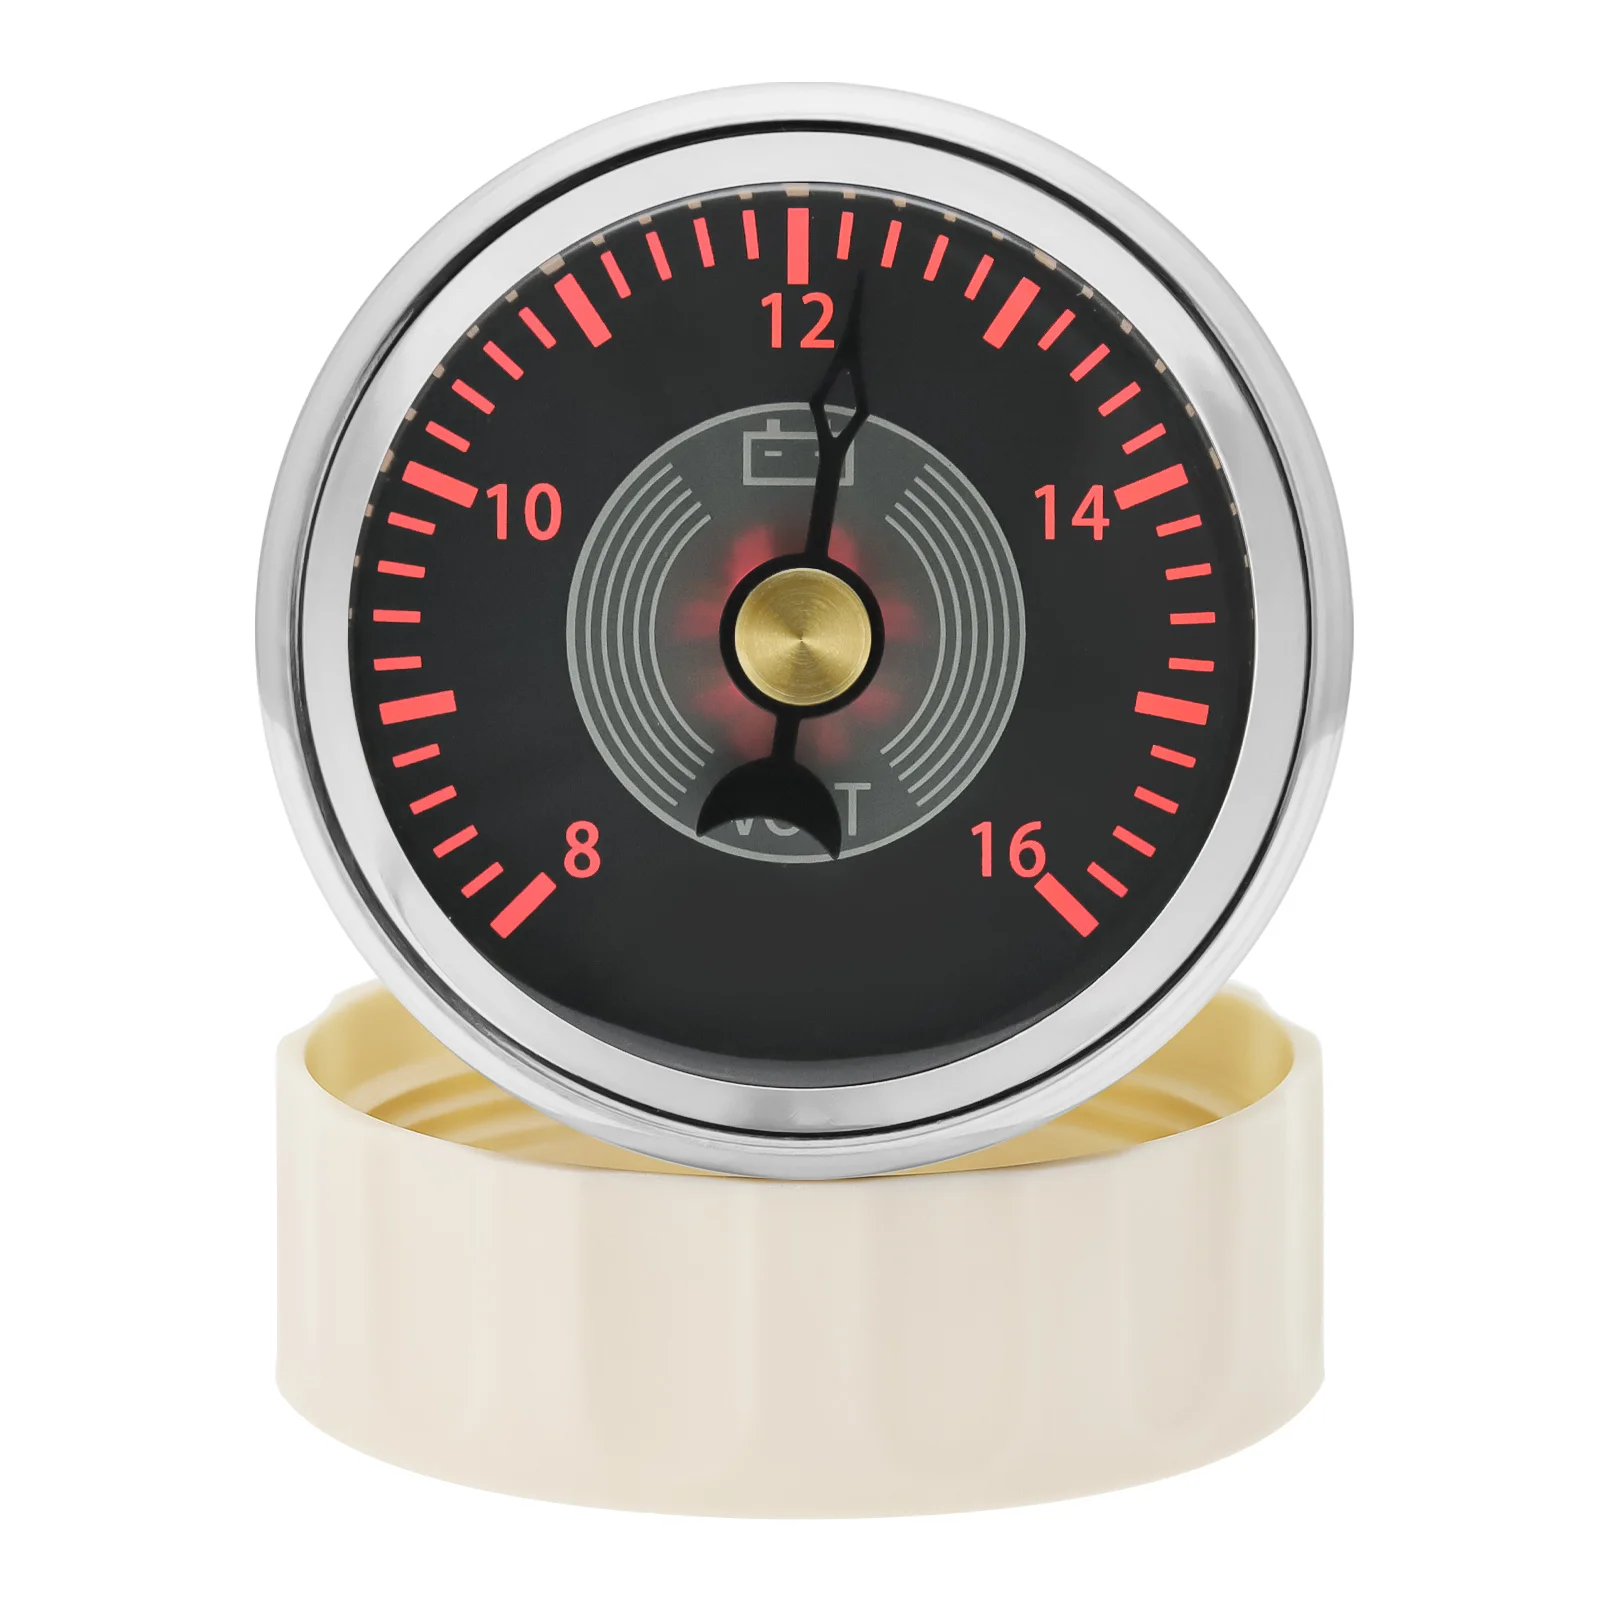
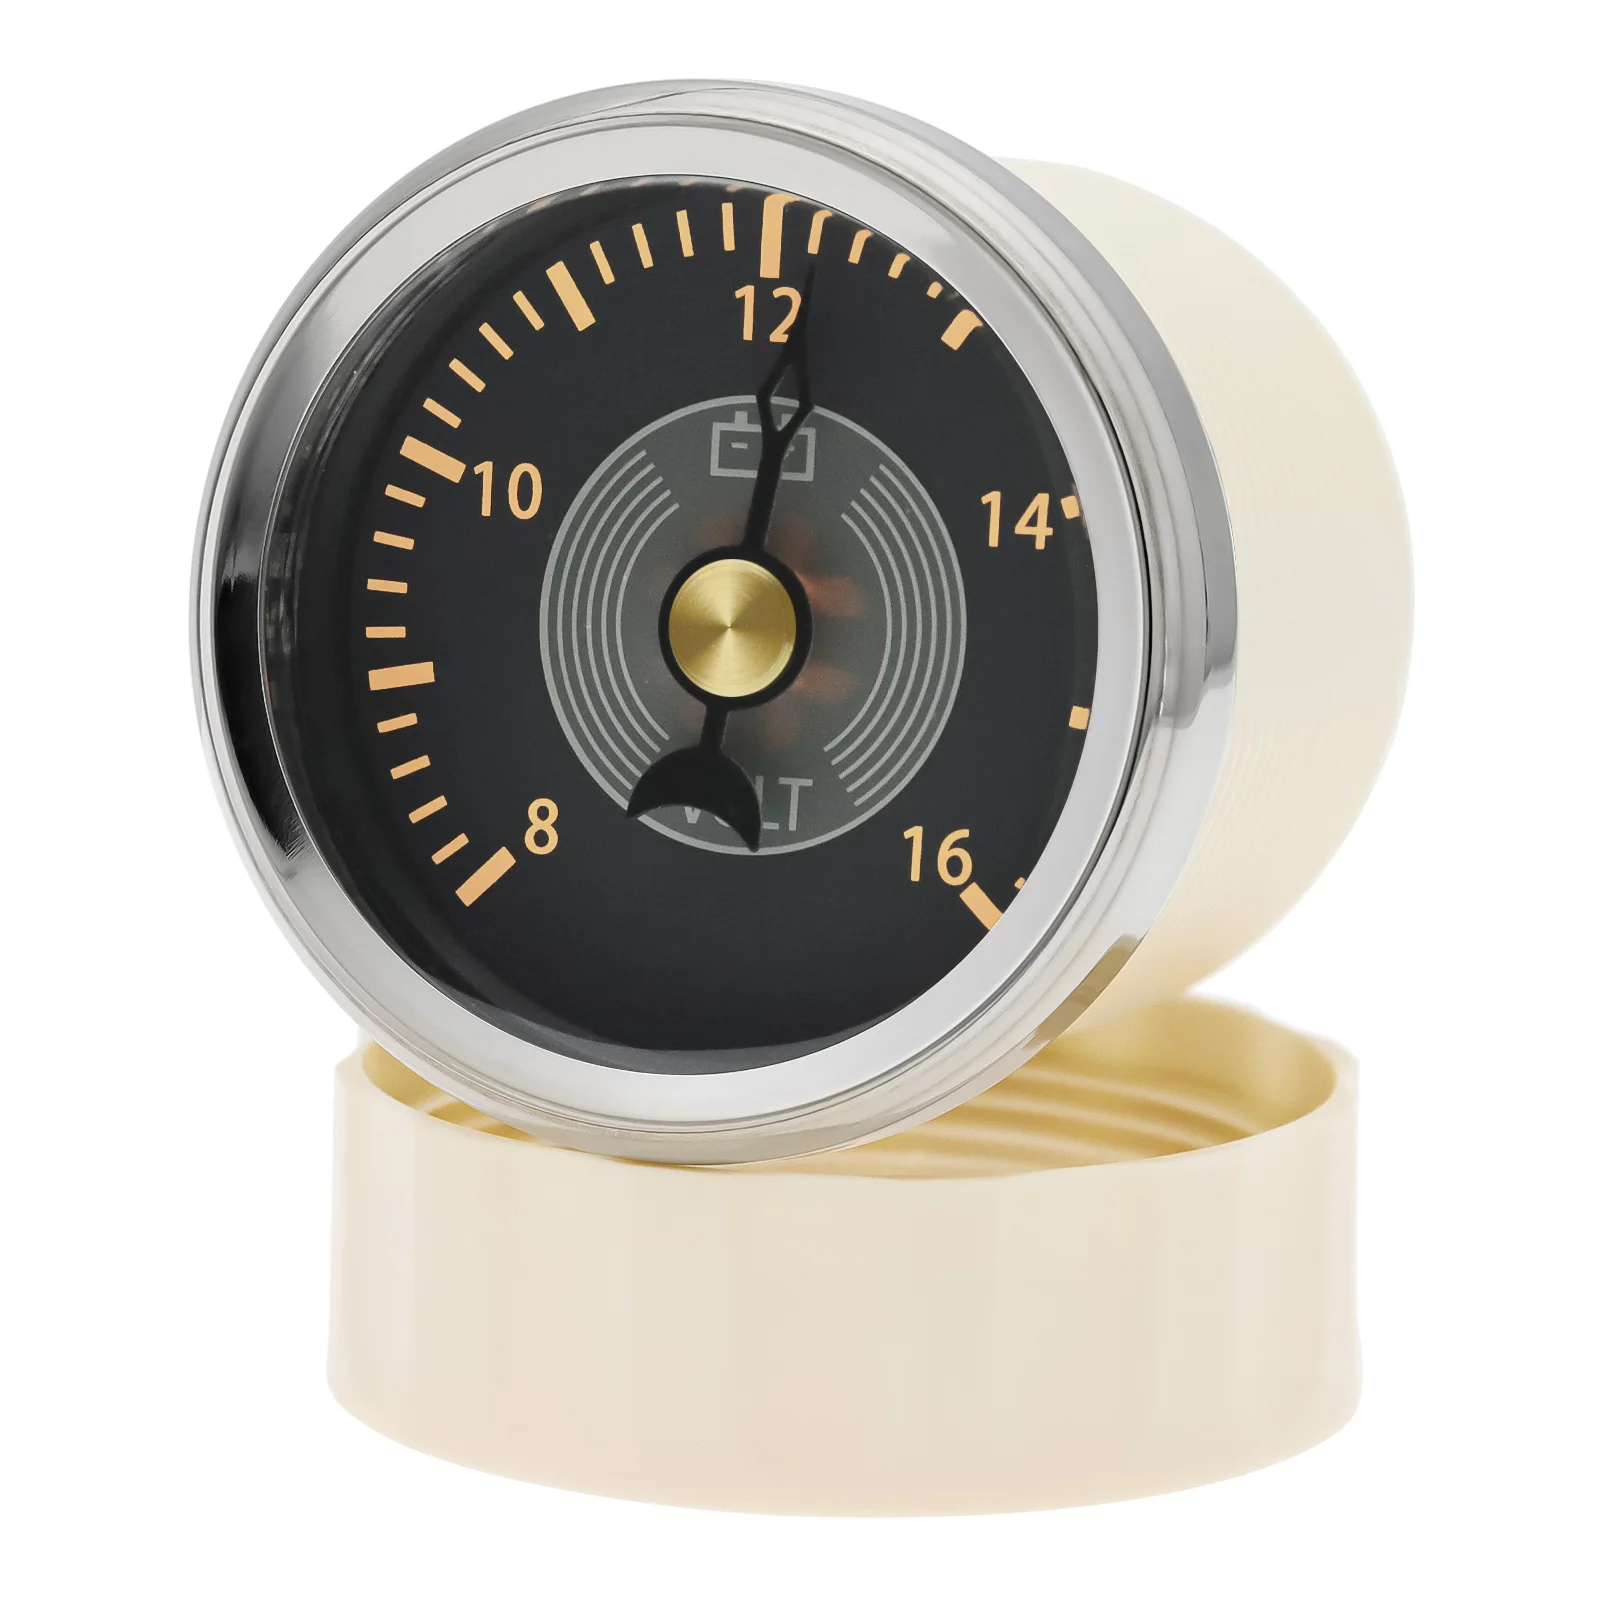
- Voltmeter: 8~16V, work on DC12V
- Work on DC12V24V
- Yellow, Red BackLight
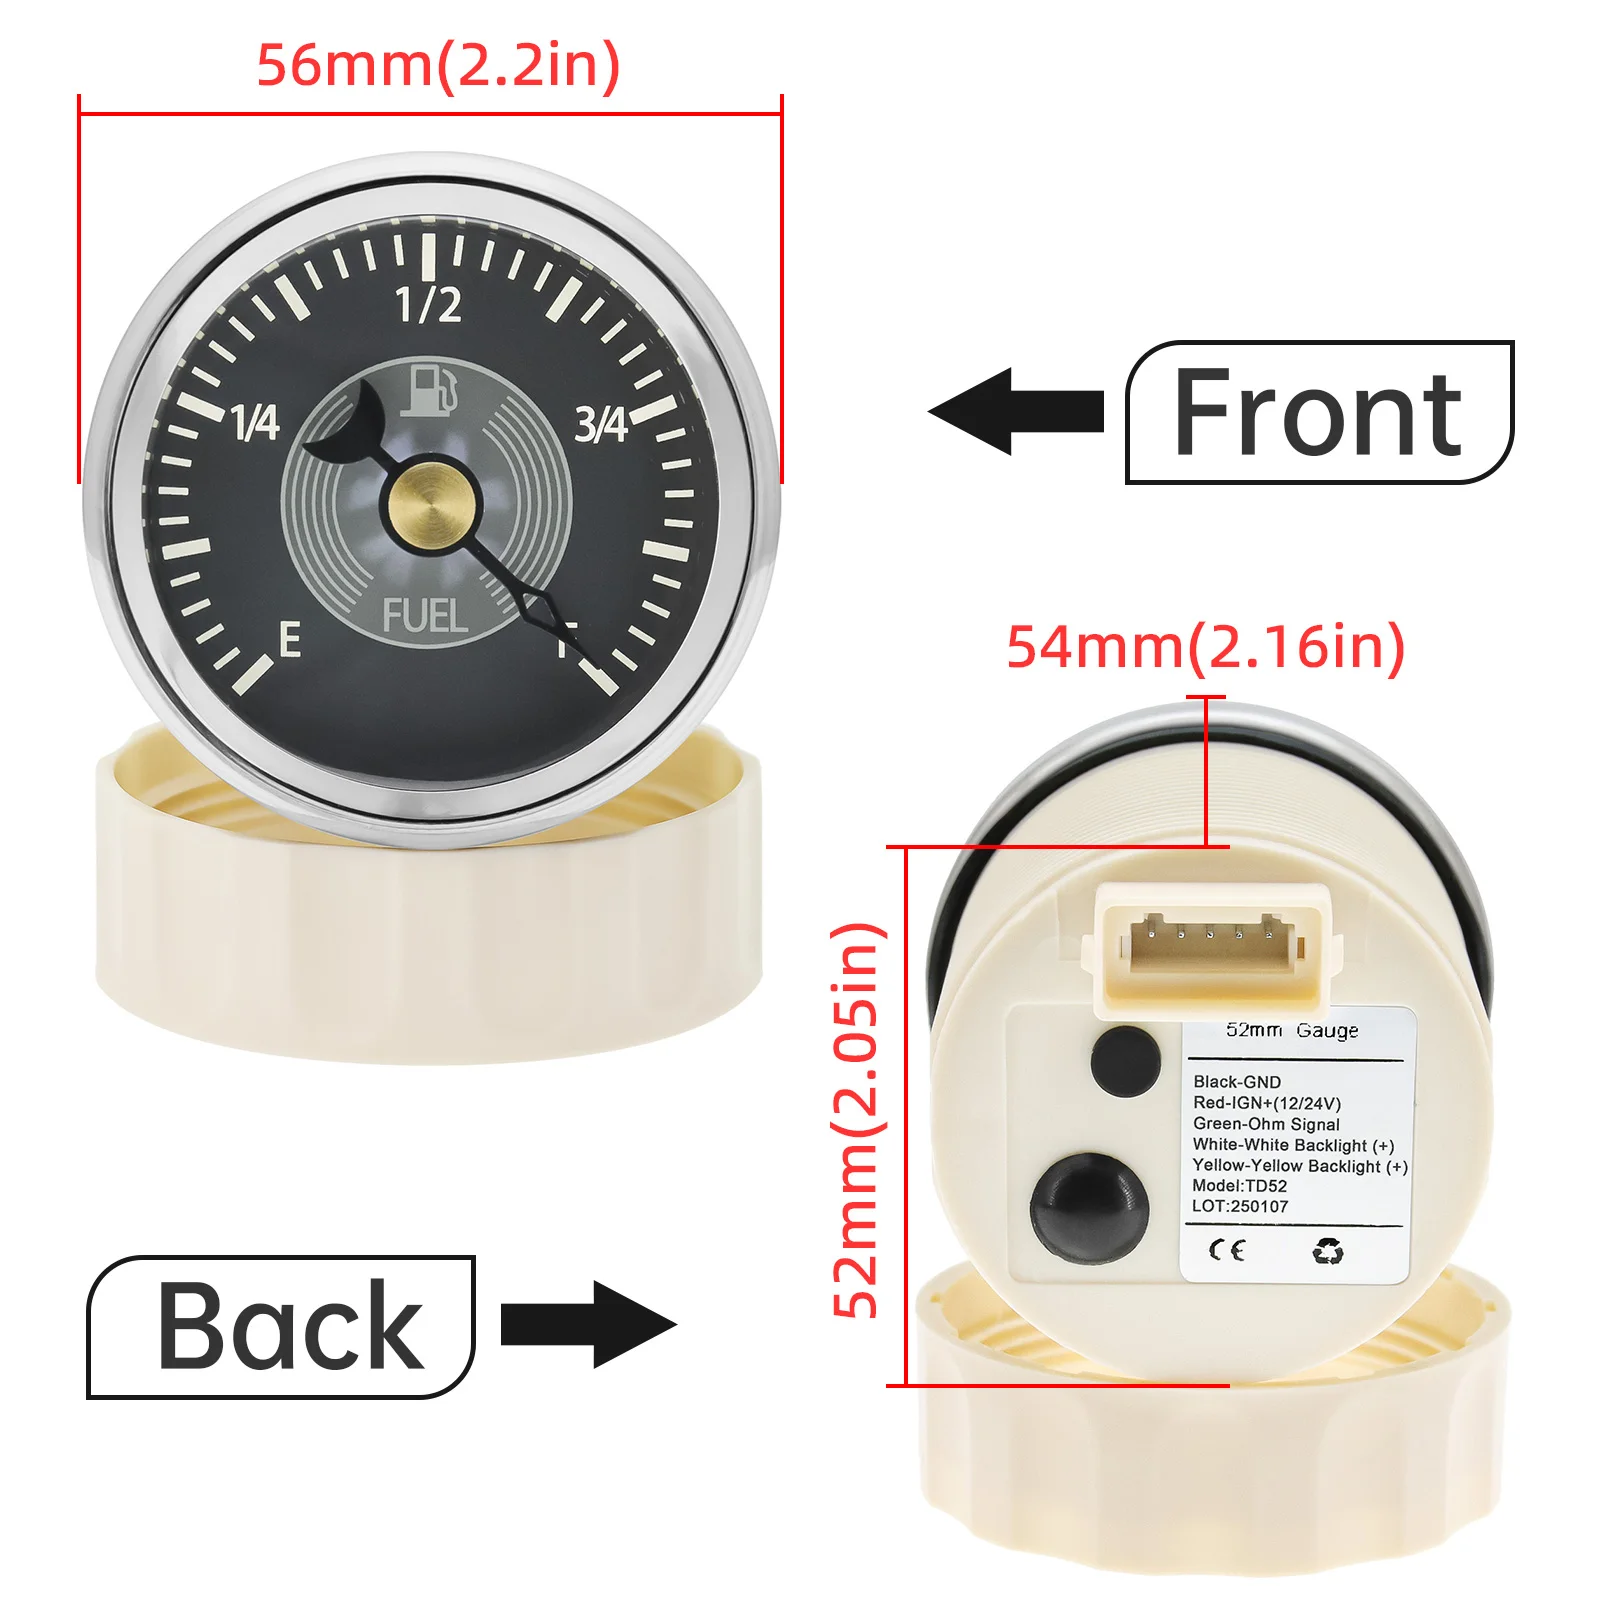
how to install:
1.Cut a 52mm (2 1/16 ) diameter panel hole (II).
You will need a minimum clearance of 55mm (2 3/16 )behind the panel to fit the gauge.
2.Remove fastening ring (I).
There is an alignment tab on the gauge body (III), place the gauge in the panel hole and mark the position of this tab to correctly align the gauge.
3.Insert gauge through panel from the front, fit and tighten fastening ring (I) from the rear.
4.Connect wires according to wiring instruction. Select either White or Yellow wires for backlighting. Wire colour corresponds with backlighting colour.
5.Insert wire harness (IV) into port at the back of the gauge
Please note if the gauge is a voltmeter, there is no Green wire.
Details
This product is crafted with quality materials to ensure durability and performance. Designed with your convenience in mind, it seamlessly fits into your everyday life.
Shipping & Returns
We strive to process and ship all orders in a timely manner, working diligently to ensure that your items are on their way to you as soon as possible.
We are committed to ensuring a positive shopping experience for all our customers. If for any reason you wish to return an item, we invite you to reach out to our team for assistance, and we will evaluate every return request with care and consideration.
Shop The Full Collection


